
Building a Bluetooth Speaker Part 1
... the electronics
Since seeing a Bluetooth Speaker build by The Smuggler’s Room I have been planning to do one my self, here I’ll discuss the electronics. Putting everything in a 3D printed case and painting it will be for the next. My build will be a little different from theirs, so I’ll include details here.
Parts Needed
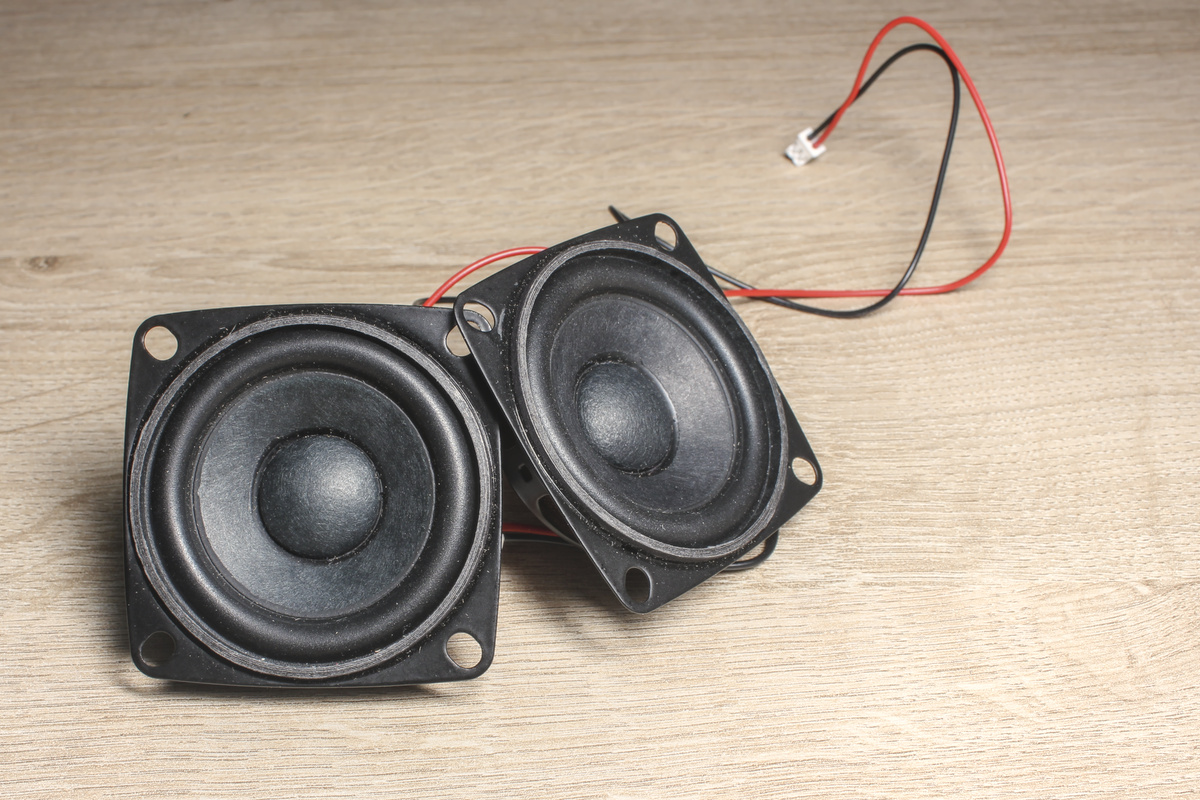
- 2x 5W speaker (small form factor)
- 1x 3.7V LiPo Battery with protection PCM module anything above 1000 mAh should give a very decent playtime.
- 1x Switch (two-way slide switch)
- 1x Bluetooth module with 2x5W amplifier (both an M38 or CT14 module will work)
- 1x LiPo charging circuit based on the TP4056 chip
- Heat-shrink tubing
- Soldering equipment
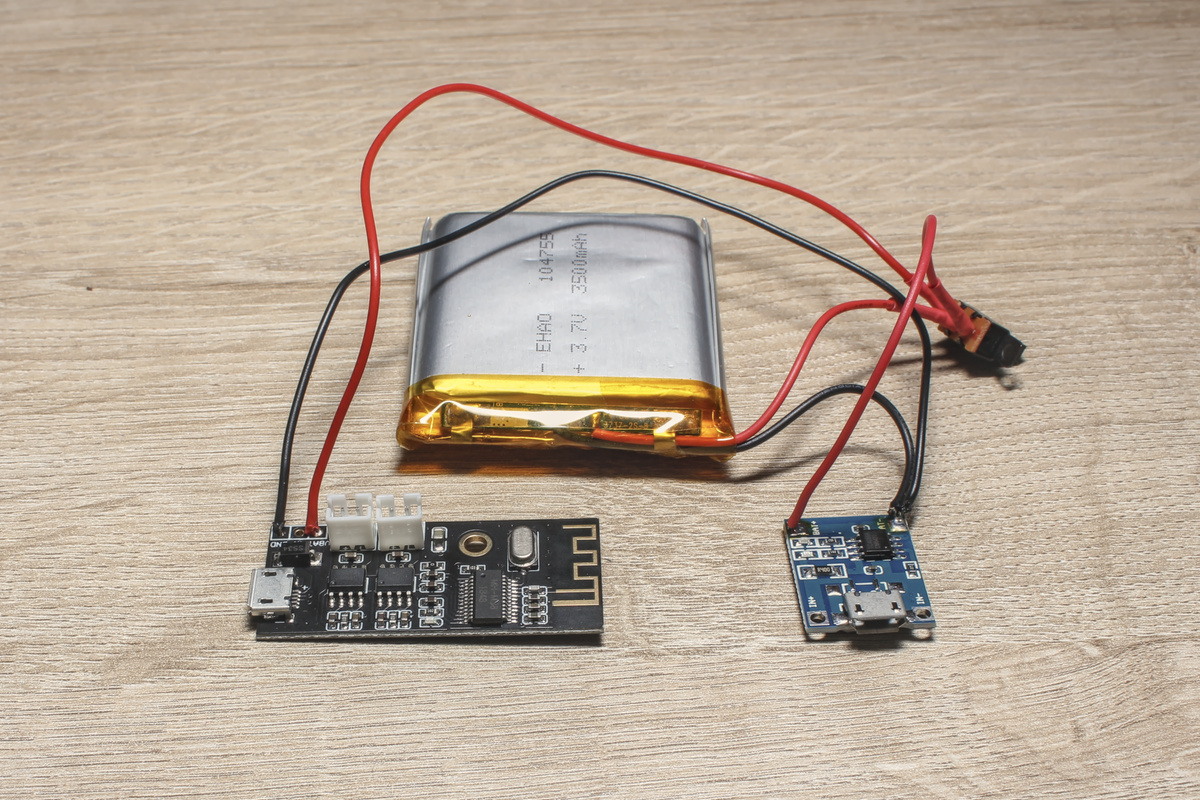
So, two main differences with the components from The Smuggler’s Room: I’m using an M38 Bluetooth module and a simpler charging circuit. While I initially used a CT14 module, the modules I got from my supplier had a rather annoying startup sound. Instead of a few discreet beeps to indicate the device was ready to pair/paired, it played a voice recording “Connecting the Bluetooth device” and “The Bluetooth device has been connected” … at the loudest possible volume. The M38 module I ordered as a replacement fortunately has a simple chime when connecting at a reasonable volume. Additionally, the M38 chip can work as a USB audio device when connected to a computer via USB (though I won’t be using it, that is a nice option to have).
The difference in charging module is simply due to me ordering the wrong module … while it is based on the same chip (TP4056) for charging LiPo batteries and provides over-charging protection, it is not designed to be wired up and provide power to another module (note the lack of Out+ and Out- pads on my module). Also, it doesn’t include over-discharge protection and hence has to be used with a LiPo battery that has this feature built-in. Furthermore, because of the way these boards work, it is not recommended charging and using a device at the same time. To add a bit of extra protection here I’ve wired the modules, batteries and switch in such a way that when the speaker is on, it is running of the battery and the charging module isn’t connected and visa versa. You can check out my wiring scheme below.
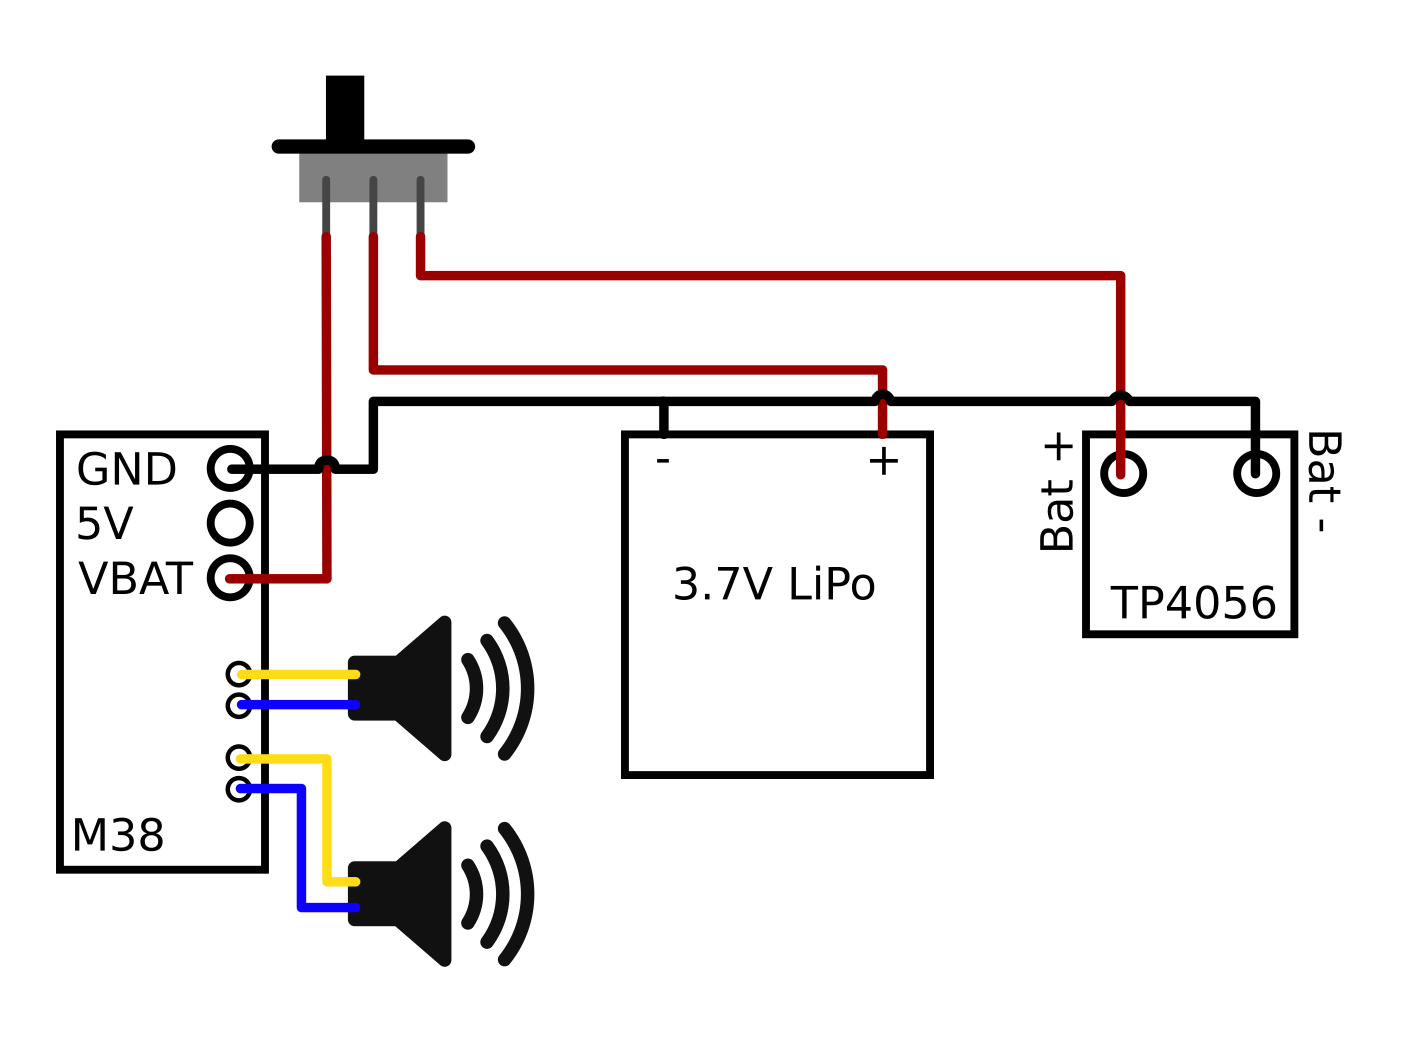
Soldering things together was really easy, all pads are clearly labelled and big so it is trivial to connect everything correctly. The speakers + and - need to be connected the same way as the speakers need to be in phase. Some heat-shrink tubing on the connectors of the switch is useful. The LiPo battery I’ve attached below is a 3500 mAh pack, though I will replace it with a lighter version later on (as I need the 3500 mAh for a future project).
To charge the battery the system needs to be switched off and connected to a 1A power supply using micro-USB. A red light means charged, while blue means charging (or no battery connected). When switching on the speaker the power is cut from the charging circuit to the battery to prevent simultaneously using and charging. The switch makes it impossible to charge and use the battery simultaneously.
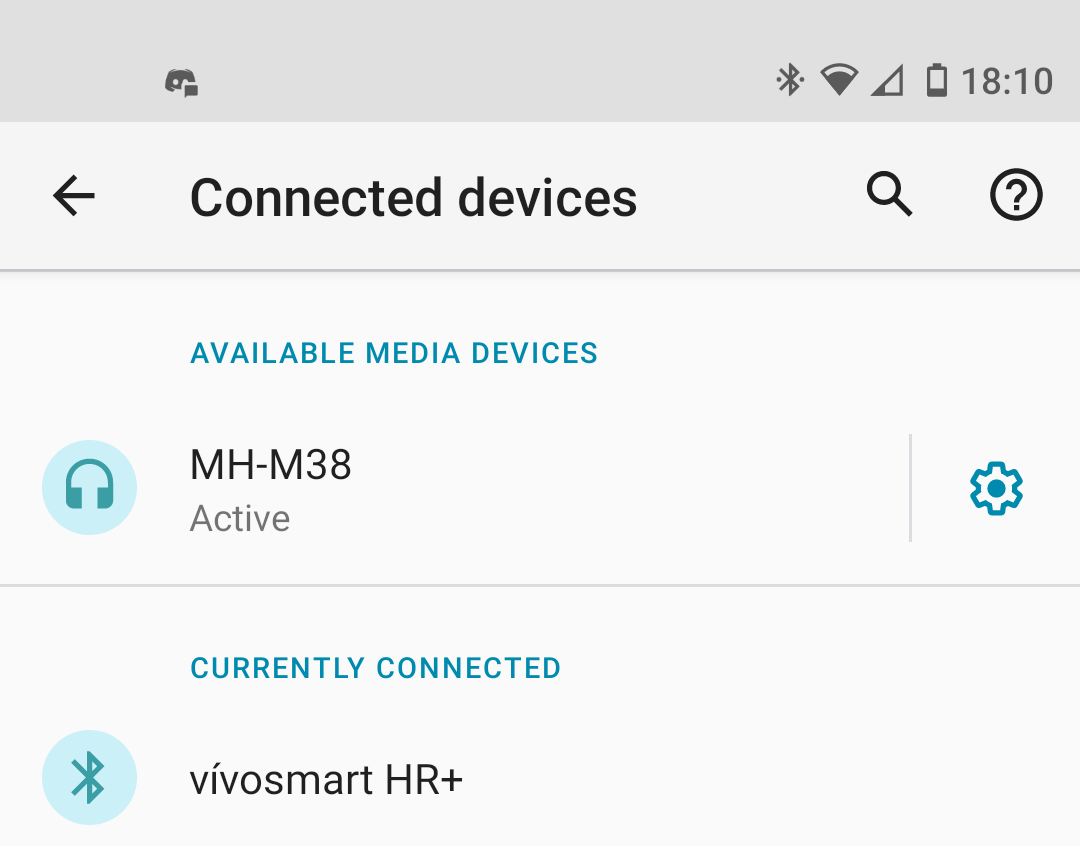
If everything is working correctly, the speaker should show up as a Bluetooth speaker named MH-M38 (the name will depend on the module you got, and while the default can’t be changed, you can rename the device in Android). Now simply connect and start playing some tunes to test the speaker.
What the final quality of the sound will be remains to be seen. These speakers should be enclosed to get the best possible sound from them, so that will need to be benchmarked once everything is assembled. However, even without a case, the sound is louder and better than what my phone can produce without external speakers, so it is looking promising… The case is 3D printed (see below), so stay tuned for more on this in an upcoming post !
Liked this post ? You can buy me a coffee