
Lights, Camera, GitHub, Actions: My Favorite GitHub Actions
GitHub Actions allow you to automate some workflows directly on GitHub when code is pushed, at regular intervals or triggered manually. While it takes a bit of setup, the advantages are well worth the time required to get acquainted with this advanced feature of GitHub.
In this post I’ll outline a few of my favorite workflows to pull in new data periodically, format code, run unit tests, … Links to different repos will be included to see the actions in, …, well, action. These are not the most advanced ones, but a simple bit of automation can go a long way in saving some time and energy.
Autoblack - Python code formatting
The package black is the de facto standard for formatting python code. Not only will it point out inconsistencies and mistakes in the code-style, black will correct them. So before committing code in a repo, it is a good idea to run black to make sure the style is A-OK. However, I tend to forget to run it … and while you could set up a pre-commit hook (which needs to be configured on each developer’s system) it is even better to let GitHub run black on all code, and if there are mistakes, fix them and re-commit. No need to install pre-commit hooks locally, or even to remember to run black yourself.
There are plenty of examples out on GitHub how to do this, for a comprehensive overview check out the collection
of workflows from cclaus’ autoback repository. The files I’m using (shown
below) is based off this with little modification. This needs to be saved in a .github/workflows folder
in the repository and will check all python code pushed to the repo. There are versions that handle pull requests as
well, make sure to check out all files in cclaus’ repo!
# GitHub Action that uses Black to reformat the Python code in an incoming push request.

name: autoblack
on: [push]
jobs:
  build:
    runs-on: ubuntu-latest
    steps:
      - uses: actions/checkout@v2
        with:  # https://github.com/stefanzweifel/git-auto-commit-action#checkout-the-correct-branch
            ref: $
      - name: Set up Python 3.8
        uses: actions/setup-python@v2
        with:
          python-version: 3.8
          architecture: 'x64'
      - run: pip install black
      - run: black --check ./
      - name: If needed, commit black changes to a new pull request
        if: failure()
        run: |
          black ./
          git config --global user.name autoblack_push
          git config --global user.email '${GITHUB_ACTOR}@users.noreply.github.com'
          git commit -am "fixup! Format Python code with psf/black push"
          git push
The workflow here is pretty straightforward, but it takes some time to wrap your head around how this is included in
the yaml file. Each instance of uses: or run: will either call an external script or run a specific command.
So this script will:
- Check the repository out using an external action [actions/checkout@v2](https://github.com/stefanzweifel/git-auto-commit-action#checkout-the-correct-branch
- Install Python 3.8 using actions/setup-python@v2
- Install black as you would locally through pip
- Run black to check if there are issues
- If there are, black will throw an error, it will run black and correct the issues + commit the updated code
This is, for me at least, essentially an auto-include for future Python project (except for notebooks, but for these there is nb_black). Simply drop the file in the correct folder and done, easy and automatic formatting for all code.
Unit tests and code coverage
Having a continuous integration (CI) system run unit tests to check if new versions of code are still working as intended is nothing new, though with GitHub Actions you can run it all on GitHub. So use of a third-party solution (like Travis CI) is no longer necessary, and with fewer “moving” parts there is less risk of a workflow breaking. Furthermore, while some external platforms didn’t allow (easily) for testing different parts of code-bases with multiple programming languages, this is now done simply by adding a yaml file for each language.
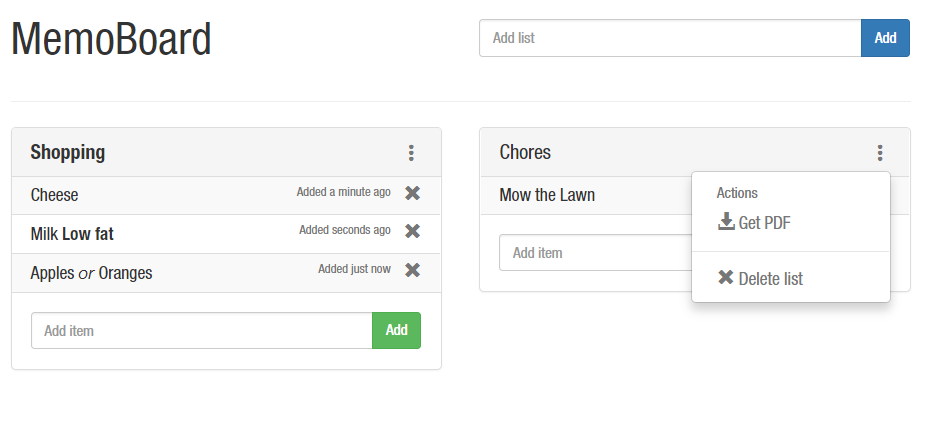
My own go-to repo for testing new things, MemoBoard has a Python and JavaScript component and unit tests have been implemented for all components. So we can simply add two yaml files to create an environment (either python or node), install all dependencies and run the tests. This will run nicely on both the Python parts as the JavaScript section and if either fails it throws an error.
For the Python part code coverage is also included and reported to codecov.io, there are existing actions for this so including those is a breeze.
# GitHub Action that uses Black to reformat the Python code in an incoming push request.

name: unittest python + codecov
on: [push, pull_request]
jobs:
  build:
    runs-on: ubuntu-latest
    steps:
      - uses: actions/checkout@v2
        with:  # https://github.com/stefanzweifel/git-auto-commit-action#checkout-the-correct-branch
            ref: $
      - name: Set up Python 3.8
        uses: actions/setup-python@v2
        with:
          python-version: 3.8
          architecture: 'x64'
      - name: Install requirements
        run: pip install -r requirements.txt
      - name: Generate Report
        run: |
          pip install coverage
          coverage run run_tests.py
      - name: Upload Coverage to Codecov
        uses: codecov/codecov-action@v1
The steps to test the JavaScript (JSX and React to be specific) are similar.
# GitHub Action that runs unittests on javascript portion of the code

name: unittest js
on: [push, pull_request]
jobs:
  build:
    runs-on: ubuntu-latest
    steps:
      - uses: actions/checkout@v2
        with:  # https://github.com/stefanzweifel/git-auto-commit-action#checkout-the-correct-branch
            ref: $
      - uses: actions/setup-node@v2
        with:
          node-version: '12'
      - name: Install dependencies
        run: npm install
      - name: Unit test
        run: npm test
Building a static website
GitHub has supported Jekyll for docs for a while, you just put the template and data in your repo, and it can build the website from there. However, this is somewhat limited: you can only use a handful of plugins, you can run your own code, and you are limited to Jekyll. Now with a GitHub action you can use any static web generator you like, and rebuild the website and post it to a gh-pages branch from where it can be hosted.
While you probably still would like to be able to build the website locally for testing and development, being able to build a version on GitHub has many advantages. For small changes you no longer need to have all build tools installed. My resume, is a static website generated using Gatsby, and most changes are rather minor (increasing publication statistics or adding a course, publication, …). So by including an action that builds the website in the repo that triggers when new content is pushed, GitHub’s interface can be used to make a small change to a file (e.g. updating the number of citations) and it will rebuild the website on its own. Given this can be done through any browser, this makes it trivial to do minor updates whenever necessary from whichever device available, the only thing required is internet access.
The script to do this can be found below, it will check the code out, install node, install gatsby, the dependencies and dev dependencies, build the website and use an existing script to push the fresh build to the gh-pages branch ( which can be used to host your website through GitHub).
# GitHub Action that builds the website and commits again

name: autobuild
on: [push]
jobs:
  build:
    runs-on: ubuntu-latest
    steps:
      - uses: actions/checkout@v2
        with:  # https://github.com/stefanzweifel/git-auto-commit-action#checkout-the-correct-branch
            ref: $
      - uses: actions/setup-node@v2
        with:
            node-version: '14'
      - run: npm i -g gatsby-cli@4.0.0
      - run: npm install
      - run: npm install --only=dev
      - run: gatsby build
      - name: Deploy to gh-pages
        uses: peaceiris/actions-gh-pages@v3
        with:
          github_token: $
          publish_dir: ./public
DeckLock, which can be build through a GitHub action, the goal is to allow everyone with a GitHub account to fork the repo, add their data through GitHub’s interface directly. With some minor configuration the build action will trigger when new data is added and create a personal platform. No need to install Python or mess with the command line to run Pelican.
# GitHub Action that builds the website and commits again

name: autobuild
on: [push, workflow_dispatch]
jobs:
  build:
    runs-on: ubuntu-latest
    steps:
      - uses: actions/checkout@v2
        with:  # https://github.com/stefanzweifel/git-auto-commit-action#checkout-the-correct-branch
            ref: $
      - name: Set up Python 3.8
        uses: actions/setup-python@v2
        with:
          python-version: 3.8
          architecture: 'x64'
      - run: pip install -r requirements.txt
      - run: mkdir -p docs
      - name: Run Pelican (build website)
        env:
          DOK_API_KEY: $
        run: make github
A GitHub Action will need to get and install all components to build the website each time it is triggered. This is actually a good check if all those dependencies are still around. While for popular frameworks that might not be much of a concern, for many small generators with less support it is a risk! I recently inherited a website which was generated using a deprecated framework… The tools to rebuild it were no longer around so all existing templates and data had to be converted to something else. If the entire toolchain is reinstalled from scratch each time data is updated, those issue would have been detected early and caught before the became urgent.
Collecting data
One last use case presented here is collecting data through a GitHub Action. As you can trigger an action every hour, day, week, … a script that collects data can be run periodically. There currently is one running hourly tracking the number of registered KeyForge decks here. Setting up the interval is similar to setting up a cron job, hardened linux enthusiasts will know immediately how to use it, others should check out the cron wikipedia page.
The Python script get_keyforge.py will load the current data, fetch the new number of registered decks from the
website and write the output. This file with additional data will then be committed and pushed.
# This is a basic workflow to help you get started with Actions

name: Update KeyForge Count Hourly

# Controls when the action will run.
on:
  schedule:
    # execute every hour
    - cron:  '50 * * * *'

# A workflow run is made up of one or more jobs that can run sequentially or in parallel
jobs:
  # This workflow contains a single job called "build"
  build:
    # The type of runner that the job will run on
    runs-on: ubuntu-latest

    # Steps represent a sequence of tasks that will be executed as part of the job
    steps:
      # Checks-out your repository under $GITHUB_WORKSPACE, so your job can access it
      - uses: actions/checkout@v2
      - name: Set up Python 3.8
        uses: actions/setup-python@v2
        with:
          # Semantic version range syntax or exact version of a Python version
          python-version: '3.8'
          # Optional - x64 or x86 architecture, defaults to x64
          architecture: 'x64'

      # Runs the script
      - name: Fetch KeyForge
        run: python ./scripts/get_keyforge.py

      # Commit and Push new data
      - name: Commit and Push files
        run: |
          git config --local user.email '${GITHUB_ACTOR}@users.noreply.github.com'
          git config --local user.name "fetch-keyforge[bot]"
          git commit -m "Add changes" -a
          git push
One thing to be aware of is that GitHub will run this more or less hourly, it can happen the action triggers later or if the load is high not at all. So for anything which has to trigger exactly every hour on the hour, this isn’t a good solution. For things where it doesn’t matter all that much, it can easily replace a raspberry pi doing this sort of stuff.
Note that in combination with a static website generator this could be a way to have a self-updating dashboard … Perhaps a good idea for a future post …
Conclusion
A few yaml files go a long way when it comes to GitHub actions. Being able to run unit-tests, build static websites, … directly on GitHub without relying on third-party solutions is great. As these are forked along with the code, it makes it trivial for others working on the code to activate them (though you do need to explicitly activate them after forking a repo) and they’ll have everything up and running in seconds.
The best part is that it is free for public repos. For private ones there is a free tier, but beyond that it becomes a paid service. However, for open-source projects it is great and totally worth setting up for your repos!
Liked this post ? You can buy me a coffee