ComfyUI and SDXL: New Workflows
experiments with Control-LoRas and the SDXL Refiner
The latest version of our software, StableDiffusion, aptly named SDXL, has recently been launched. This has simultaneously ignited an interest in ComfyUI, a new tool that simplifies usability of these models. It’s important to note, however, that the node-based workflows of ComfyUI markedly differ from the Automatic1111 framework that I previously utilized (you can find my tips and tricks using that framework in a previous post). In this article, I’ll take you through some techniques I have found effective when working with ComfyUI.
Background
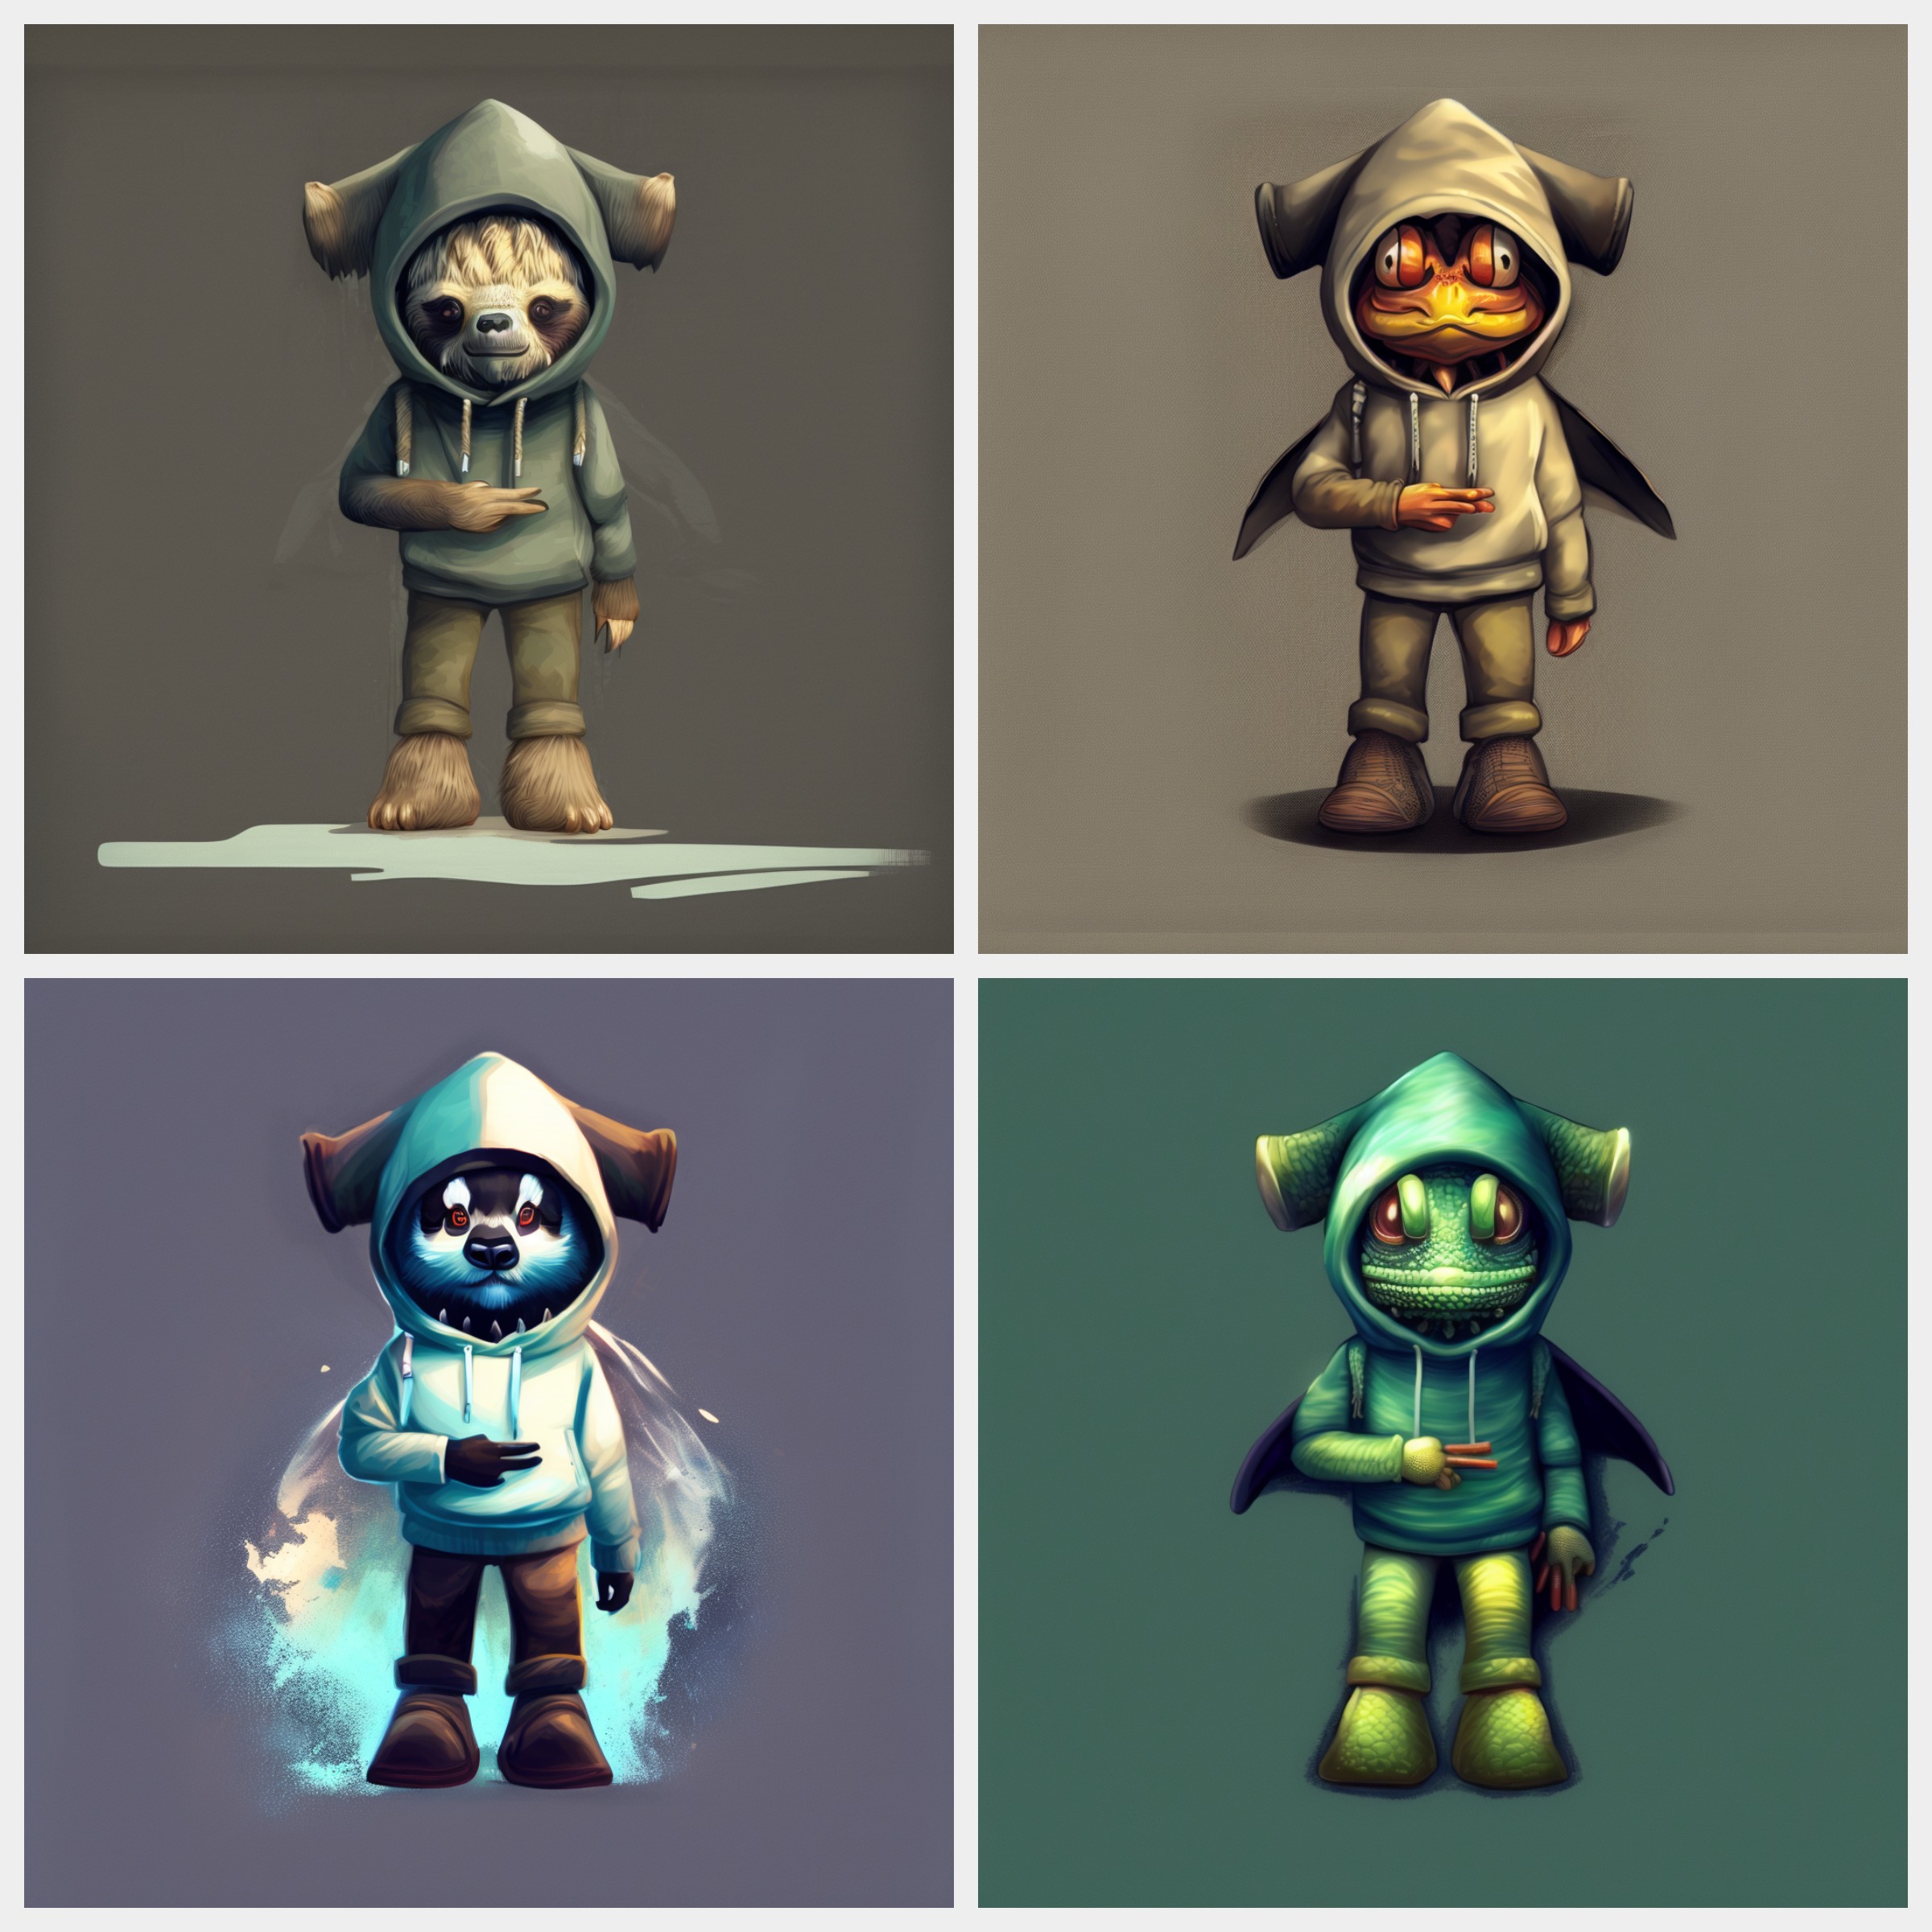
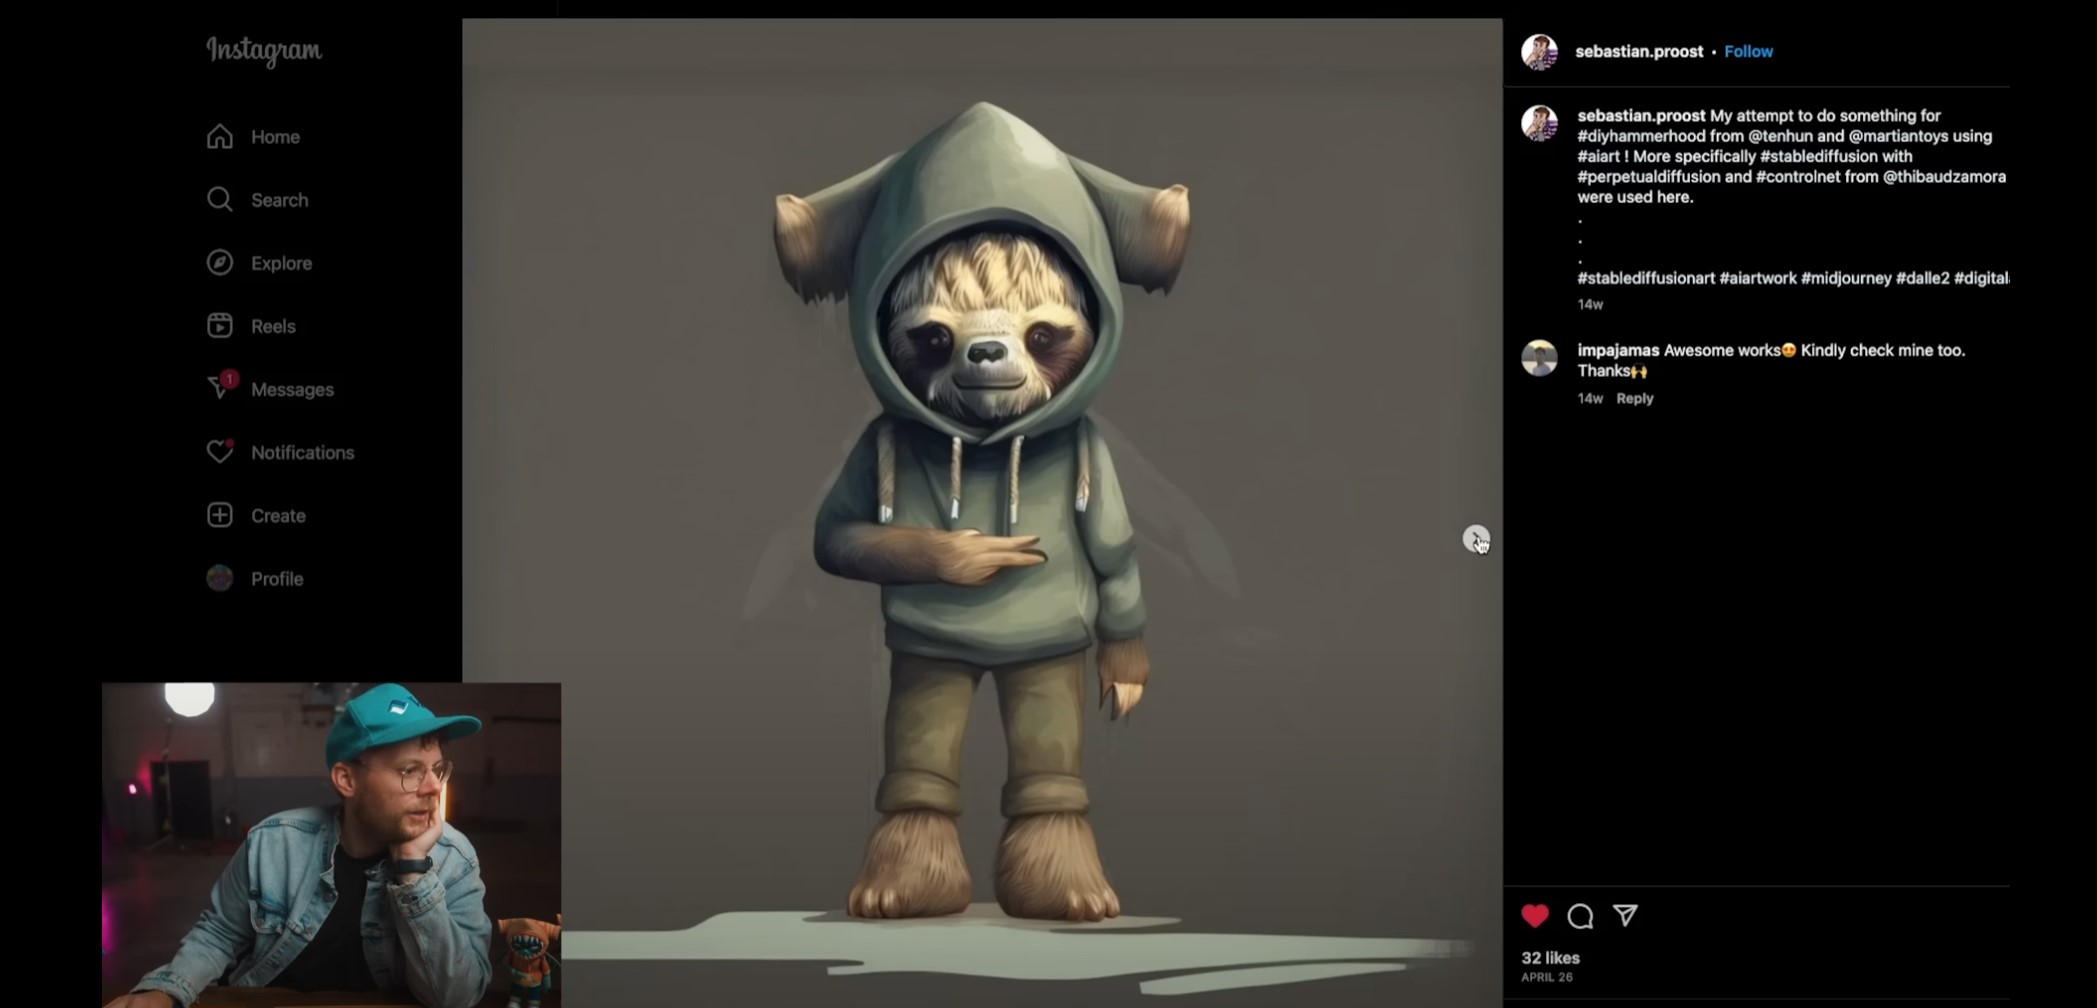
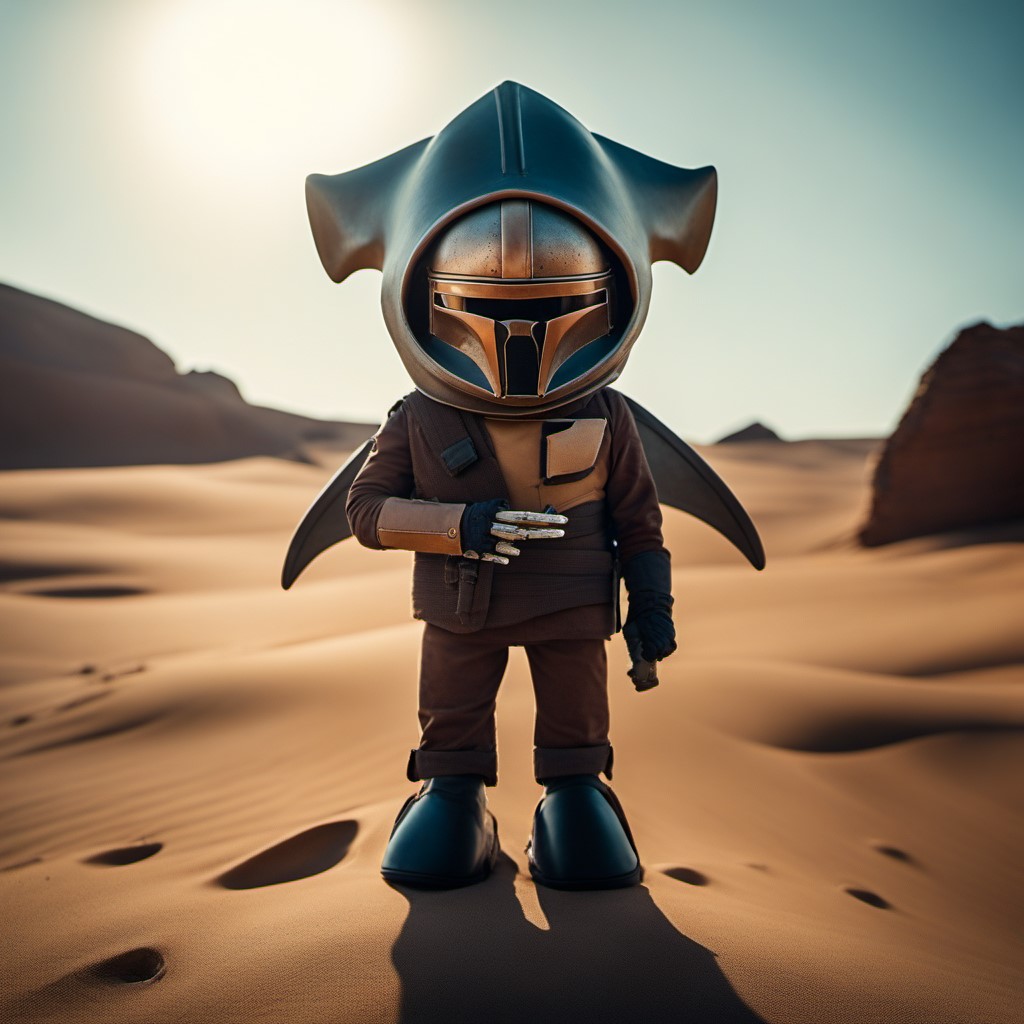
Not too long ago, an awesome artist and YouTuber, Ten Hundred (or Ten Hun), held a competition that welcomed everyone to create their unique interpretation of his art toy: Hammerhood. I seized this opportunity to experiment with the technologies I was delving into at that moment, namely StableDiffusion 2.1 and ControlNet. So, I decided to create and submit a version that was entirely generated by AI.
In the spirit of clarity and transparency, I made it a point to mention in the submission description that this creation was born out of artificial intelligence. Surprisingly though, my AI-generated images found a place among the featured submissions on Ten Hun’s channel! Unsurprisingly, my AI-manufactured artwork couldn’t compete with the winning entries,highlighting the irreplaceable creative human touch in the domain of art that currently remains unmatched by AI.
Since the submission of these images, Stability AI has introduced a range of new tools, prompting me to refine my original workflow. So in this post I’ll outline the new workflow I’ve adopted specifically those that include ControlNet.
The new tools
To follow along this post you’ll need to install a few new tools and download the new models. Each of these tools
comes with its own detailed installation guide, which you should closely follow for a seamless setup. Please keep in
mind that, given the innovative nature of these software tools, the installation process might be slightly more
intricate than that of conventional software packages.
- Stability AI on Huggingface: Here you can find all official SDXL models
- SDXL 1.0: The base model, this will be used to generate the first steps of each image at a resolution around 1024x1024.
- SDXL Refiner: The refiner model, a new feature of SDXL
- SDXL VAE: Optional as there is a VAE baked into the base and refiner model, but nice to have is separate in the workflow so it can be updated/changed without needing a new model.
- Control-Lora: Official release of a ControlNet style models along with a few other interesting ones.
- OpenPose SDXL: OpenPose ControlNet for SDXL.
- ComfyUI: Node based workflow manager that can be used with Stable Diffusion
- ComfyUI Manager: Plugin for CompfyUI that helps detect and install missing plugins.
- ComfyUI ControlNet aux: Plugin with preprocessors for ControlNet, so you can generate images directly from ComfyUI.
- ESRGAN Upscaler models: I recommend getting an UltraSharp model (for photos) and Remacri (for paintings), but there are many options optimized for various uses.
My ComfyUI workflows with ControlNet
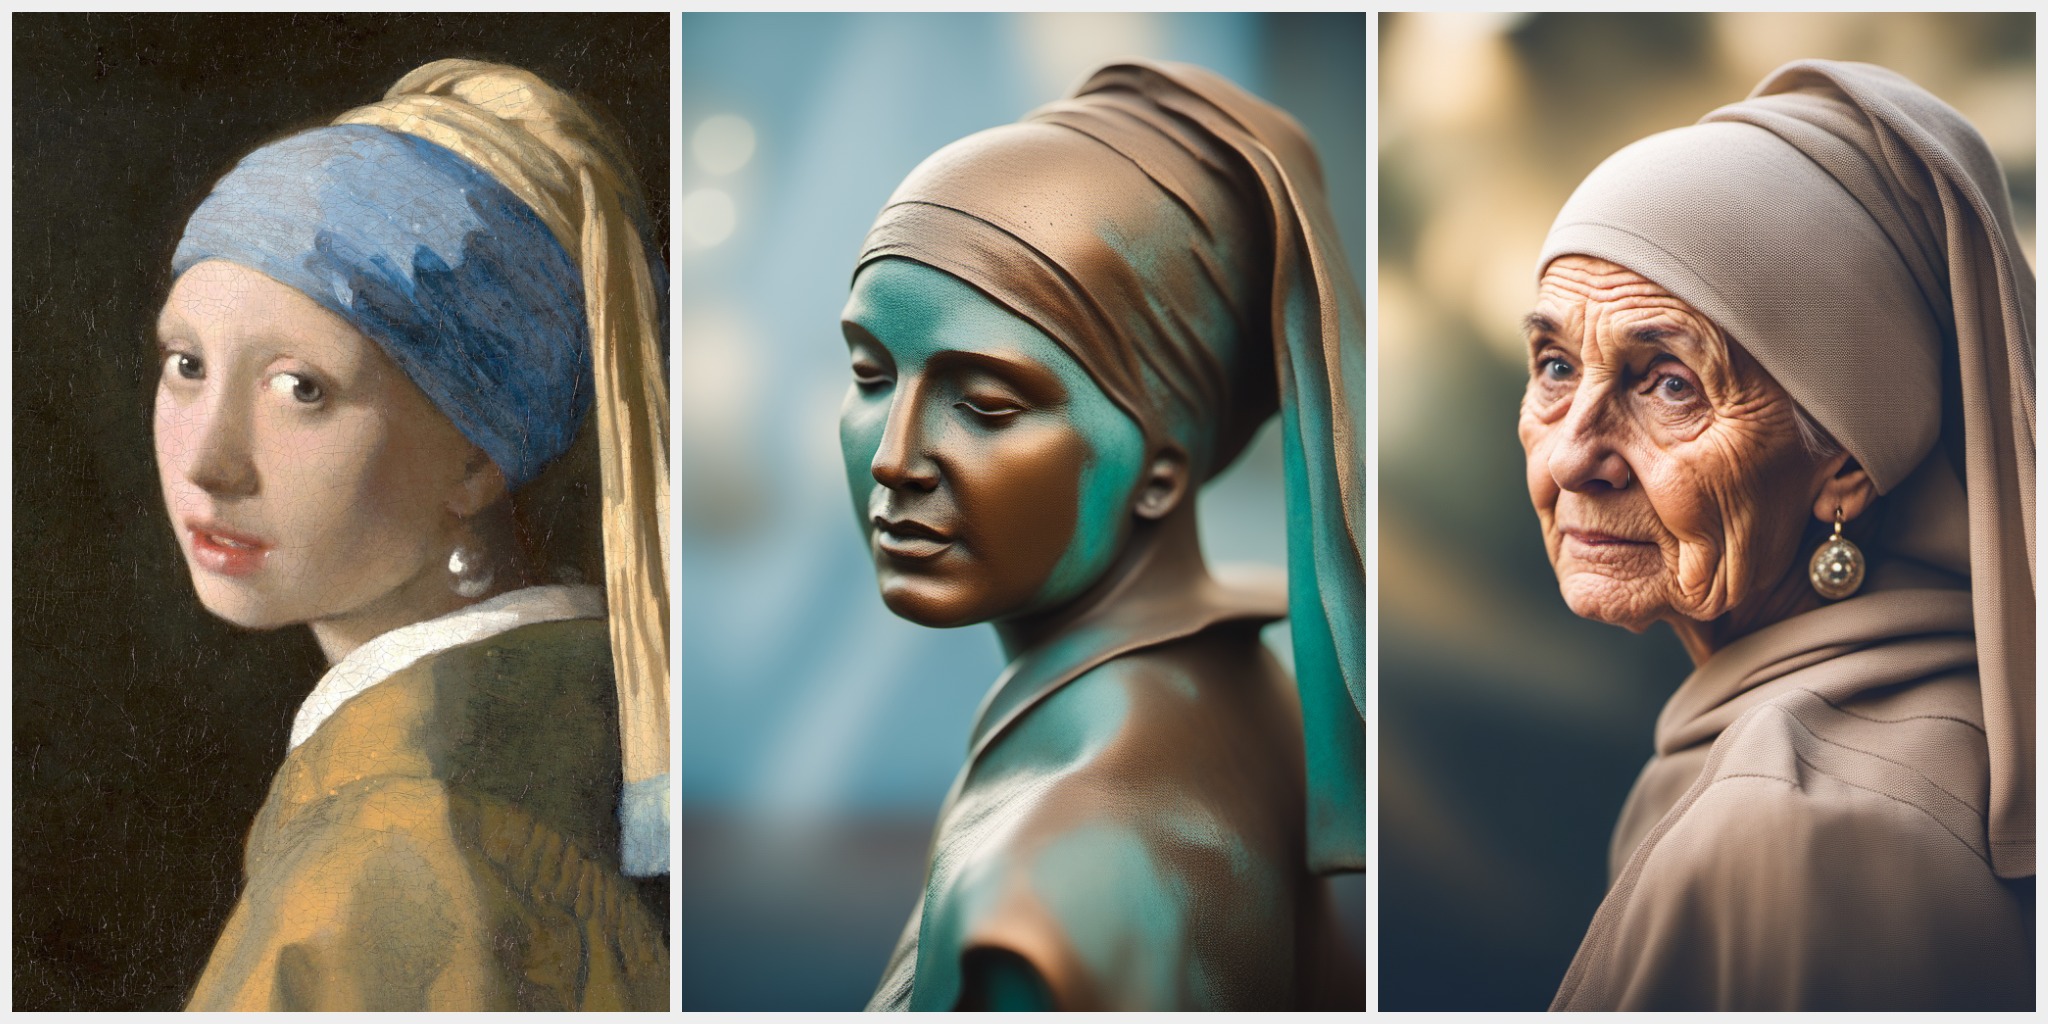
For the art challenge, we were offered several reference images. In this case, I’ve used one of the 3D renders as the reference. First, this picture will pass through two pre-precessors: a depth map and edge detection. The depth map makes sure we capture the overall shape of the subject, whether it’s an object or a person in a specific pose. Combining it with an edge detection tool helps to maintain even the fine details. As a result we can alter an image while maintaining its recognizability.
In ComfyUI it is essential to connect all nodes properly, ensuring each model contributes as needed. Once this is set up correctly, you have a host of customizable options at your disposal - from tweaking the reference image to deciding the influence of each ControlNet on the final outcome. Coupled with the variety options offered by prompts and LoRa models, this method hands you tremendous control over the content and composition of an image.
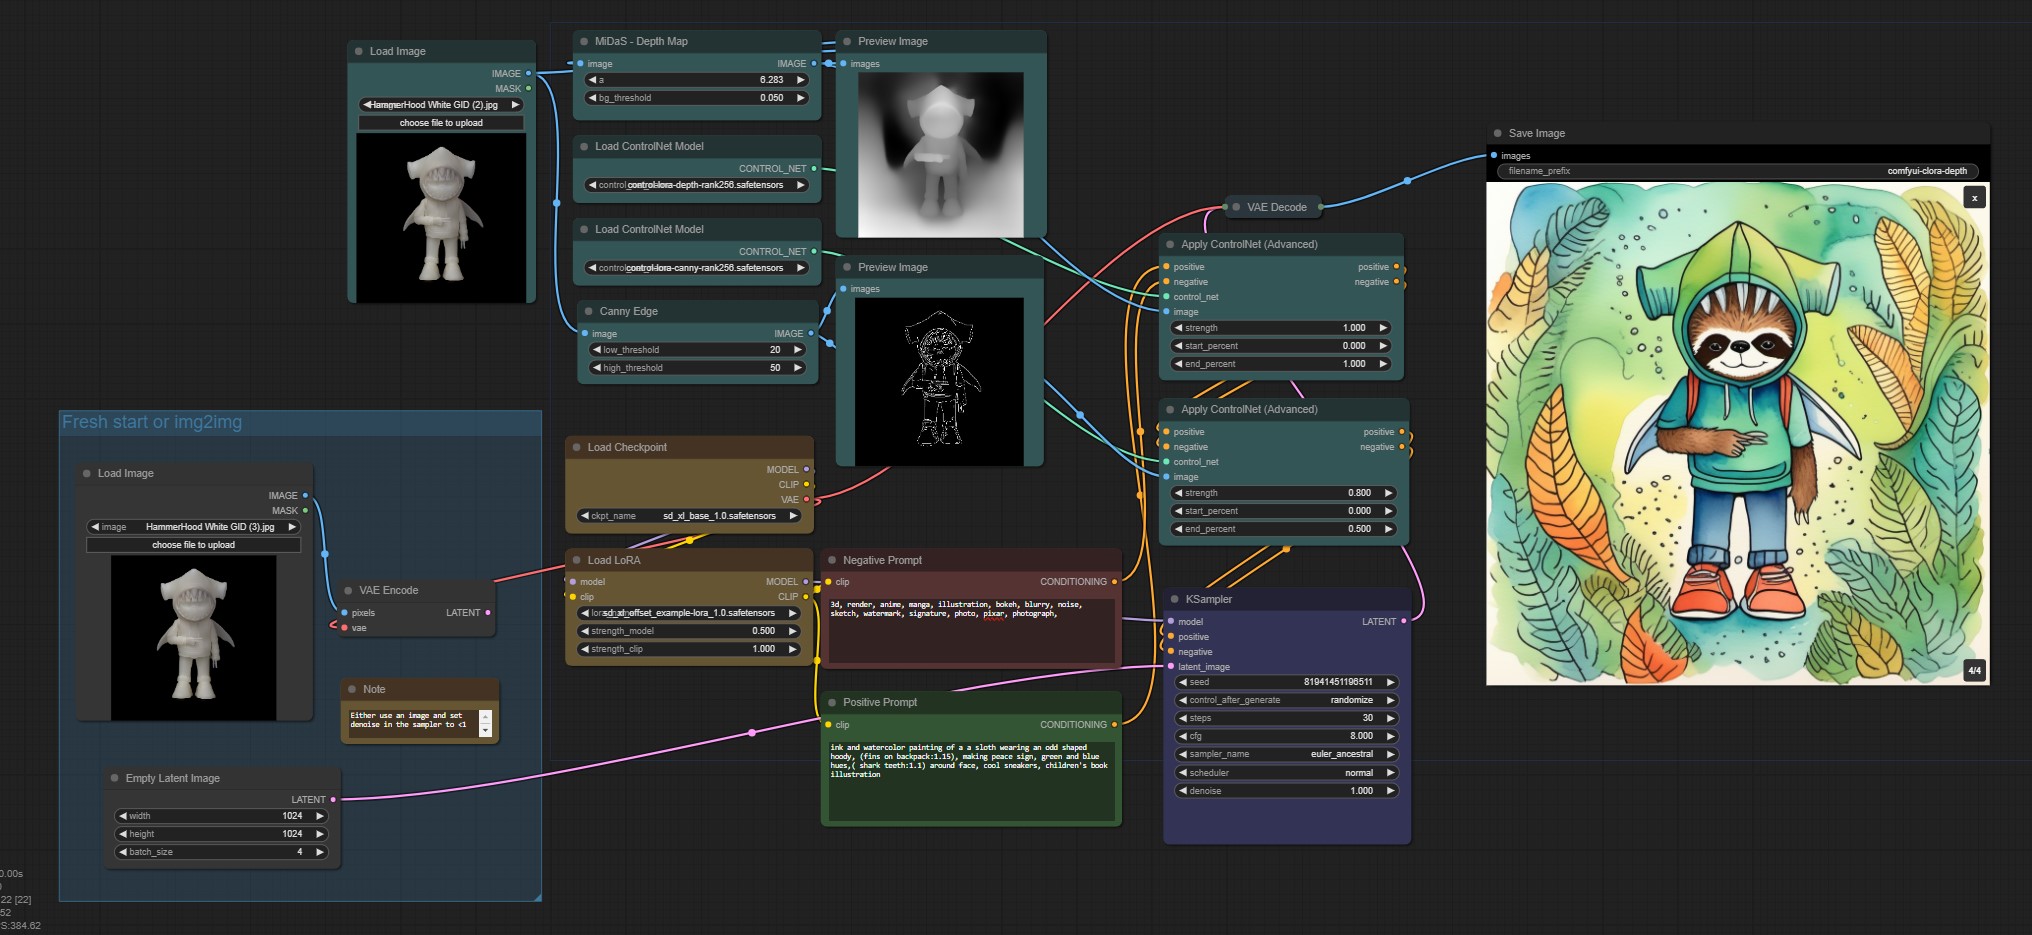
Download this workflow as a .json file.
Note that once you have an image close
to what you need, you can still use the img2img to generate similar images as shown in a previous post! Load the image using the appropriate
node, run it through a VAE Encode node, and use the resulting latent as the input for the sampler (replacing the Empty Latent Image as the staring point). Don’t forget to lower the denoise
strength (0.6 to give the AI a lot of freedom to change the input image, the lower this value, the less flexibility it
has) and you are good to go.
Bear in mind, you don’t need to use the SDXL Refiner for pieces where you’re aiming for an artistic, painterly style. However, if you’re hoping to create something with a more lifelike or photorealistic look, using the refiner can be a great help.
If you are looking for a similar workflow which does include the refiner, download it here.
While the refiner offers a boon for photorealism, including an img2img step, to iterate over an image multiple times,
is harder with the required KSampler (advanced) nodes.
Exploring Other Workflows
Are you interested in not using ControlNet but want to delve into SDXL and the refiner? Take a look at the Sytan SDXL ComfyUI workflow. This is the basis for my other workflows, which are readily available on GitHub and also incorporates an upscale phase. Using ESRGAN Upscaler models, this phase amplifies the resolution of the created images, maintaining high quality.
Wrapping Up
Wrapping your head around ComfyUI and using a node-based system may initially seem challenging, especially if you’re new to this, but nonetheless, it’s an incredibly potent instrument. Automatic1111 also is a dependable choice that supports SDXL if you refer a more traditional UI; there’s nothing wrong with that either!
The rapid advancements in this field never cease to astonish me. Whereas with SD2.1 certain elements were nearly impossible to perfect, SDXL renders them correctly (hands are still the biggest issue). The base model’s capacity for realism has escalated and the resolution has significantly improved. For individuals like me who need a creative outlet occasionally and are more skilled with computer engineering than paintbrushes, this toolkit is pivotal in creating cool looking images.
Liked this post ? You can buy me a coffee