Best Tools to Edit STL Files
Comparing MeshMixer, Fusion360 and Blender
After being inspired by The Smuggler’s Room I decided to build a Kyber Crystal Crate Bluetooth speaker myself. Though the 3D printable models they provide need some work after being printed … with tools I don’t have … So I decided to make the necessary changes to the models digitally before printing. To do this I experimented with three tools, MeshMixer, Fusion360 and Blender, to edit STL files. All can be downloaded for free, though they all have their own strengths and weaknesses, let’s have a look at how they line up.
The Kyber Crystal Crate STLs used by the guys from The Smuggler’s Room, can be found on Thingiverse. Though if you look at their project, there are quite a few modifications necessary to the prints before they can be used. Holes for ports and switches need to be added, a hole for the speaker, … Which requires a few tools I don’t have access too or would take me ages with hand tools to do. So I decided a better route would be to alter the models digitally before printing, no extra tools required … except sanding, there will always be a ton of sanding with 3D printed projects …
Fusion360
Fusion360 is my goto program in case I need to model something myself, it is free to use under an educational licence (which is great learning how the tool works and doing personal projects, though be aware that if you plan to sell models and/or prints, commercial, professional and for-profit use is not permitted under this type of licence). The parametric modelling allows you to go back at any point, make a change to a size, position, … and the entire model updates automatically. This is very powerful when designing prototypes for printing. However, STL files contain the models as a mesh, a collection of triangular faces, not a parametric model. This is a problem, while there are ways to convert a mesh into a surface representation that Fusion360 needs, this only works for relatively simple models. I did manage to make the desired recess into the side panel where the speakers should fit. More complex objects such as the main crate, were problematic to load, and even more problematic to edit.
So for the first change I wanted to make, a simple recess in the side panel to fit the speaker, Fusion360 worked fine. First make sure you click “do not capture design history” (by right-clicking the project name) directly after loading the model. Next, you need to select the object and from the menu go to Modify > Mesh > Mesh to BRep … this will convert the Mesh into surfaces you can work with in Fusion as you are used to. Optionally you can combine planar faces for a cleaner representation.

So while it is a great tool, Fusion360 isn’t designed for editing STL files. It might work for some models, but your mileage may vary! I only used Fusion360 because it was a tool I was familiar with already, if you have to start out fresh, check out the other option first!
MeshMixer
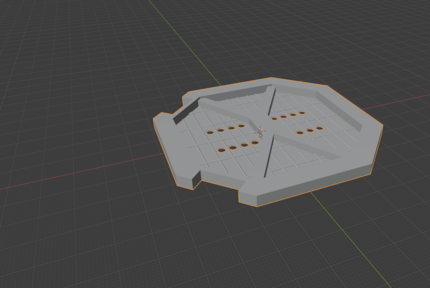
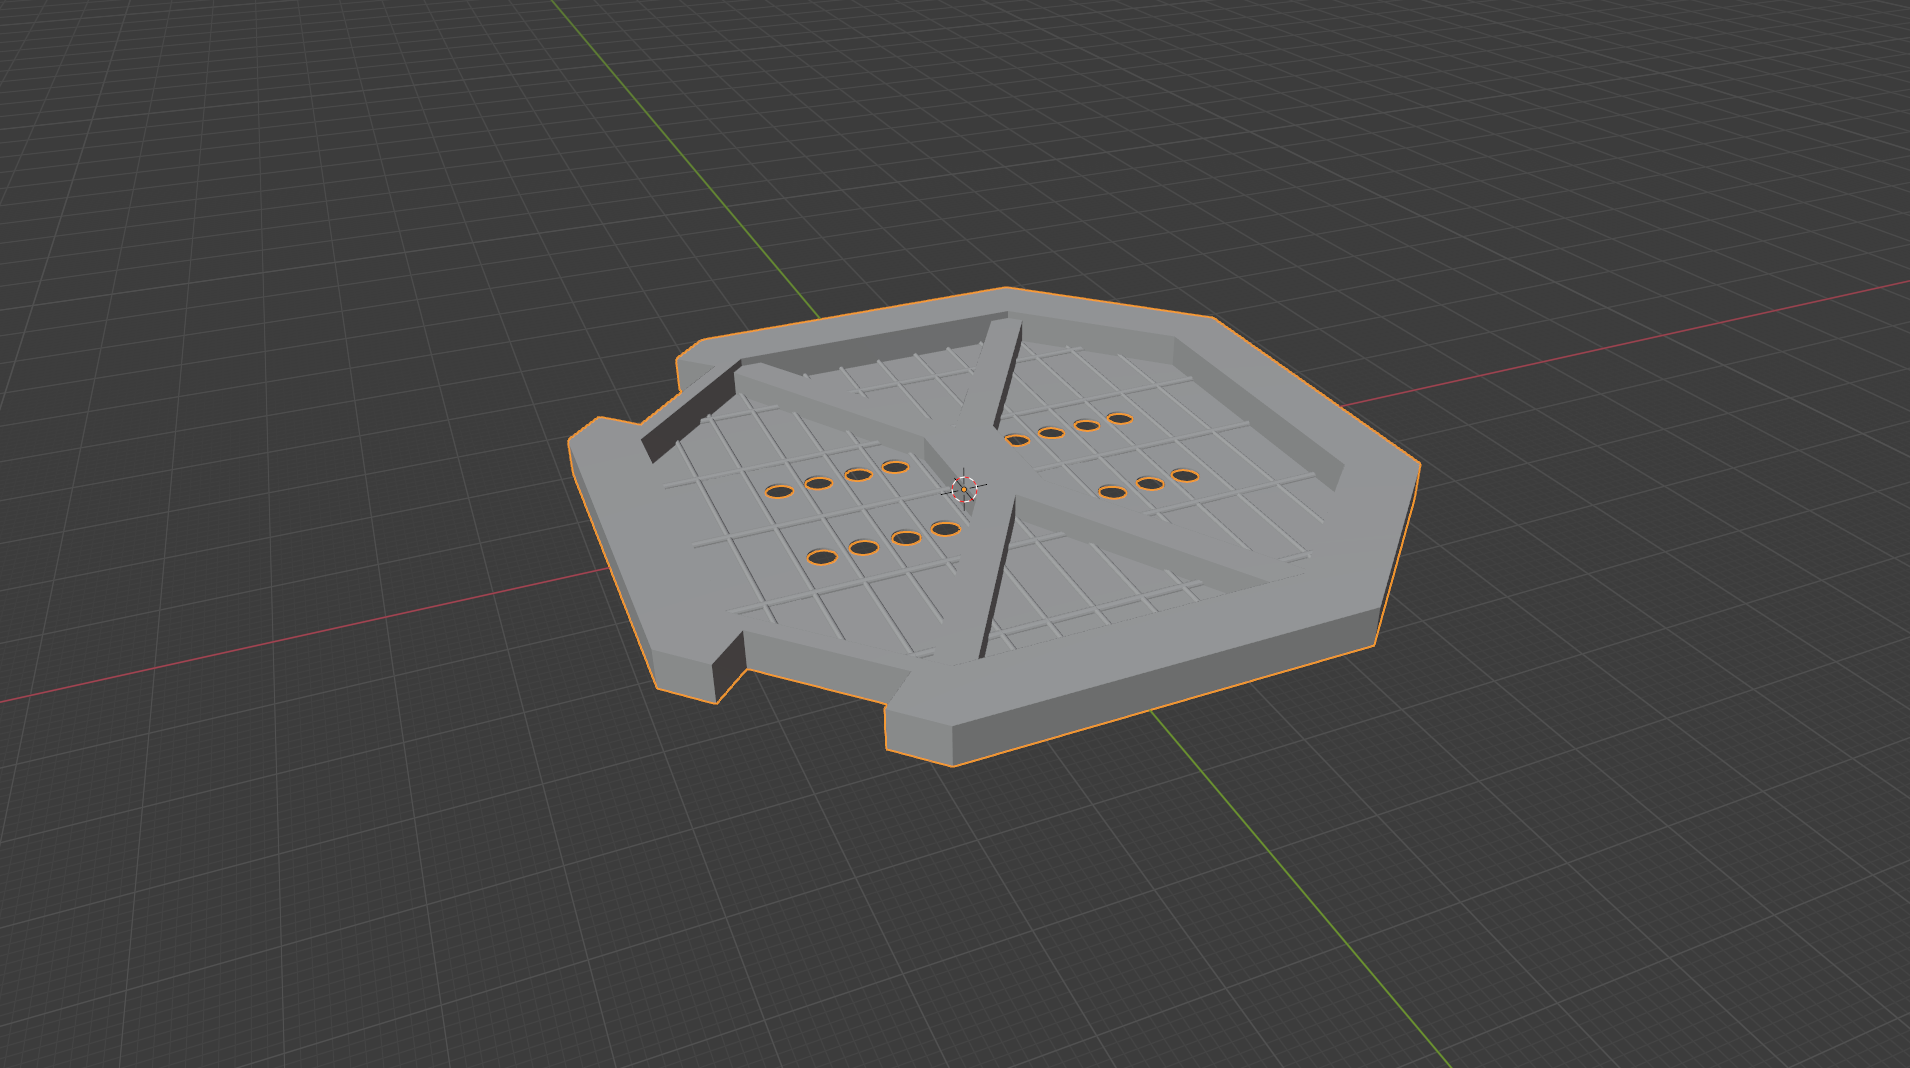
AutoDesk’s MeshMixer is a user-friendly tool that allows you to, as in the name, combine meshes (such as objects in an STL file). It also has a few basic objects (such as cubes, spheres, cylinders, …) built in. Using MeshMixer it was straightforward to load even the most complex STL and add a few cubes to the inside of the care to attach the electronics.
Similarly, a cube and cylinder were created where the holes for speakers, usb-port and on-off switch were necessary and then these shapes were subtracted from the main model to create actual holes. While it worked eventually, subtracting a simple primitive from the complex geometry took a long time and the resulting mesh wasn’t perfect (you can see in the image below the joins aren’t perfectly straight and edges are no longer crisp). I also found it hard to work in a very precise manner. Placing an object at an exact distance of another one, … isn’t included in the software.
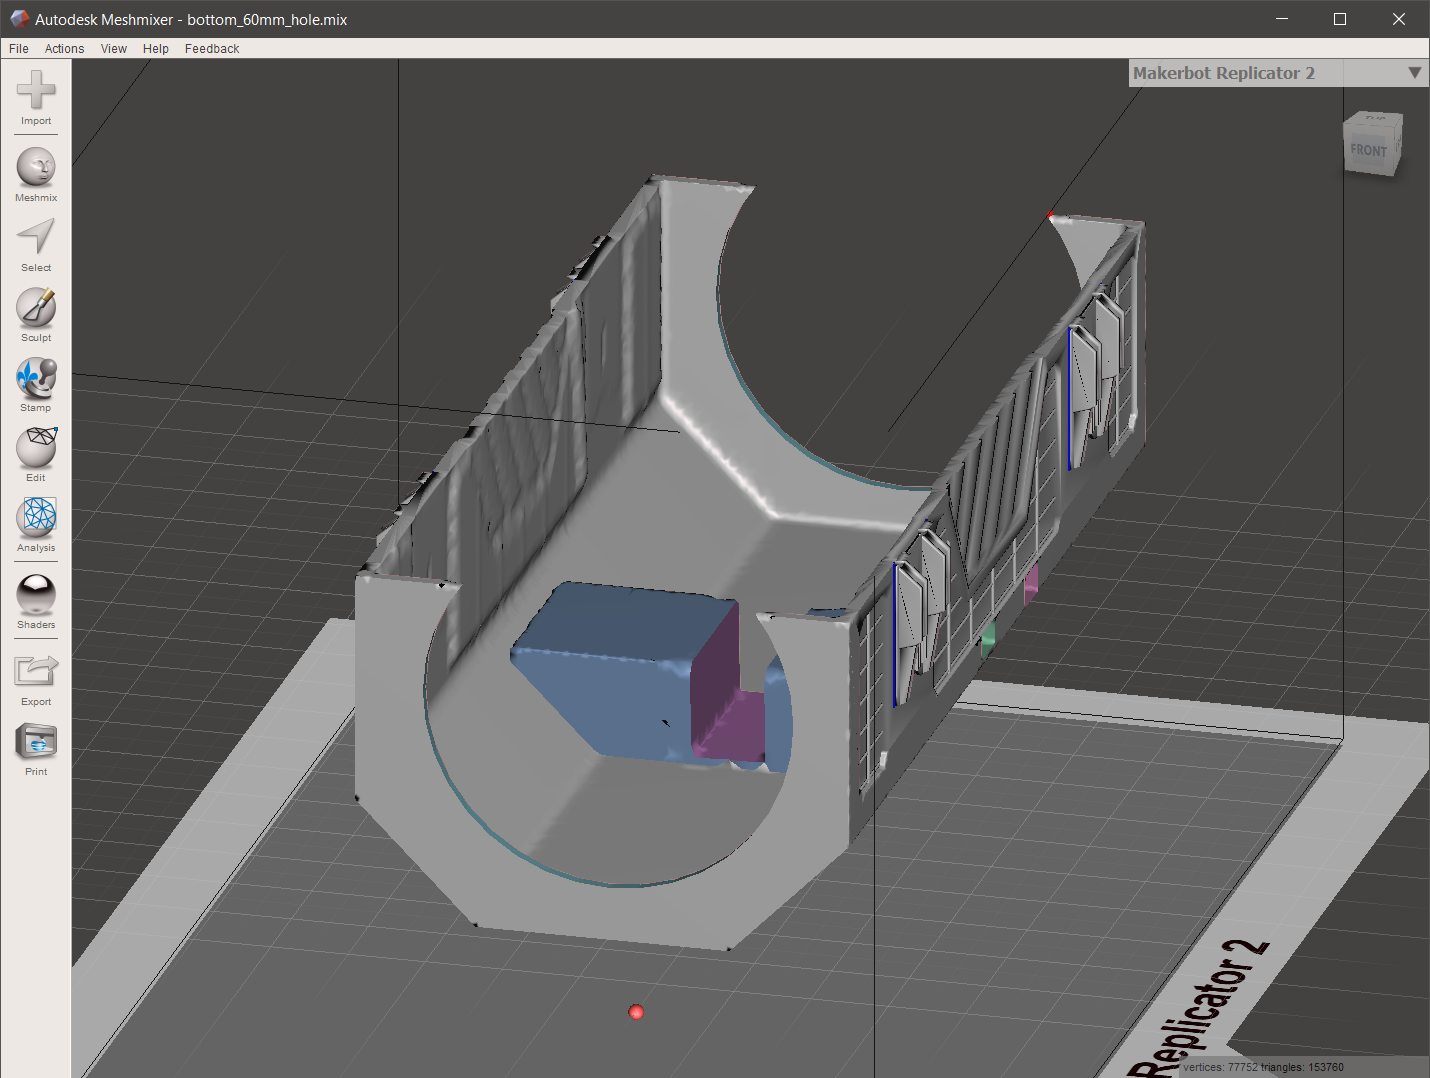
MeshMixer did allow for changing STL files that could not be edited using Fusion360, and it is very user-friendly. So this tool is often recommended as the first one to try. Finally, it has a few options that are often needed for 3D printing, like slicing straight through a model to split a large model into parts that fit the build plate, readily available. However, the resulting geometry after cutting holes in objects wasn’t ideal and in case issues arise, the tools to correct the issue by editing vertices in the mesh directly are lacking.
Blender
Blender has been around the longest, and can be used to do extremely advanced 3D modelling and animation. To no surprise this tool has a steep learning curve. However, if you need more precision than MeshMixer, or you are working with complex geometry were MeshMixer runs into problems, this is your best bet!
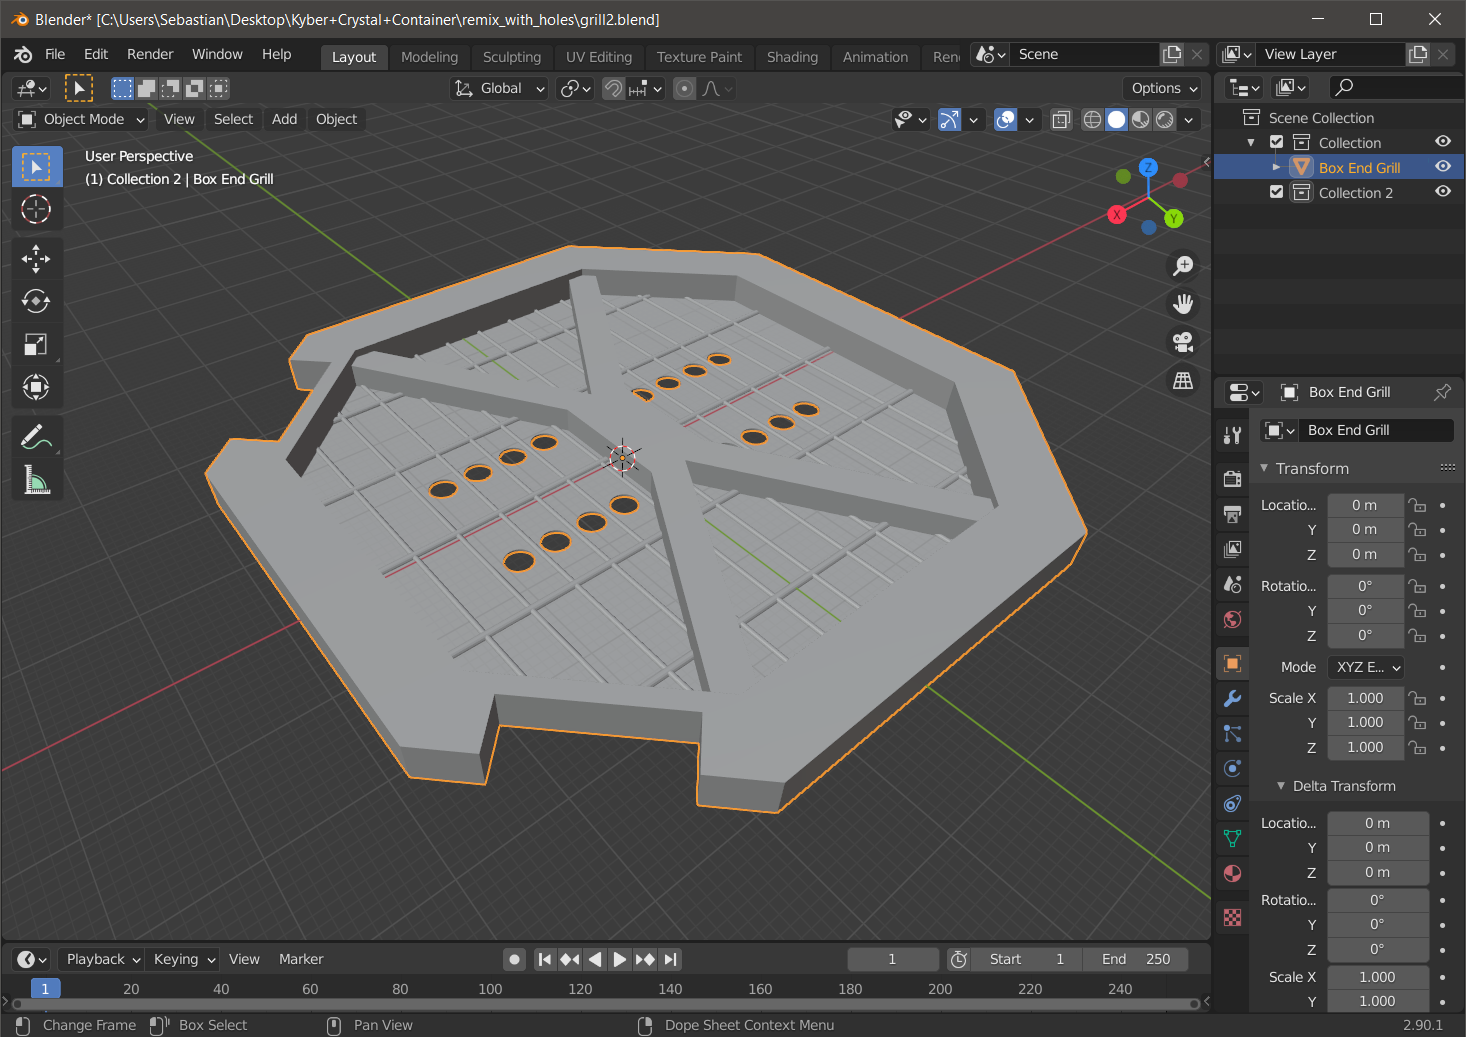
To add some holes to the sides of the crate for the sound of the speakers I had to resort to Blender. Aligning all cylinders correctly in MeshMixer was tough and even if this would have worked, MeshMixer wasn’t able to subtract the cylinders from the grill correctly.
While the most powerful tool I used, it is also the hardest one to use. While it took me a few minutes to get started with MeshMixer, Blender took significantly more time.
Conclusion
Hindsight being 20/20, I should have immediately used Blender for all parts. Though given I had prior experience with Fusion360 it made sense to try this first, even while being aware this wasn’t the best tool for the job. MeshMixer, despite being commonly recommended, I found rather limited and didn’t produce good results. It is a very user-friendly tool, and for those that quickly want to edit together a few STL files it might work. Though here, subtracting very simple geometry from complex ones, it didn’t produce a clean result and the lack of precision ended up being a game breaker too. Investing a couple of hours to get familiar with Blender and figuring out the basics was well worth it. I was able to make the changes to the grill (which neither Fusion360 nor MeshMixer could do without breaking the mesh). Furthermore, it would have been better to make the other changes in Blender as well, as that would have been more accurate and provided better results.
So from now on, when editing STL files, Blender will be the first tool I’ll fire up!
The prints, STL files and build guide for my own Kyber Crystal Crate Bluetooth speakers will come in a future post. Stay tuned!
Liked this post ? You can buy me a coffee