
Building a Custom Deej Volume Mixer with an RP2040 Pro Micro
using CircuitPython
Looking for a DIY hardware volume mixer to control individual app volumes effortlessly? Whether you’re a gamer, streamer, or audio enthusiast, manually adjusting software volume sliders can be frustrating. That’s where Deej, an open-source USB volume mixer, comes in.
This guide will show you how I’ve built a Deej volume mixer using an RP2040 Pro Micro, a Raspberry Pi Pico-clone in a smaller form-factor, with a few quality-of-life improvements and a USB-C port. Unlike the more common Arduino-based builds, this setup takes advantage of CircuitPython for an easy-to-code, powerful alternative.
As there are many ways to build a Deej, I’ll show you my build, and then we’ll cover writing the code and configuring Deej. Hopes this gives you a good starting point for your own custom volume mixer.
What You Need
Before you start, gather the following components and tools:
- RP2040 Pro Micro – An RP2040-based microcontroller which will do the heavy lifting.
- Potentiometers – Three 10K Ohm potentiometers for adjusting volume levels.
- Knobs – Three knobs to attach to the potentiometers.
- Perfboard – A small piece of perfboard for soldering components.
- Jumper wires – To connect components on the perfboard.
- Case – A custom enclosure to house the components.
-
Soldering gear – A soldering iron, solder, and flux for assembling the hardware.
- Optional parts if you want to add a power indicator:
- 3 mm LED - An LED to indicate when the device is powered on.
- 82 Ohm resistor – To limit the current to the LED.
- LED holder - To secure the LED in place and make it look nice.
Assembling the Hardware
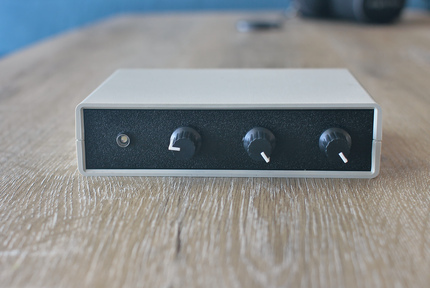
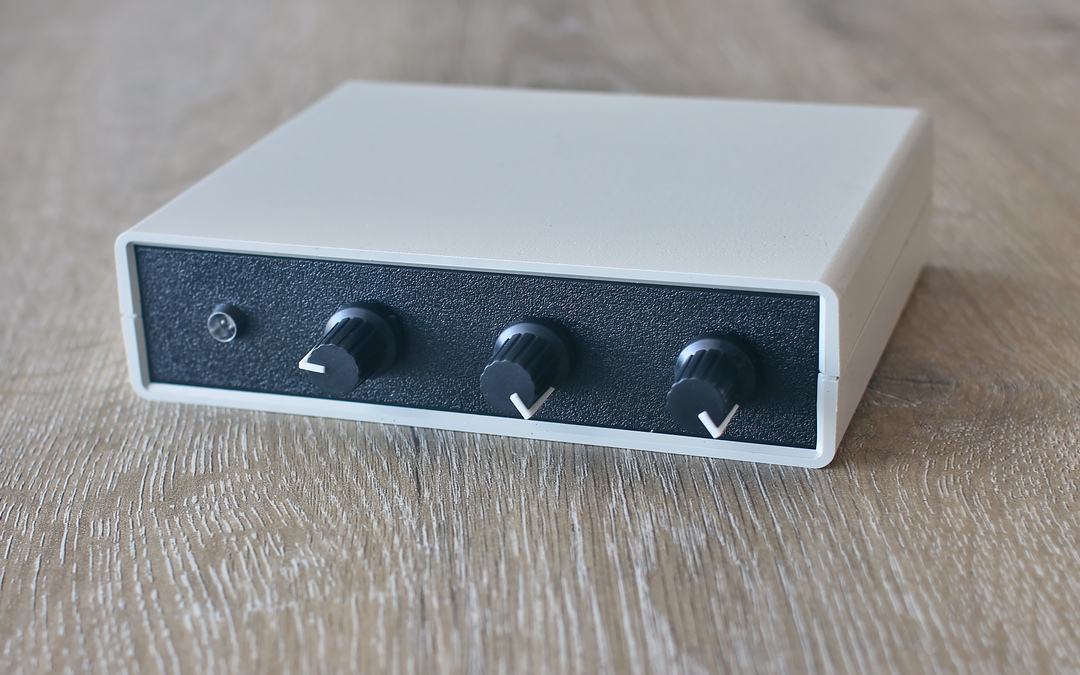
I first started preparing the case, I mocked up the front panel in Inkscape and placed all components until I was happy with the layout. I printed this design on sticker paper, which I then applied to the front panel. This way I could drill holes for the potentiometers and LED holder in exactly the right spots.
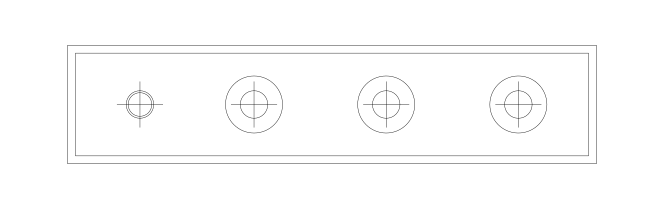
Next, I soldered the RP2040 Pro Micro to the perfboard, connecting the potentiometers and LED to the microcontroller. The LED’s cathode needs to be connected to the ground, the anode to the RP2040’s GP8 (though this can be nearly any other GPIO pin) pin through the 82 Ohm resistor. The potentiometers’ middle pins connect to the RP2040’s GP26, GP27, and GP28 pins, respectively. For the potentiometers, only these pins can be used as they are the only ones supporting Analog-to-Digital Conversion (ADC), which is needed to get the potentiometers’ values. The other pins of the pot-meters go to ground and 3.3V.
Then I mounted the perfboard in my case, which required drilling two screw-holes in the board. In the case, which had a few spots intented to screw a pcb down, I added threaded-inserts to make sure the screws would hold the board in place. I also added a hole for the USB-C port of the RP2040 Pro Micro to be accessible on the back panel. Finally, I attached the knobs to the potentiometers and secured the LED holder in place.
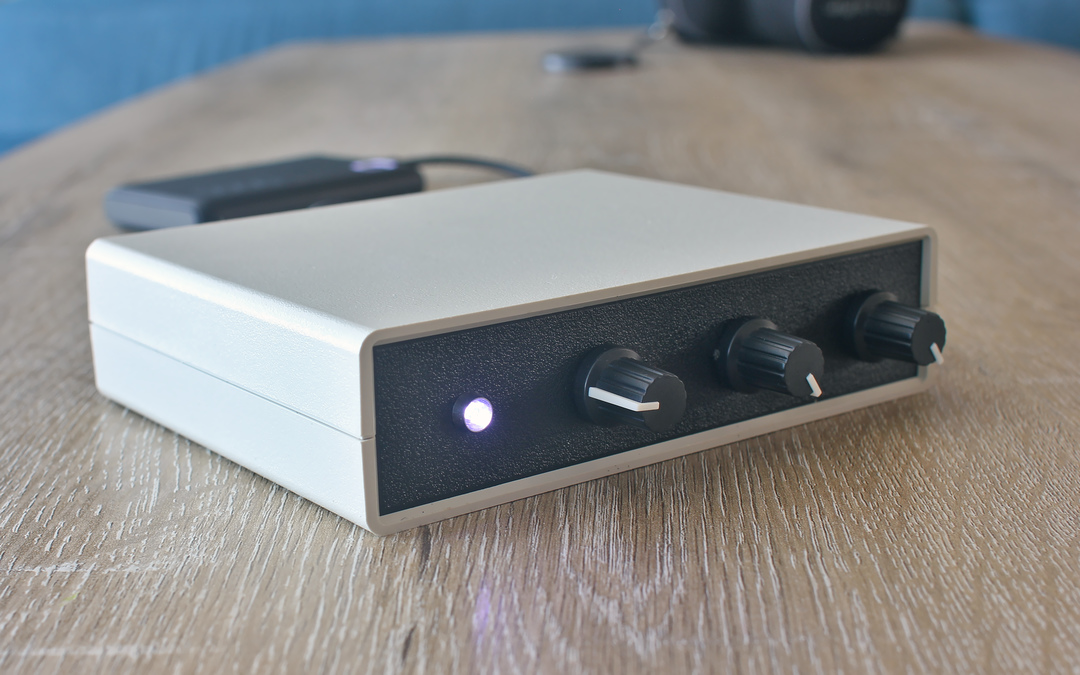
The case I picked must have been in my parts bin for 20 something years, the DIY electronics kit I initially bought it for, despite it being the recommended enclosure, didn’t fit well. Given the retro-vibe of the case, I decided to go with equally retro knobs, the single white LED being the sole hint this project didn’t originate in the 80s or 90s.
Preparing the RP2040
In case you haven’t already, you’ll need to set up the RP2040 Pro Micro for use with CircuitPython. Follow the steps in the Adafruit guide to install CircuitPython on the RP2040. Once you’ve done that, you can proceed with the next steps.
Writing the Code
To interact with Deej, you need a device that mimics a serial device and sends the desired volume levels as messages on that serial connection. Values need to be between 0 and 1023, with 0 being muted and 1023 being the maximum volume, separated by pipes (|). CircuitPython makes this trivial as it will open a serial connection by default and print statements will be sent over this connection. For instance, printing 0|512|1023, when picked up by Deej, will set the first channel to 0, the second to 50%, and the last one to 100%.
The code I’m using for reading the potentiometers and sending the values over the serial connection looks like this:
import board
import analogio
import time
import pwmio

# Constants
MIN_VALUE = 340
MAX_VALUE = 65535
RANGE = MAX_VALUE - MIN_VALUE
ADC_PINS = [board.GP26, board.GP28, board.GP27]
SAMPLES = 10
SLEEP_TIME = 0.1  # 100ms delay

# Set up ADC inputs
ADCs = [analogio.AnalogIn(pin) for pin in ADC_PINS]

# Set up LED, use PWM otherwise it is too bright
pwm = pwmio.PWMOut(board.GP8, frequency=8000, duty_cycle=32768)

def get_smoothed_adc_value(adc, samples=SAMPLES):
    """Reads and averages multiple ADC samples for noise reduction."""
    smooth_value = sum(adc.value for _ in range(samples)) // samples
    return (max(0, smooth_value - MIN_VALUE) * 1023) // RANGE

def read_pot_values():
    """Reads and returns smoothed values from all ADCs."""
    return [get_smoothed_adc_value(adc) for adc in ADCs]

def send_pot_values(pot_values):
    """Formats and prints potentiometer values."""
    print('|'.join(map(str, pot_values)))

# Main loop
while True:
    pot_values = read_pot_values()
    send_pot_values(pot_values)
    time.sleep(SLEEP_TIME)
This code reads the values for the potentiometers, smooths them out (by averaging multiple measurements), and sends them over the serial connection. The MIN_VALUE and MAX_VALUE constants are used to scale the ADC values to the desired range (and might need to be adjusted for other devices). The RANGE constant is the difference between the maximum and minimum values. The SAMPLES constant determines how many samples are taken to smooth out the ADC values. The SLEEP_TIME constant sets the delay between each reading, you’ll want this to trigger often enough so Deej responds quickly to changes, but not too often to flood the serial connection. I found 100 ms to be a good balance, but I’ve seen implementations with delays as low as 10 ms. If you want to use this, just save it as code.py on the RP2040 Pro Micro.
Configuring Deej
On the host computer, download Deej from the official GitHub repository, the executable simply needs to be stored somewhere and in the same folder a config.yaml file needs to be created, which will specify which serial port to use and which channel controls which app. The config.yaml file should look something like this:
slider_mapping:
  0: master
  1: chrome.exe
  2: mic


# set this to true if you want the controls inverted (i.e. top is 0%, bottom is 100%)
invert_sliders: false

# settings for connecting to the RP2040 Pro Micro
com_port: COM4
baud_rate: 9600

# adjust the amount of signal noise reduction depending on your hardware quality
# supported values are "low" (excellent hardware), "default" (regular hardware) or "high" (bad, noisy hardware)
noise_reduction: default
I’ve set things up so the knobs from left to right control the master volume, chrome (useful for YouTube, …), and the microphone. The com_port should be set to the port the RP2040 Pro Micro is assigned to (tip: you can find this using Windows’ device manager). Now you can start Deej and enjoy your new hardware volume mixer!
Conclusion
Building a custom Deej volume mixer with an RP2040 Pro Micro is a fun and rewarding project that offers a tactile way to control your system audio. Using an RP2040 based microcontroller running CircuitPython is a great alternative to the Arduino-based solutions when you are familiar with Python and want to leverage the RP2040’s capabilities. With a few components and some basic soldering skills, you can create a custom volume mixer that enhances your audio experience. Happy tinkering!
Liked this post ? You can buy me a coffee