Improving blogs with custom Jekyll Plugins
taking things to a higher level
This blog is built using Jekyll, which can be used to generate a static website based on a set of templates (for the layout) and markdown files (for the content). The main advantage is that GitHub pages can be leveraged to host those static pages for free. However, while there are plenty of great themes available, some features I really wanted are usually not included. Fortunately, Jekyll supports plugins to fill those gaps, here you’ll read about some plugins I made for this blog and Beyond the Known (a travel blog).
Getting started
For both blogs I’m involved in, the Centrarium theme was used as a starting point. This theme already included many bits and pieces I wanted. There really isn’t any need to re-invent the wheel for every project. I did make a number of changes to the theme, for instance I removed support for HighlightJS in favor for default code highlighter present in Jekyll. I also prefer LightGallery over Lightbox, so I swapped that out as well.
These changes are pure html, js and css, you just need to pinpoint where the relevant code in the _sass, _includes or
_layouts folder and make the change. However, I wanted a few more things that took a little bit more effort to
include.
Automatic LightGallery links for all images
In markdown you have a rather simple way to include an image.

Technically, you should add the website’s baseurl to the path. This way the site will work also when hosted in a
sub-directory. This can be done by adding {{ site.baseurl }}/ before the path. This however is specific for the theme I started from and if you ever want to
use the markdown files with another theme or,framework this will come back to haunt you… To include the image, with all the
required features for LightGallery, you’ll have to resort to including pure html in your markdown file.
<a href="{{ site.baseurl }}/path/to/the/image.jpg" class="lightgallery-link" data-sub-html="image_description">
<img alt="image_description" data-src="{{ site.baseurl }}/path/to/the/image.jpg" src="{{ site.baseurl }}/path/to/the/image.jpg" />
</a>"
This is extremely verbose so adding a few images to a post will decrease the readability of the markdown. Furthermore, the url needs to be repeated three times, the description twice. This irked me … a lot! I would like to use the basic syntax in my markdown files, but convert this to the html when building the page. This can be done using a Jekyll Hook. Hooks are run before the file is parsed and they give you a spot to process the markdown files before Jekyll parses them, here we’ll include a hook that converts everything for us automatically.
To do this a folder _plugins needs to be created in your project, and a file lightgallery_links.rb with the
code below needs to be added.
Jekyll::Hooks.register :posts, :pre_render do |post, payload|
post.content.gsub!(/^!\[(.*)\]\(([^\)]+)\)((?:{:[^}]+})*)/, "<a href=\"{{ site.baseurl }}\\2\" class=\"lightgallery-link\" data-sub-html=\"\\1\">\n{: height="" width=""}\\3{:data-src=\"{{ site.baseurl }}\\2\"}\n</a>")
end
The cryptic line is a regular expression that will detect image tags in standard markdown syntax, wrap them with the html link tags and add a section to set the data-src of the image correctly. This will only be applied to images that are defined at the start of the line, so it can still be disabled by simply putting a space in front of the image declaration.
Thumbnail generator
Without pictures, the overview pages look rather dull, so adding a thumbnail there to grab the attention is a must. As I will include a header image for each post, using the same image as the thumbnail is an option. However, the header image is far larger than needed, so I wanted to automatically scale this down. Using a generator you can can create new files using Ruby code, this can be used to create a low-resolution thumbnail for each header automatically.
First, we need to add the desired size of the thumbnails in the website’s _config.yml, as shown below. These
are parameters that will be passed to ImageMagik.
plugins:
  # Add Mini magick to the plugins
  - mini_magick

thumbnail:
    resize_dimensions: '430x288^'
    crop_dimensions: '430x288+0+0'
We’ll also need to add mini_magic to the Gemfile, it should look like this:
source 'https://rubygems.org'
gem 'jekyll', '<4'
gem 'jekyll-archives'
gem 'jekyll-sitemap'
gem 'jekyll-paginate-v2'
gem 'mini_magick'
We’ll have to add a path where to store the resized image in the header of each post. See the header of this post in the example below, the cover needs to be defined, this is the input for the thumbnail generator and the thumbnail path is the place where the resized image will be written to.
layout: post
title:  "Jekyll Plugins"
byline: "lift your blog to a higher level"
date:   2020-03-13 12:00:00
author: Sebastian Proost
categories: programming
tags: ruby jekyll blog
cover:  "/assets/posts/2020-03-13-Jekyll-Blog/map_extension.png"
thumbnail: "/assets/images/thumbnails/jekyll_map.jpg"
Finally, place a file thumbnail_generator.rb in the _plugins folder with the code below.
require "mini_magick"
include MiniMagick

module Jekyll
  class ThumbnailGenerator < Generator
    safe true

    def generate(site)
       posts = site.posts.docs.select { |post| post.data['thumbnail'] }
       resize_dimensions = Jekyll.configuration({})['thumbnail']['resize_dimensions']
       crop_dimensions = Jekyll.configuration({})['thumbnail']['crop_dimensions']
       posts.each do |post|
         input_path = ".#{post['cover']}"
         output_path = ".#{post['thumbnail']}"
         if !File.exists?(output_path) || File.mtime(output_path) <= File.mtime(input_path)
            puts("Generating thumbnail", input_path, output_path)
            image = MiniMagick::Image.open(input_path)
            image.strip
            image.compress "JPEG2000"
            image.resize resize_dimensions
            image.gravity "center"
            image.crop crop_dimensions
            image.write output_path
         end
      end
    end
  end
end
This will select all posts with a thumbnail path defined and load the dimensions from the configuration. Then it will iterate over the selected posts, resize the header to the desired size and write the output to the thumbnail path. to avoid unnecessarily resizing images over and over it will check if the thumbnail exists and the input file isn’t newer than the thumbnail.
Finally, the image needs to be included in the posts overview, but this is as trivial as getting the post’s title !
Using the same approach, I also built the gallery.
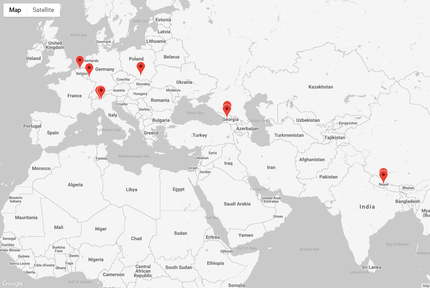
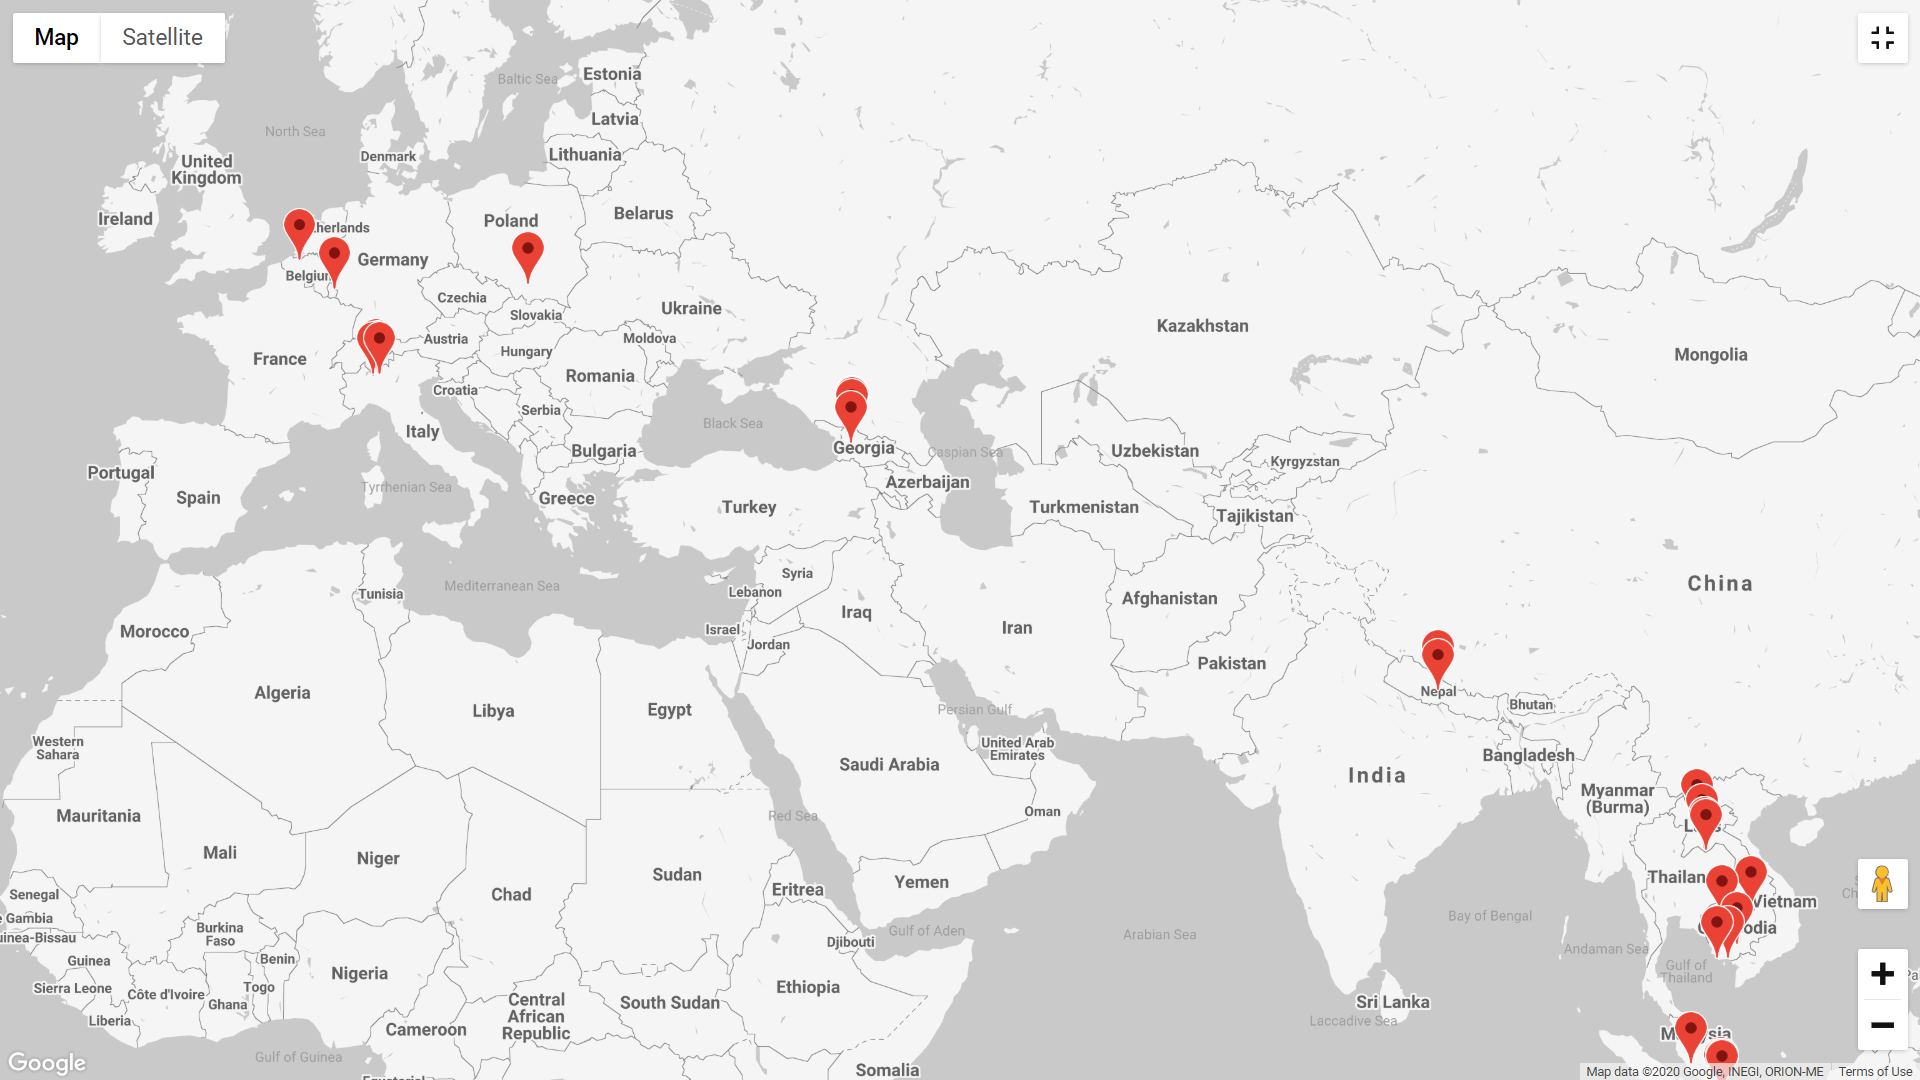
Posts on a world map
For Beyond the Known we really wanted to include a world map with pins for each location a post was written about. To do this, the GPS coordinates for each post need to be defined in the yaml header. These can easily be obtained from google maps, and need to be included in the header of the post as shown here:
coords:
  lat: 51.151706
  lng: 3.8708973
A Google Maps API key needs to be obtained from Google Developer Console and defined in the _config.yml file.
Make sure to set the appropriate restrictions on your key!
# Google maps API key
google_maps_api_key: "your key here"
Next, we need a json file that contains for each post: the coordinates, the title, the link and the
description. We’ll grab that file later when the actual map is generated. To do this create a file map_data.json in the
main folder of the website with this code:
---
layout: null
---

[
{% for post in site.posts %}
{
  "title": "{{ post.title }}",
  "url": "{{ post.url | prepend: site.base }}",
  "date": "{{ post.date | date: " % B % d, % Y " }}",
  "content": "{{ post.content | strip_html | smartify | truncatewords: 50 }}" {% if post.coords %},
  "coords": {
    "lat": {
      {
        post.coords.lat
      }
    },
    "lng": {
      {
        post.coords.lng
      }
    }
  } {% endif %}
}
{% if forloop.last %} {% else %}, {% endif %}
{% endfor %}
]
Now we can include a map on a page using the code below. This will include JQuery to load the data in map_data.json
(which is build from the coordinates in the
posts’ headers), these will be converted to markers on the map (complete with a popup menu) and together with the map
added to the div with id="map".
<div id="map"></div>
<div id="map_spacer"></div>

<script src="https://code.jquery.com/jquery-3.4.1.js"></script>
<script>
	var map;
	function initMap() {
		map = new google.maps.Map(document.getElementById('map'), {
			center: {lat: 50.8798, lng: 4.7005},
			zoom: 2
		});

		function addMarker(props) {
			var marker = new google.maps.Marker({
				position: props.coords,
				map: map
			});

			var infoWindow = new google.maps.InfoWindow({
				content: '<h2><a href="' + props.url + '">' + props.title + '</a></h2><p class="map_info_window">' + props.content + '</p>'
			});

			marker.addListener('click', function() {
				infoWindow.open(map, marker);
			});

		}

		$.getJSON( "/map_data.json", function( data ) {
			data.forEach(function(el){
			  if (typeof el.coords !== 'undefined') {
			    console.log(el);
				  addMarker(el);
				}
			})
		});

	}
</script>
<script src="https://maps.googleapis.com/maps/api/js?key=&callback=initMap" async defer></script>
To make the map show up, a little CSS is needed. Here is what works for our needs but will likely need to be adjusted to match your site’s design. It is important to define a height and width, otherwise the map won’t show.
#map {
    height: 90vh;
    min-height: 250px;
    margin: 0;
    position: absolute;
    width: 100%;
    left: 0;
}

#map_spacer {
    height: 90vh;
    min-height: 250px;
    margin: 0;
}

p.map_info_window {
	width: 350px;
}
The final result on Beyond the Known. Note that I also included a custom style (have a look at the Google Maps Javascript API documentation for details how to do that). This overview allows you to quickly find a relevant post about a region you’d might like to visit! Very useful feature for a travel blog.
Conclusion
Using these plugins I was able to include all functionality I needed for this blog and Beyond the Known. Generating a static website has certain restrictions and it has been an adjustment to work with an opinionated framework like Jekyll. However, now everything is in place there is one, consistent way to do things. This will make maintaining both blogs a lot easier in the future. Static sites are also cheap to host, GitHub offers free hosting, the only cost to run is the domain name which, at < $10 per year, is negligible. This frees up some time and money that can be put towards generating content!
If you have a blog, feel free to grab the code here to include these features in your website.
Liked this post ? You can buy me a coffee