3D Printing Tips & Tricks
printing PLA and PETG on Creality CR10S
3D Printing can be tricky if you don’t have the right settings for your machine and material. Here are some tips & tricks I’ve picked up since buying a Creality CR10S. With some minor tweaks to the printer and the standard Cura profile some great results can be achieved.
Update 12/01/2021: Added an extra setting for PETG filament, as it oozes out more, models with a lot of retractions were giving poor results. Setting the Retraction Extra Prime Amount to 0.2 (for a 0.4 mm nozzle) improves those models.
The printer
The Creality CR10S I use for printing is stock with two exceptions: the glass heating bed and the firmware. The glass pane has been replaced with an IKEA LOTS mirror. On the original glass I wasn’t able to print without painter’s tape to make the first layer stick. After degreasing the mirror and applying a little bit of hairspray this is possible.
The original firmware was dropped in favor of the Marlin 1.1.9 firmware, which has an important safety feature, thermal runaway protection. This will stop the printer if a heating element (the bed or nozzle) is on, but no increase in temperature is detected. Without this a faulty temperature sensor would result in the heating element switching on permanently! This can result in damage to the printer and worse, this is a serious fire hazard. Though I never run the printer without someone at home to take action in case something goes wrong, I do run it overnight occasionally. Having this feature makes me sleep a bit better those nights! This firmware also includes a feature called babystepping which allows you to adjust the z-axis in real time. This is a great way to get the right amount of “squish” to make the first layer stick.
The materials and settings
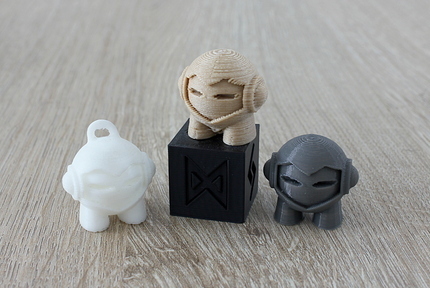
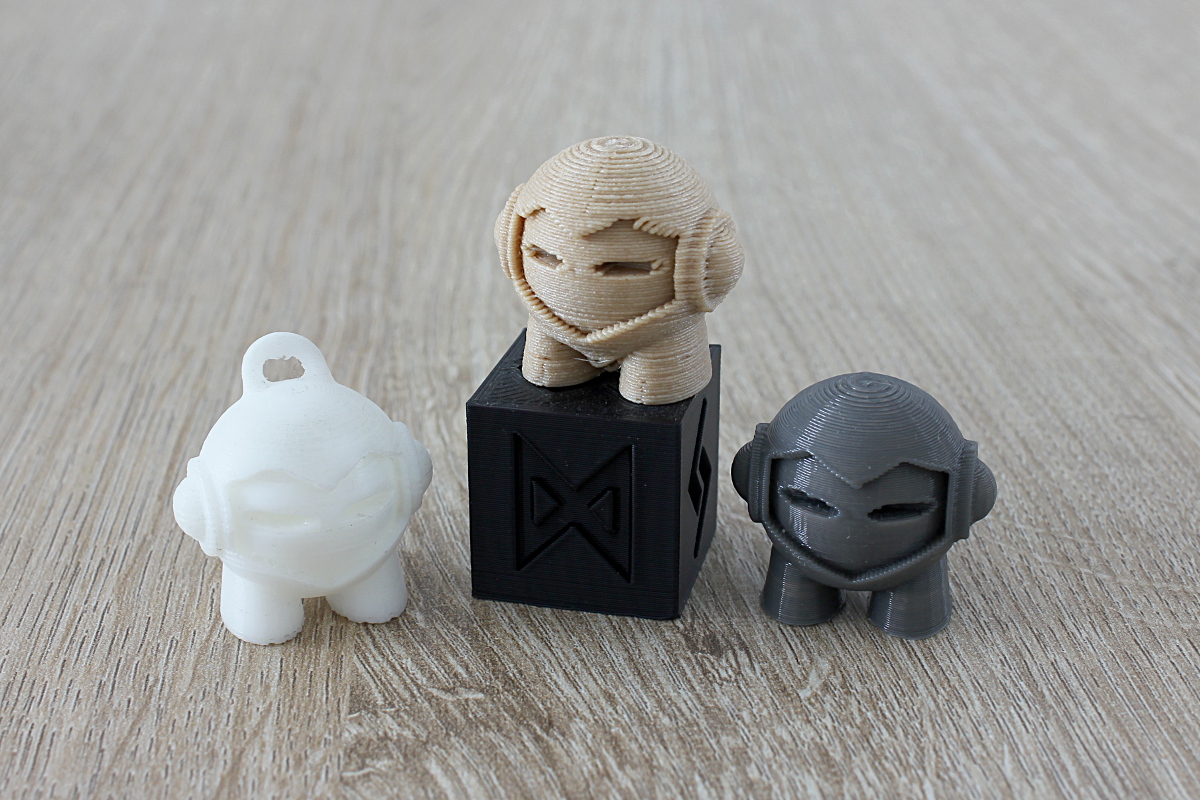
There are a couple filaments I frequently use, plain PLA, woodfill PLA and PETG. The all need different settings to produce optimal results. In the image below you can see a Marvin Keychain and Rune Calibration Cube printed in white and black PLA, a Marvin printed in woodfill PLA (with 0.28 mm layer height) and one in gray PETG.
All these materials require slightly different settings. Below I’ll list the settings work well for me (using a standard 0.4 mm nozzle) using Cura 4.3. These might vary a little for some filament brands , so your mileage might vary! Though, it should be a good starting point if you have a similar setup.
| Setting | PLA | Woodfill PLA | PETG |
|---|---|---|---|
| Quality | |||
| Layer Height | 0.08 - 0.28 mm | 0.28 mm | 0.16 - 0.20 mm |
| Initial Layer Height | 0.20 mm | 0.20 mm | 0.20 mm |
| Shell | |||
| Wall count | 3 | 3 | 3 |
| Top Layers | 3 or 4 | 3 or 4 | 4 or 5 |
| Bottom Layers | 3 or 4 | 3 or 4 | 3 or 4 |
| Top/Bottom pattern | Lines | Lines | Lines |
| Infill | |||
| Pattern | Doesn’t matter | Doesn’t matter | Lines |
| Material | |||
| Nozzle Temp. | 205 °C | 205 °C | 235 °C |
| Bed Temp. | 50 °C | 50 °C | 80 °C |
| Enable Retraction | Yes | No | Yes |
| Retraction Distance | 5 mm | NA | 5 mm |
| Retraction Speed | 45 mm/s | NA | 45 mm/s |
| Speed | |||
| Print Speed | 50 mm/s | 50 mm/s | 35 mm/s |
| Infill Speed | 50 mm/s | 50 mm/s | 35 mm/s |
| Wall Speed | 25 mm/s | 25 mm/s | 25 mm/s |
| Travel Speed | 150 mm/s | 150 mm/s | 150 mm/s |
| Travel | |||
| Retraction Extra Prime Amount | 0 mm³ | 0 mm³ | 0.2 mm³ |
| Combing mode | Any | Any | Any |
| Z Hop When Retracted | Any | Any | No |
| Cooling | |||
| Enabled | Yes | Yes | No |
| Fan Speed | 100 % | 100 % | 20 % |
| Initial Fan Speed | 0 % | 0 % | 0 % |
| Build plate adhesion | |||
| Build plate adhesion type | Brim | Brim | Skirt |
PLA
The spools of PLA I bought have rather poor bed adhesion, while switching to a mirror did help, it is often still an issue. So when using PLA I do use a brim to ensure the part will stay stuck to the build plate for the duration of the print. While the recommended bed temperature is usually 60 °C I’m getting better results and less warping with a slightly colder bed.
Woodfill PLA
One of my favorite materials, woodfill PLA actually uses the layer lines to its advantage. Here I usually go for a 0.28 mm layer height as this gives nice results when staining the prints later with wood stain. The extra layer height also reduces the print time, perfect for functional boxes. As woodfill PLA is abrasive it is recommended to disable retractions. This does result in more stringiness, but these can be easily removed with a lighter.
PETG
While I was initially reluctant to try something other than PLA, PETG has pleasantly surprised me. It sticks to the build plate easily and has a nice glossy, smooth finish even at the default layer height of 0.2 mm. The downside it that the infill speed of 50 mm/s is too fast, to get a good strong infill I had to drop this to 35 mm/s. It also seems to need a good base to print on, so Cura’s lines infill pattern is recommended along with an additional top layer. The lines pattern alternates between layers, so this creates a denser mesh for the next layer to grab onto. Alternatively, a higher density can be selected for another pattern at the expense of print speed.
PETG doesn’t require much cooling while printing, the fan can be switched off entirely, however this does affect the size of the gaps that can be bridged. However, I would pick PETG over PLA for the vast majority of my prints, except for those where speed really matters or bridging large gaps cannot be avoided.
Finishing prints
On most models I don’t spend much time after they are printed. I’ll remove the brim with a hobby knife and run the model a couple times through the flame of a lighter to remove stringing. When removing strings this way be careful with light-colored materials, the flame can discolor the plastic, leaving smudges. This trick works very well with both PLA and PETG.
The woodfill PLA is an exception. After removing the brim and strings, I usually sand the model with 280 grit sandpaper, to hide the layer lines, but there is no need to sand them out completely completely. Then I’ll apply some wood stain, let the model dry, sand with 280 or 400 grit sandpaper, and repeat this process a few times. The color of the stain, the number of times this is repeated and the level of sanding will determine the look. Next, I will brush on a couple coats of nitrocellulose lacquer which is diluted quite a bit with cellulose thinner (70/30 lacquer to thinner). Sand with 400 grit sandpaper. Apply a few more coats of diluted lacquer, repeat with a finer grit sandpaper (as many times as you need). This way you can create beautifully finished prints that hardly look like 3D printed objects.
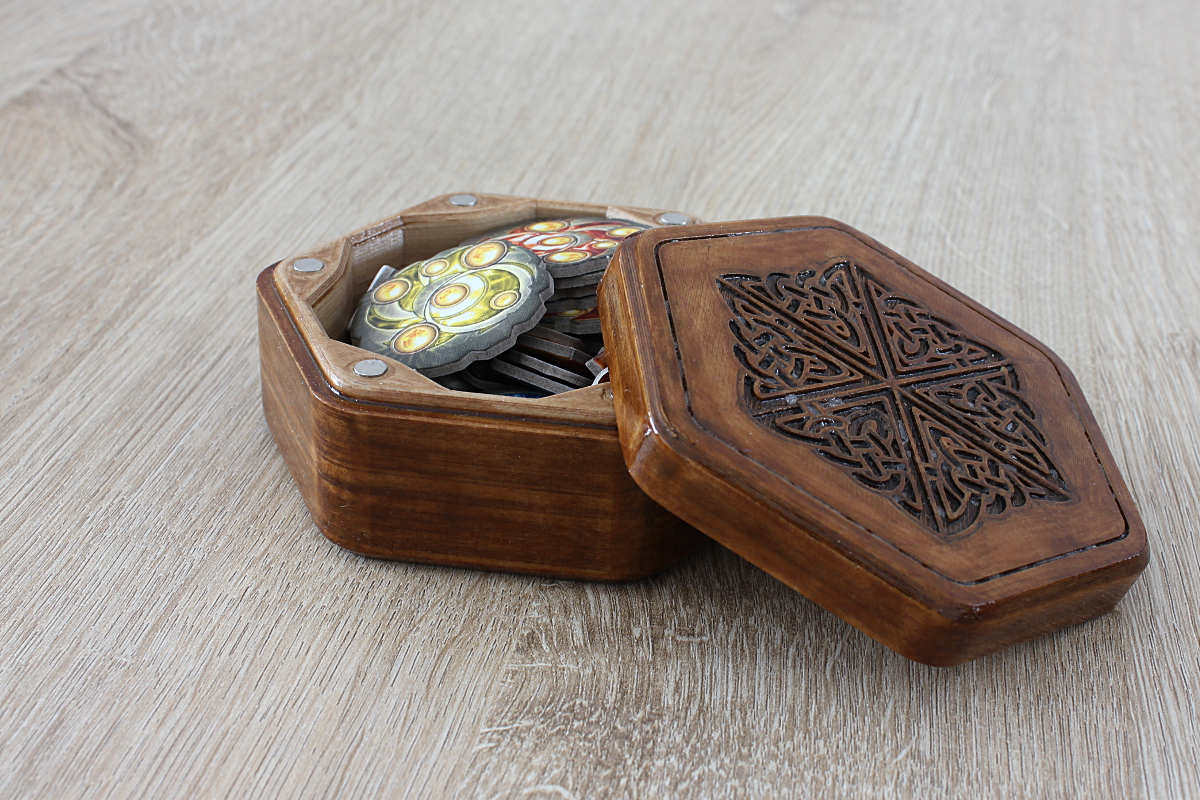

These boxes for KeyForge tokens and dice were printed with woodfill PLA and finished with wood stain and nitrocellulose lacquer.
Printing faster
3D printing is a slow process, for larger prints I use a wider nozzle, 0.6 mm. This has two main advantages, you can get away with fewer perimeters, areas are filled faster and the maximum layer height increases. However, to print faster, plastic needs to be extruded faster, so you’ll have to bump up the temperature. Also note that print quality decreases with these settings. Though I personally find this a good compromise between speed and quality.
| Setting | PLA 0.6 mm nozzle |
|---|---|
| Quality | |
| Layer Height | 0.20 - 0.36 mm |
| Initial Layer Height | 0.28 mm |
| Shell | |
| Wall count | 2 |
| Top Layers | 3 or 4 |
| Bottom Layers | 3 or 4 |
| Top/Bottom pattern | Lines |
| Material | |
| Nozzle Temp. | 230 °C |
| Bed Temp. | 50 °C |
| Enable Retraction | Yes |
| Retraction Distance | 5 mm |
| Retraction Speed | 45 mm/s |
| Speed | |
| Print Speed | 60 mm/s |
| Infill Speed | 60 mm/s |
| Wall Speed | 30 mm/s |
| Travel Speed | 150 mm/s |
| Cooling | |
| Enabled | Yes |
| Fan Speed | 100 % |
| Initial Fan Speed | 0 % |
| Build plate adhesion | |
| Build plate adhesion type | Brim |
More prints
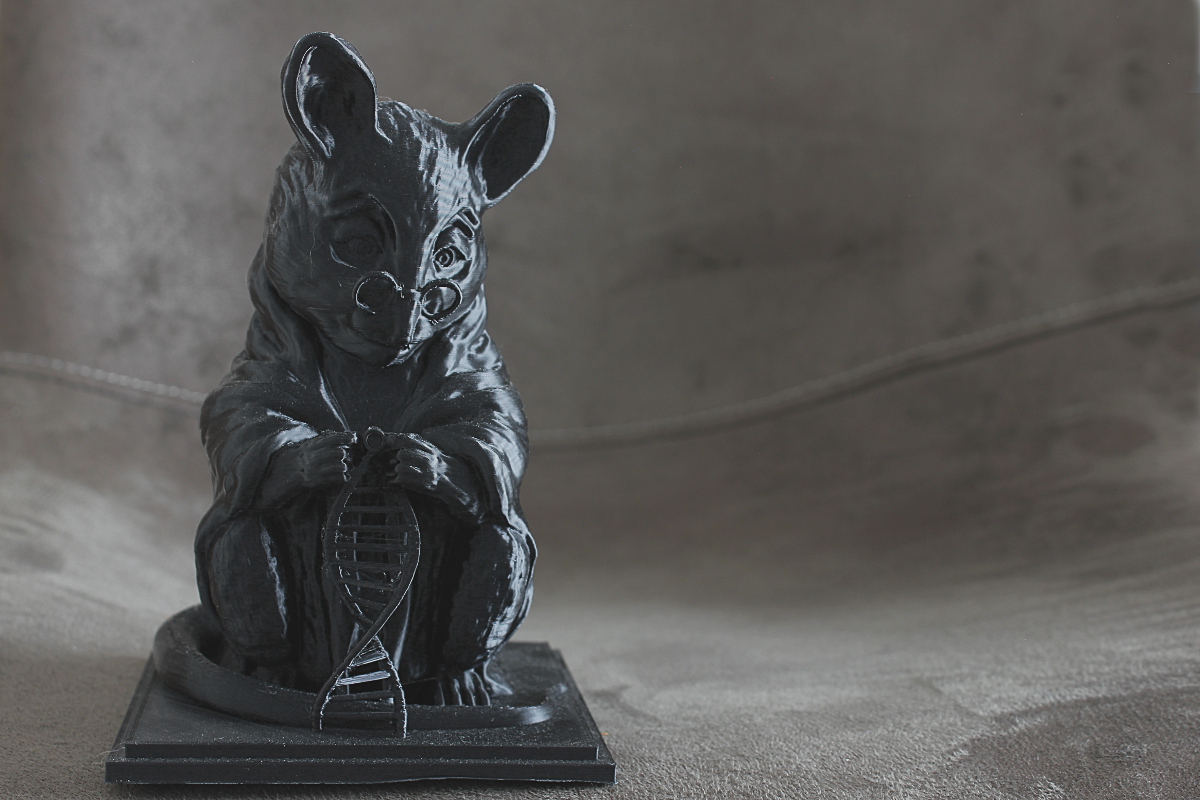
This is a 3D printed copy of Monument to the laboratory mouse, a statue to commemorate mice that died for Genetics Research. Black PLA is used here, this model is cleverly designed by Jukka Seppänen and can be printed without support or infill (except for the base plate).
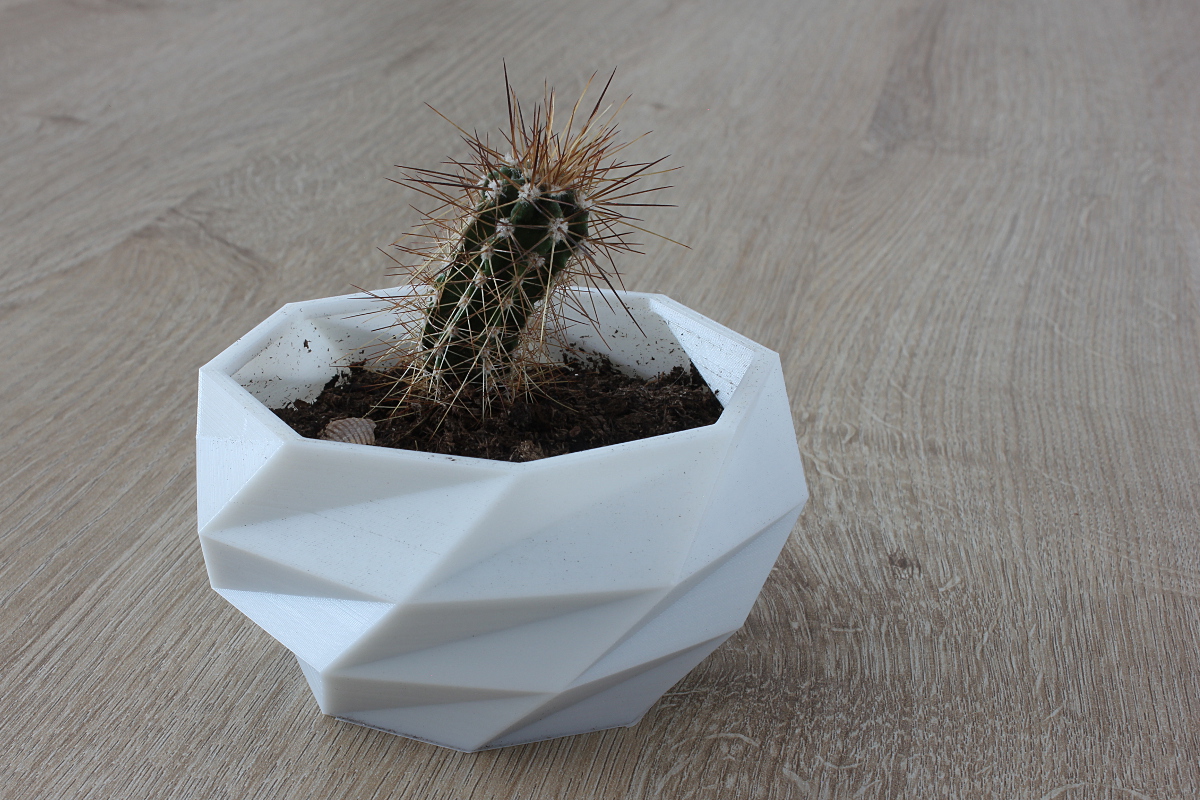
A minimal planter for my cactus, I have a whole set of these in different sizes for all my succulents.
Conclusion
3D Printing is awesome! People, like myself, with computer skills but little knowledge of real world tools, now have the ability to create physical objects. It enables makers to do things that would be very difficult otherwise and share their work. It is here to stay and it will be interesting to see how it is used in the future!
Liked this post ? You can buy me a coffee