Adding an Aqara Cube to Home Assistant
to control my kitchen lights
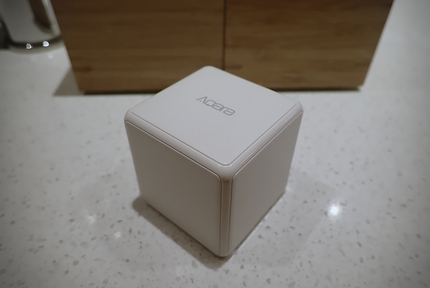
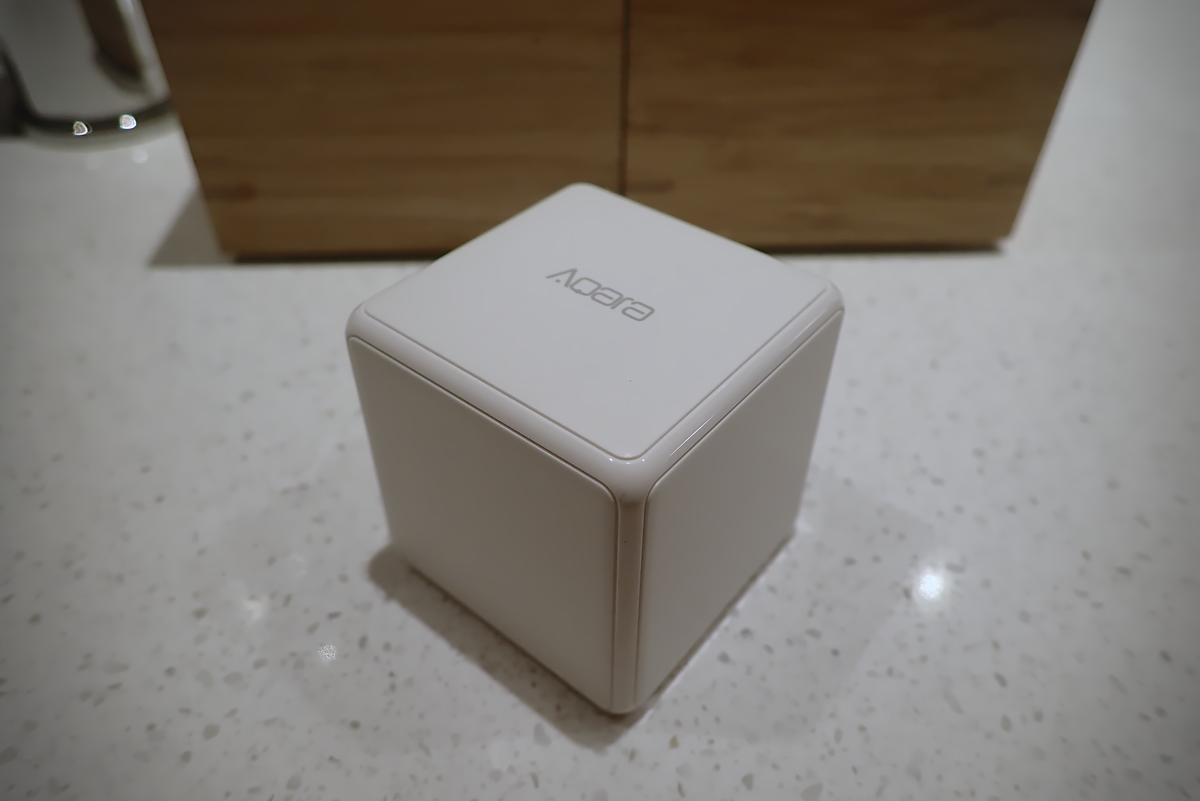
Aqara cubes are a fantastic way to switch on and off different devices in a smart home. However, getting them to run with Home Assistant is not trivial … Here you can read all about how I’ve hooked up one of those cute cubes to Home Assistant to control my kitchen light.
Each house/apartment probably has a few things that start to bother you after living there for a while. In our apartment this is the location of the kitchen light switch. You enter the kitchen … you can’t reach it … you leave the kitchen and realize the light is still on … you can go through the kitchen to the switch, make your way back in the dark, … After a few dozen times this becomes annoying. As proof-of-concept I already added a Sonoff Mini (with tasmota firmware) behind that switch, so I can toggle the light using my phone. With that working, it is now time to add a physical switch that can be placed in a more convenient location. So I decided to expand Home Assistant with a device that allows me to control the kitchen light and other smart lights throughout the apartment. Aqara cubes are small cubes which you can tap, turn, shake, rotate, … to control different devices, perfect for what I had in mind. Though they would need an extra HUB, and I don’t want an additional smart HUB. I want my Raspberry Pi to function as the main HUB for all devices … this turned out to be easier said than done!
Aqara cubes (and other Aqara sensors, switches, …) communicate through the Zigbee protocol with a HUB, this is a very
efficient protocol for battery powered devices (compared to WiFi) though you need either a HUB or hack your way around
one … I decided to do the latter and expand my Raspberry Pi which runs Home Assistant with an Zigbee antenna.
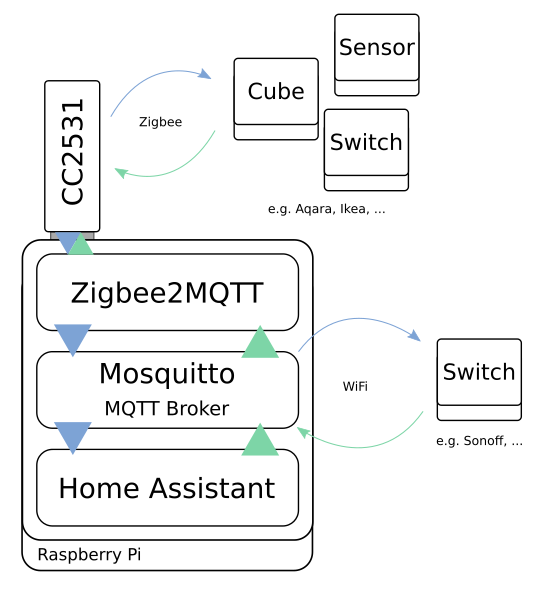
Home Assistant, unfortunately, can’t communicate directly with Zigbee devices. Therefore, the stock firmware on the Zigbee dongle had to be replaced
with the Z-Stack firmware. In combination with Zigbee2MQTT this will allow Zigbee devices to pair with the
Raspberry Pi with Zigbee antenna, the communication will be captured by Zigbee2MQTT, translated and forwarded to an
MQTT broker … which Home Assistant can listen to.
This is a little abstract and hard to grok, so I sketched up an overview how all these fit together.
Update 27/03/2021: I recently added a few Aqara Sensors (Temperature, humidity and pressure) which connect to Home Assistant using Zigbee2MQTT and the stick prepared here, check out this post for more details on those.
Update 03/12/2020: This post was written for Home Assistant 0.92.3, though as I recently switched to version 0.118.4
I can confirm this is still up-to-date, except the light.toggle in one of the automations, which no longer switches on
all lights, individual devices need to be specified. This section has been updated, though it will be different for
every setup. Also note that when configuring MQTT devices there are now user-friendly options through the interface to do so.
Parts List
So for this I bought a couple of things on Amazon :
- A (third party) Arduino Uno, with USB cable (USB-A, the old, bulky connector)
- A Zigbee dongle based on the CC2531 chip
- An Aqara Cube
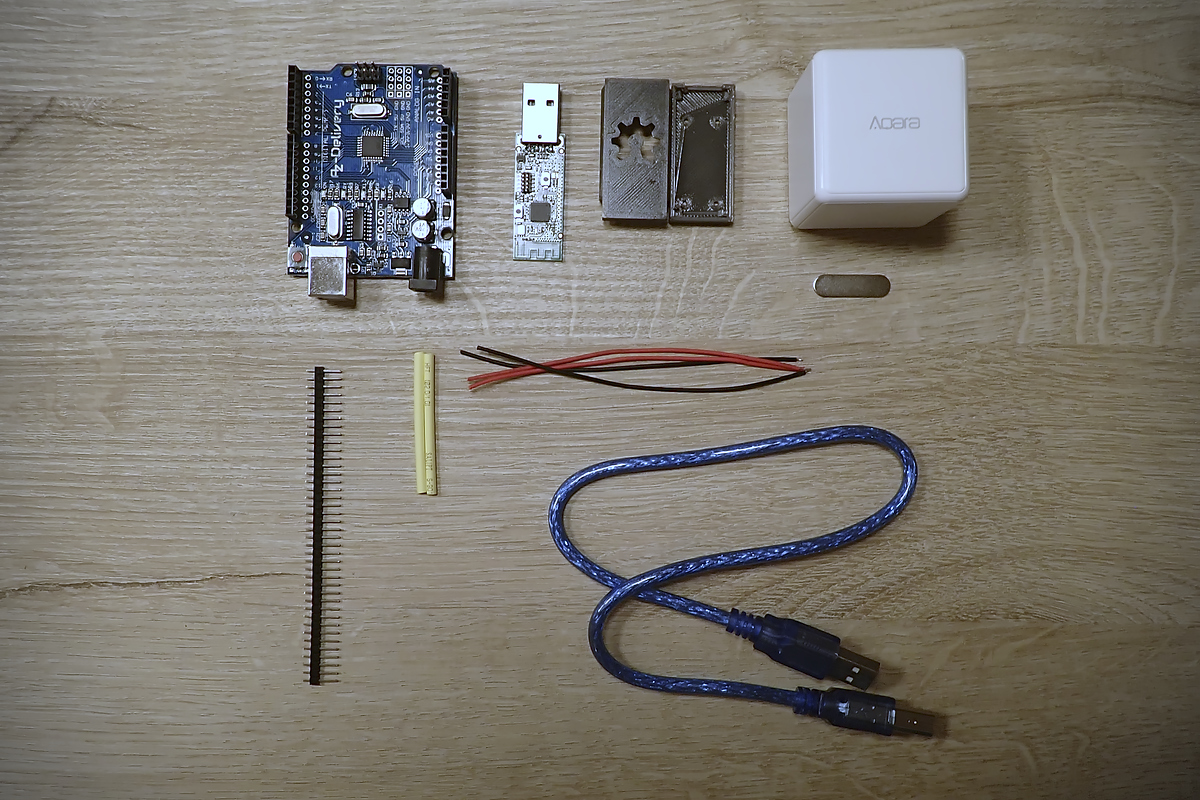
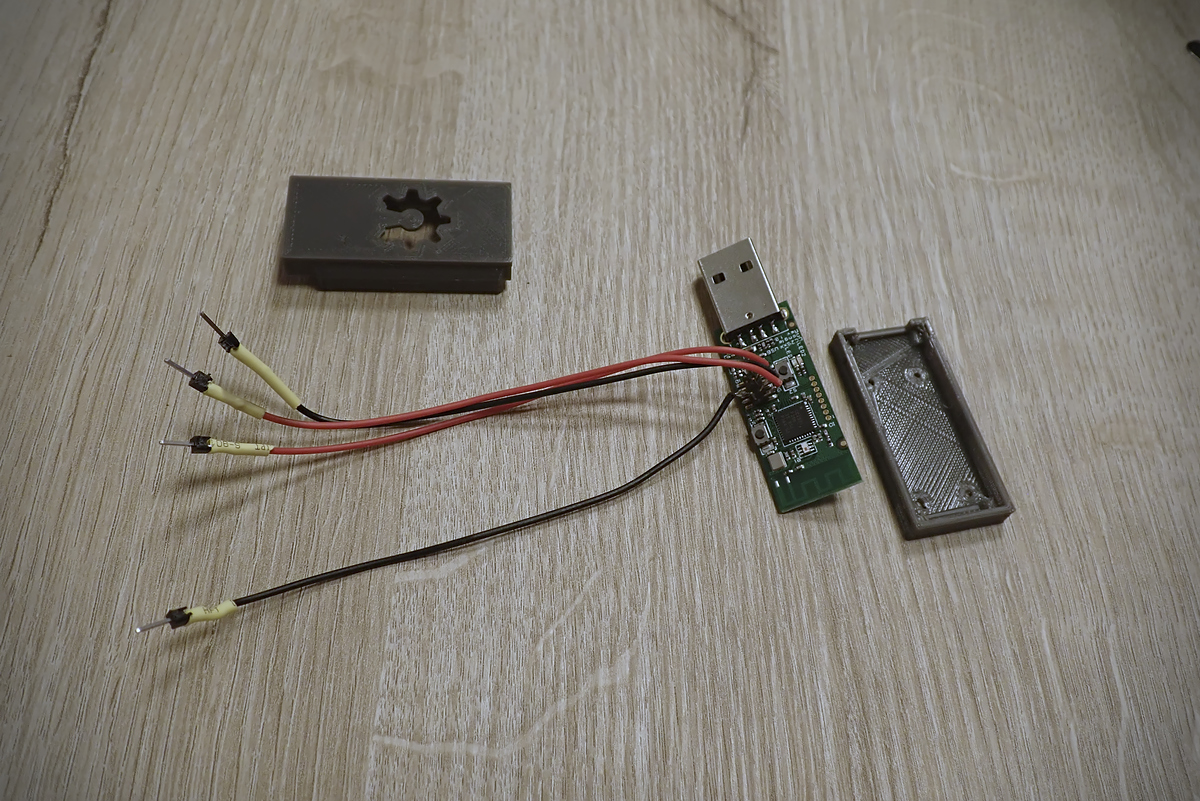
Furthermore, you’ll need some cables to connect the Arduino with Zigbee stick. Depending on how you wish to do this you might need a soldering iron with solder, heat-shrink tubing, some pin headers and connectors you can put on the cables.
Since the Zigbee dongle is a bare PCB, I 3D printed a case desgined by hansaya for this type of dongle which can be found on Thingiverse. An overview of all parts I used is shown below.
On the software side there are quite a few packages you’ll need :
- GNU binutils (On windows the easiest way to get this is using Cygwin)
- Arduino IDE
- The Arduino CCLoader firmware and software
- The Z-Stack firmware for CC2531
Last but not least you’ll need to have Home Assistant and the Mosquitto MQTT Broker running on a device and a couple of smart switches and/or lights to turn on and off.
Note: The majority of the steps are to get the zigbee2mqtt firmware on a common Zigbee Antenna with the CC2531 chip. There are antenna’s available with this firmware pre-loaded, which cost only a few bucks more. So, if you just want to get everything running, consider picking up a stick with the pre-loaded firmware and skip ahead to step 4.
Step 0: Test Everything
Before messing with firmware, test the device with the native configuration. Once you start flashing alternative firmware, especially if you would solder wires directly to pins to do so, voids your warranty. Make sure the Arduino and Zigbee stick are recognised when you plug them into a USB port of your computer.
Step 1: Prepare the Arduino
First install the Arduino IDE, this will be used to upload the CCLoader firmware to the Arduino. Once the Arduino IDE
is installed, plug in the Arduino UNO and wait for the drivers to install. Next, get the CCLoader code from GitHub,
extract it and open Arduino\CCLoader\CCLoader.ino in the Arduino IDE, in Tools select the right type of Arduino and
the port it is on and click the upload button to compile the CCLoader code and upload the firmware to the Arduino.
Step 2: Connect the Arduino to the Zigbee
The Arduino will be used to flash the new firmware to the Zigbee Antenna. To do this, four cables need to be connected to the debug pins on the Zigbee Antenna. There is plenty of information in the Zigbee2MQTT documentation how this can be done. Since I won’t need to reprogram the stick later on, I decided to bend the debug pins on the dongle to get easy access to them, solder a cable to each of the required pins, and solder a standard header pin, that fits the Arduino, on the other end of those cables. Bending the pins and putting solder on them will likely render them useless for other applications, but these dongles are cheap enough that if I ever need one with the stock firmware (unlikely), I won’t break the bank picking up a second one.

Step 3: Prepare the MQTT Firmware and Flash the Zigbee dongle
For this section the Zigbee2MQTT documentation is excellent. The only step I struggled with was to get binutils working. Installing Cygwin and adding the binutils package to the installation was the solution. Alternatively, you can download the processed firmware I used here.
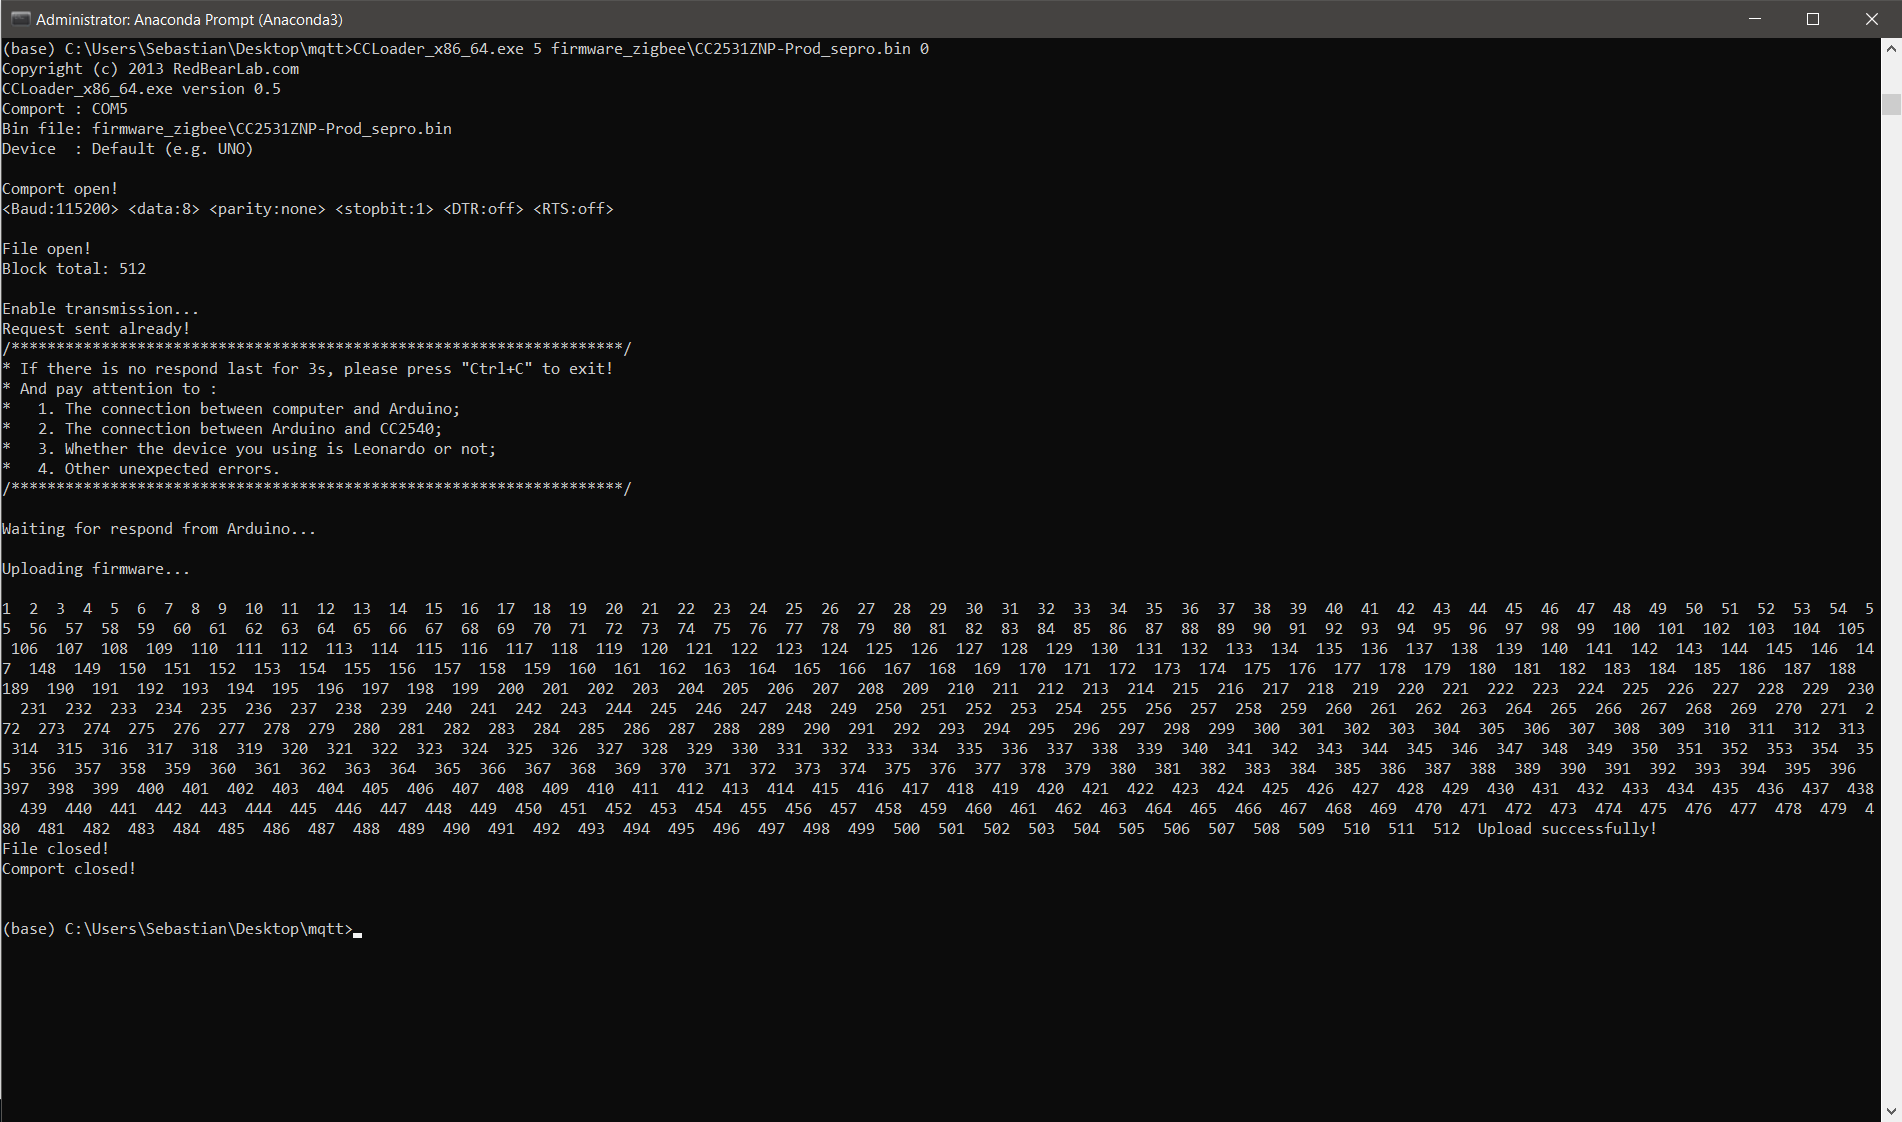
Next, using CCLoader you can flash that firmware to the Zigbee Dongle. This is a single command as shown below.
CCLoader_x86_64.exe [Number of the COM port] CC2531ZNP-Prod_sepro.bin 0
Note that you should not have any other software that can talk to the Arduino running while doing this. This includes the Arduino IDE! I wasted half an hour looking for things I did wrong before realizing this. Once I closed the IDE and ran CCLoader I finally got the screen below, success! Also note that when connecting the Zigbee dongle using four wires, it needs to be powered through its USB port while flashing, so make sure it is plugged into.
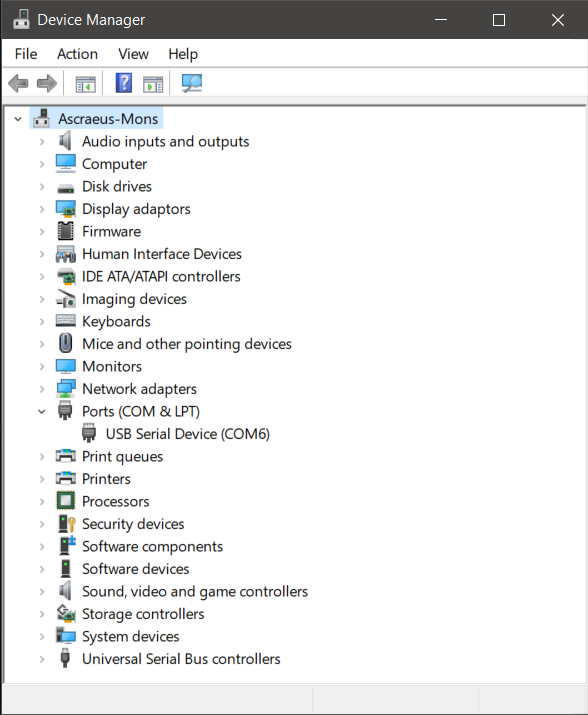
You can double-check flashing the Z-Stack firmware was successful by opening the device manager (windows), now the Zigbee Dongle should appear as a USB Serial Device.
Step 4: Installing Mosquitto and Zigbee2MQTT
First, you can plug the Zigbee dongle with the brand new firmware into the device that runs Home Assistant. Next, log into that device, as we’ll need to install and configure a few things. First, we’ll install the Mosquitto MQTT broker, this is essentially the central switchboard for MQTT devices. All devices will send their status to the MQTT broker, the broker will forward that information to devices that need to respond, and more importantly, this is the piece of software Home Assistant can communicate with. Installing this on a Raspberry Pi is easy, just a few commands are needed.
sudo apt install mosquitto mosquitto-clients
sudo systemctl enable mosquitto
sudo systemctl status mosquitto
If this is successful, the MQTT broker is now running on your Raspberry Pi. Next, up is Zigbee2MQTT, this is a Node.js application, so both Node and npm need to be installed first. Here I’ll defer to the official Zigbee2MQTT installation guide : https://www.zigbee2mqtt.io/getting_started/running_zigbee2mqtt.html. The only change I made was that I installed everything as the user homeassistant as that is the one I’m using to run homeassistant (and not the default user pi). This is easy, just replace the word pi with whatever user name you need.
After completing all the steps and pairing all (just one in my case) devices this is what my configuration file, located at /opt/zigbee2mqtt/data/configuration.yaml
looked like. I enabled support for Home Assistant and disabled new devices joining (make sure to do this after all devices are paired).
As Mosquitto is running on the same device, the MQTT server is located at localhost.
homeassistant: true
permit_join: false
mqtt:
  base_topic: zigbee2mqtt
  server: 'mqtt://localhost'
serial:
  port: /dev/ttyACM0
devices:
  '0x00158d0003495e50':
    friendly_name: 'Aqara Cube'
One part I will copy from the official docs are the commands below. These are to start and stop the service and check the logs. The latter is very handy when debugging as you can see exactly what devices are sending (and this is also the one I tend to forget).
# Stopping Zigbee2MQTT
sudo systemctl stop zigbee2mqtt

# Starting Zigbee2MQTT
sudo systemctl start zigbee2mqtt

# View the log of Zigbee2MQTT
sudo journalctl -u zigbee2mqtt.service -f
When running Zigbee2MQTT you can see all devices that are connected and which message they are passing along.
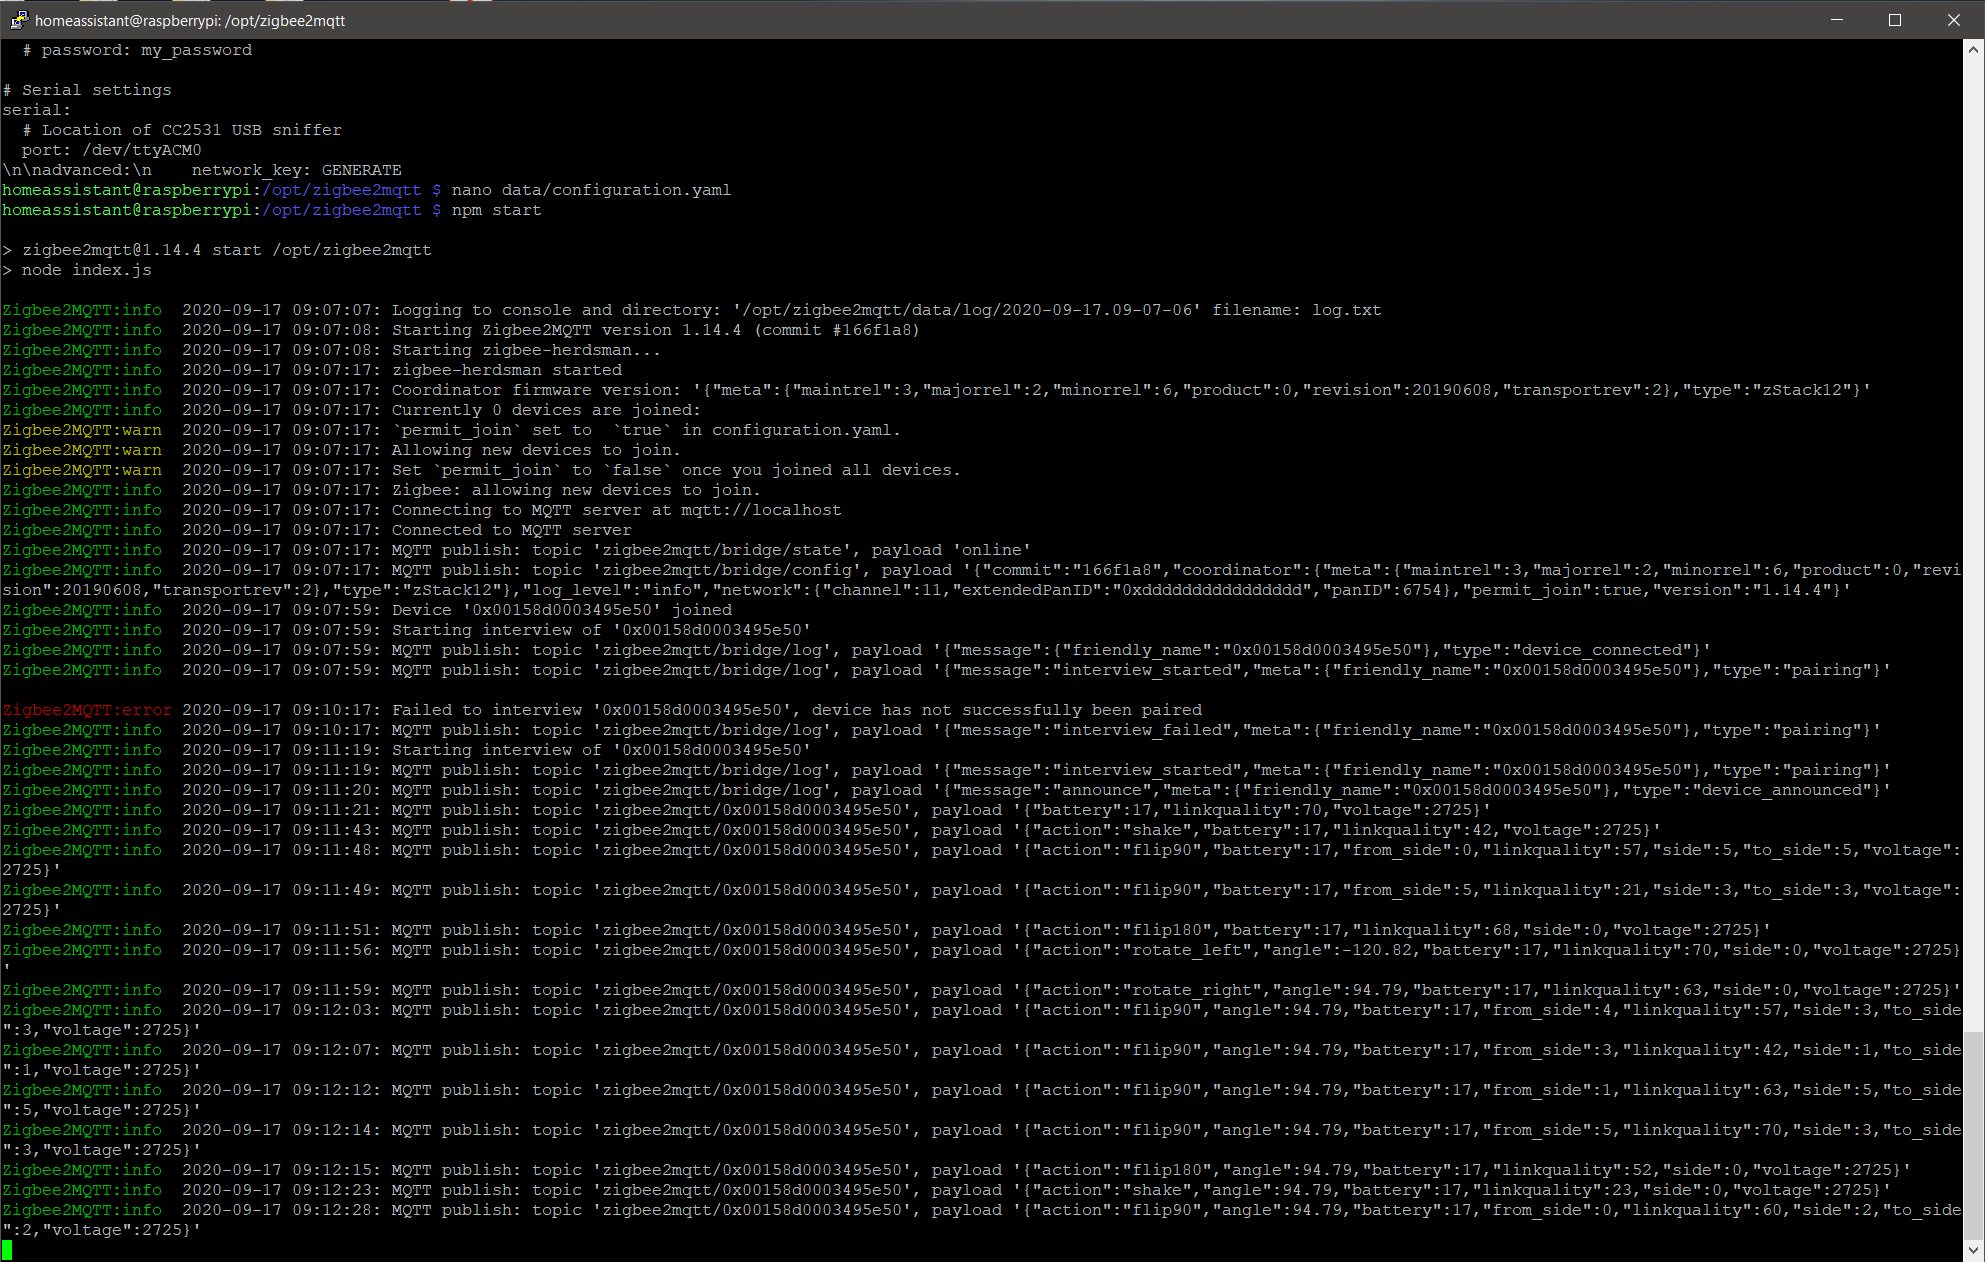
Now everything works, the 3D printed case can be snapped on the Zigbee stick and we can move onto the final phase.

Step 5: Configuring Home Assistant
Time to tie everything together and configure Home Assistant. There are a few bits to add to configuration.yaml
(located in /home/homeassistant/.homeassistant/). We’ll have to make sure Home Assistant is aware there is an MQTT
broker it should be listening too, to do so we’ll add these lines to configuration.yaml.
mqtt:
  discovery: true
  broker: localhost
  birth_message:
    topic: 'hass/status'
    payload: 'online'
  will_message:
    topic: 'hass/status'
    payload: 'offline'
I also added an input list to the configuration file which will be used to cycle through colors with the Aqara cube. To
do this the next section was added to configuration.yaml
input_select:
  color:
      initial: CadetBlue
      options:
        - CadetBlue
        - CornflowerBlue
        - DarkSlateBlue
        - DarkOrchid
        - DeepPink
        - FireBrick
        - OrangeRed
        - DarkOrange
        - Gold
        - GreenYellow
        - Green
        - LightSeaGreen
Now, go to the Home Assistant interface and from the configuration check if the configuration files are still valid and
restart HA. Now we can finally get to the part where we’ll make automations to turn the cube into a physical switch for
my kitchen light. Open up automations.yaml and add the section below.
- id: '1597674578966'
  alias: Cube Kitchen Light
  trigger:
    platform: mqtt
    topic: zigbee2mqtt/Aqara Cube
  condition:
    condition: template
    value_template: '{{ "flip90" == trigger.payload_json.action }}'
  action:
    entity_id: switch.sonoff
    service: switch.toggle
This automation will trigger each time the cube is flipped 90 degrees, it will simply toggle the Sonoff Mini that is sitting in between the power and the light. Save the file, reload the scripts from HA’s configuration panel and flip the cube.
So this actually solved my grievances with the kitchen light. Though the Aqara cube supports controlling more devices with different movements and I have one more smart light I would like to control, a LED strip providing some indirect light near the TV. These lights switch on and off automatically as the TV is switched on and off already, but it could be nice to have an easy way to switch them on without the TV to be on and cycle through some colors that I like.
For switching those lights on, we’ll use the full flip motion where you pick up the cube and put it back on its top. Turning the cube, like a dial, is another supported motion and that we’ll use to control the colors. This took some playing around with different options and lots off googling, but persistence persevered and the following automations worked.
- id: '1597674578967'
  alias: Cube TV Light
  trigger:
    platform: mqtt
    topic: zigbee2mqtt/Aqara Cube
  condition:
    condition: template
    value_template: '{{ "flip180" == trigger.payload_json.action }}'
  action:
  - service: light.toggle
    entity_id: light.tv_led_strip
  - service: light.toggle
    data: {}
    entity_id: light.blinkstick

- id: '1597674578968'
  alias: Cube - rotate CW
  trigger:
  - platform: mqtt
    topic: zigbee2mqtt/Aqara Cube
  condition:
  - condition: template
    value_template: '{{ trigger.payload_json.action in [''rotate_right''] }}'
  - condition: state
    entity_id: light.tv_led_strip
    state: 'on'
  action:
  - entity_id: input_select.color
    service: input_select.select_next
  - data_template:
      color_name: '{{ states(''input_select.color'') }}'
      entity_id: light.tv_led_strip
      transition: 0
    service: light.turn_on
  initial_state: 'on'

- id: '1597674578969'
  alias: Cube - rotate CCW
  trigger:
  - platform: mqtt
    topic: zigbee2mqtt/Aqara Cube
  condition:
  - condition: template
    value_template:  '{{ trigger.payload_json.action in [''rotate_left''] }}'
  - condition: state
    entity_id: light.tv_led_strip
    state: 'on'
  action:
  - entity_id: input_select.color
    service: input_select.select_previous
  - data_template:
      color_name: '{{ states(''input_select.color'') }}'
      entity_id: light.tv_led_strip
      transition: 0
    service: light.turn_on
  initial_state: 'on'
The first automation is simple and just toggles the light group (which is the LED strip and the Moon light from a
previous post), same as with the kitchen lights. The other two automations are a bit more complicated, then the
cube is rotated like a dial, if the LED strip is on, it will cycle through to the previous/next color (which are defined as an
input select in configuration.yaml) and then assign that color to the LED strip.
Conclusion
This looked a daunting project in the beginning, but zigbee2mqtt has excellent documentation that makes the process a lot easier than you would expect at first glance. Also there are many smart devices that communicate through the Zigbee protocol (for instance the new Ikea smart lights), so with this configuration we can further expand our smart devices as we see fit. The cube still can detect tap, shake and slide motions which could be used to control additional devices …
Liked this post ? You can buy me a coffee