The Sound of Silence: Building a Quiet Mechanical Keyboard
Are you still typing away on a cheap rubber dome keyboard? If so, you might be missing out on the satisfying and efficient experience of using a mechanical keyboard. I’ve been using my own homemade mechanical keyboard for years now, and I can’t imagine going back. Furthermore, the 60% size is perfect for keeping my mouse close and reducing unnecessary hand movements, but the sound can be a drawback. That’s why I’ve spent some time exploring quieter options that still deliver the tactile response I love. Keep reading to learn more about how I build a much quieter mechanical keyboard.
What makes mechanical keyboards loud?
What sets mechanical keyboards apart from their rubber dome counterparts is the use of individual switches for each key. These switches consist of a spring and a stem that, when pressed, complete an electrical circuit and register the keystroke. The result is a tactile and audible response that helps you know when a key has been successfully pressed. Additionally, extra is noise created by the stabilizers under larger keys such as the spacebar and the shift key. These stabilizers are necessary to ensure that these keys depress evenly from all sides, but they add extra components that can rattle.
Picking the right components to avoid noise
Silent switches can significantly reduce the sound of key presses without sacrificing the tactile feedback. Another option is to switch to an ortholinear keyboard, which uses a grid layout that eliminates the need for stabilizers as there are no large keys. This design also allows for a more ergonomic typing experience, as your fingers move less to reach different keys. Adding O-rings to the keycaps or foam padding to the case can further dampen the sound of the switches and stabilizers. By combining these methods, you can achieve a nearly silent typing experience that won’t disturb your coworkers or housemates.
The Parts
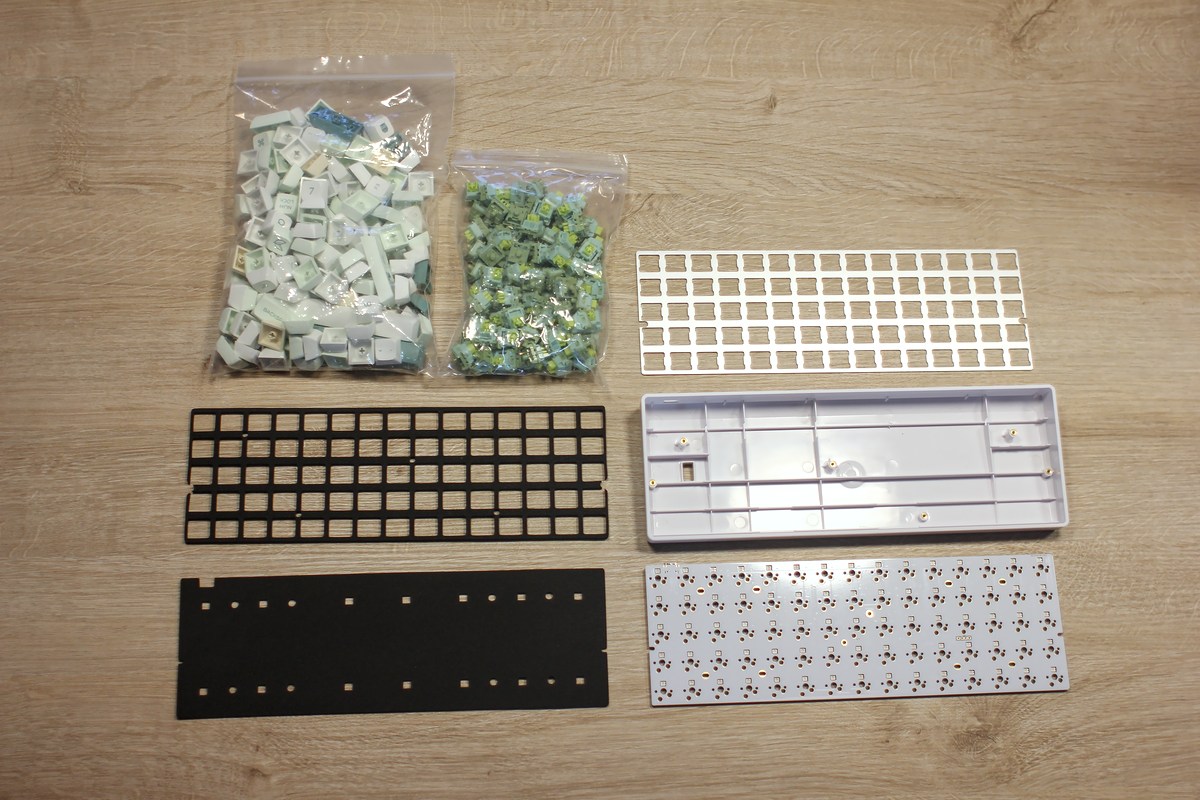
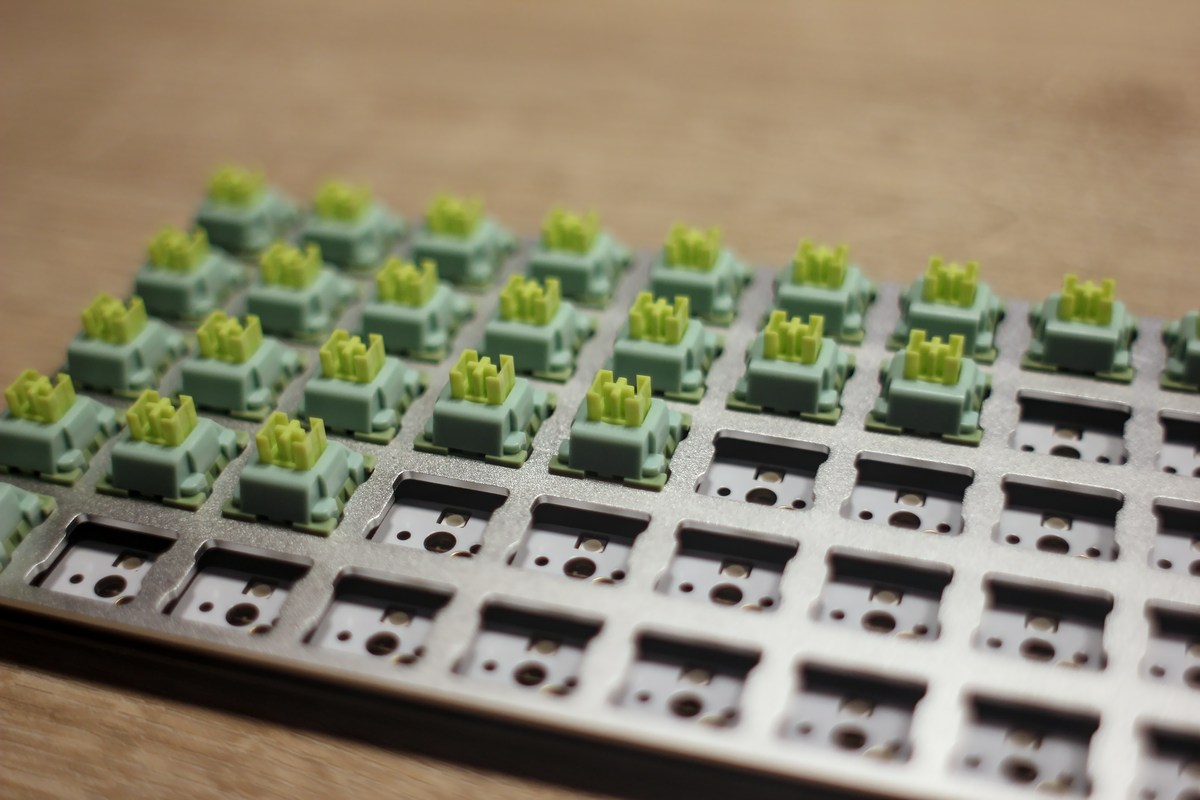
- ID75 Hot Swappable PCB with aluminum backplate
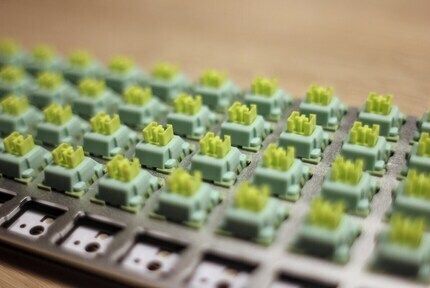
- Outemu Silent Lemon Tactile Switches (You’ll need 75 + a few spare ones just in case)
- Foam padding to add between backplate and pcb
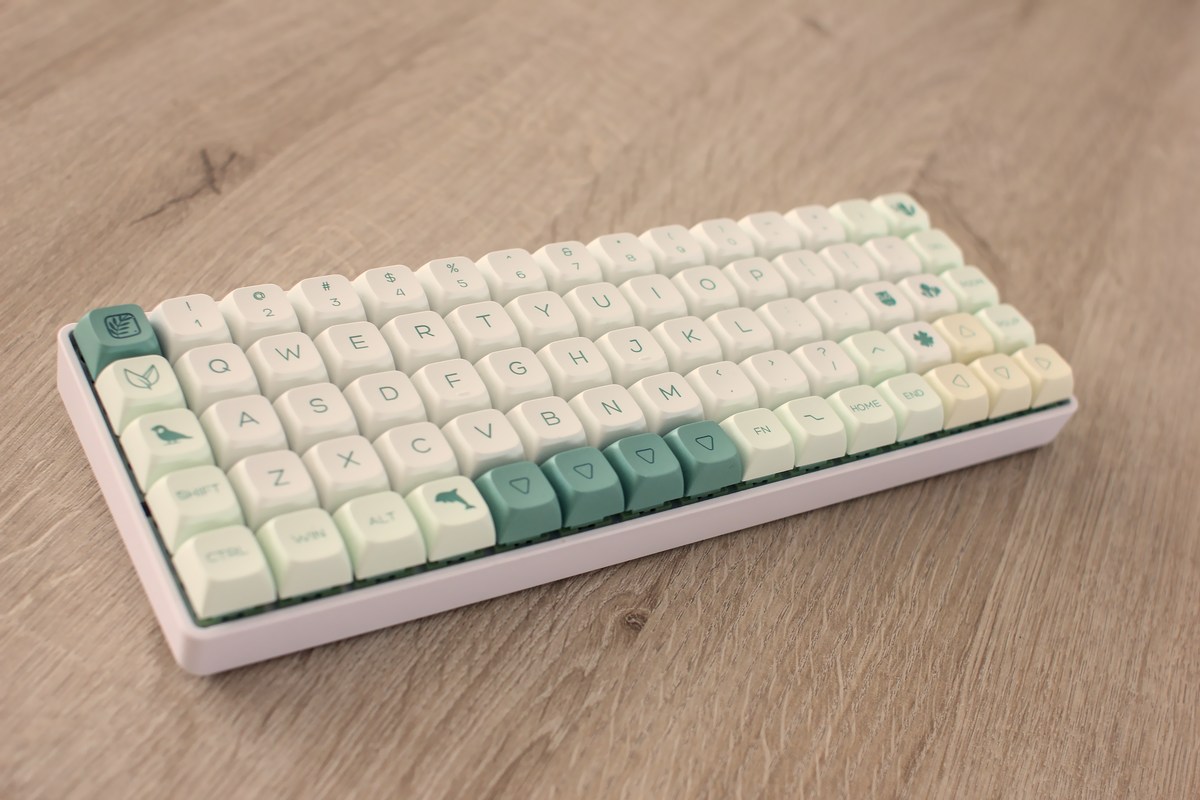
- A set of XDA profile keycaps
- Rubber O-rings to put on the keycaps (75, one for each keycap)
- A case you like (most 60% cases will work with the ID75 but might need some modification)
- A keycap puller and a switch puller (usually included with a keycaps and switches respectively)
All parts (except the rubber O-rings) are shown above, the foam padding intended to be used below the pcb however wasn’t a good fit with the case and ultimately wasn’t used. The standard 60% case did require some standoffs to be removed and a bit of plastic that was pushing the ID75’s reset button to be trimmed.
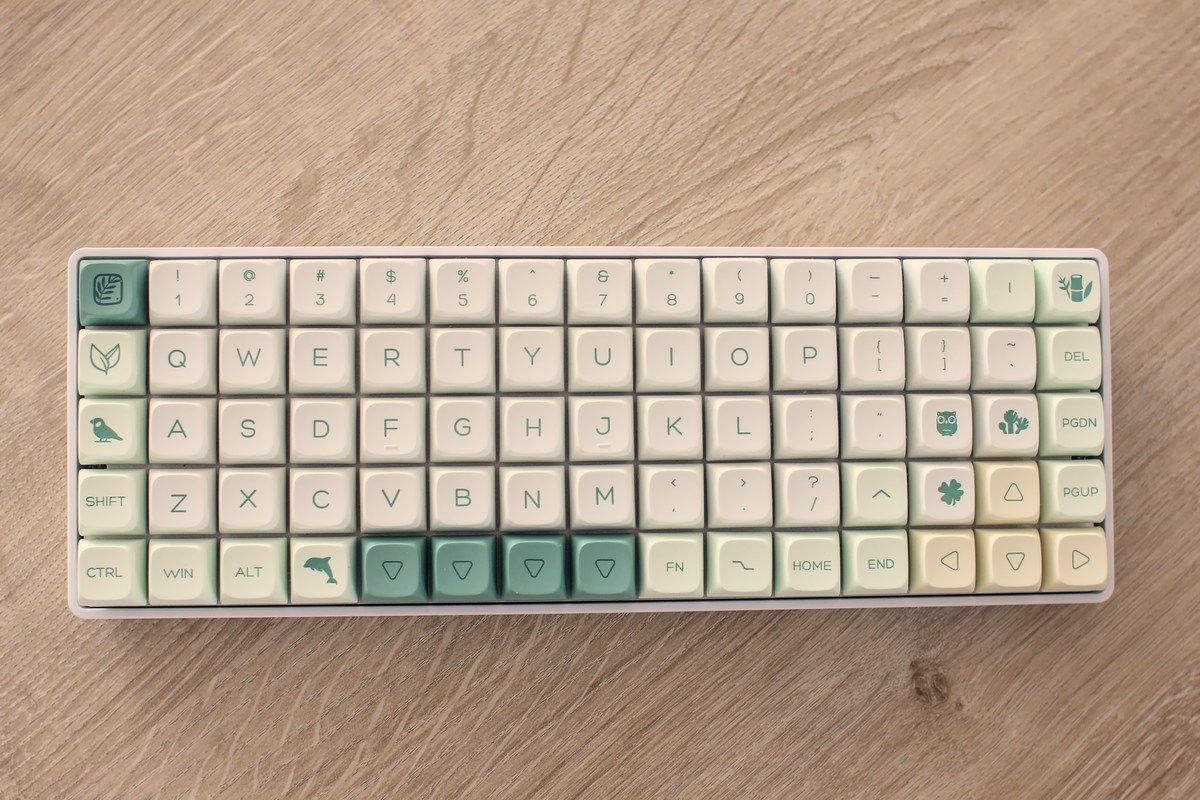
Note that with XDA profile switches there are no differences between keys on different rows of the keyboard. They are all identical in shape. Having all caps in the same shape allows you to get a bit creative where you put which keys, without having to worry about the keys being the right shape.
The build
As this board is hot swappable, switches can simply be pushed in, no soldering required. Simply put a few switches in the correct orientation in the corners of the backplate, put the foam in the right position, snap this into the pcb and start pushing in more switches. Do make sure that the pins of the switches are nice and straight! If they are misaligned you will bend them beyond repair and the switch will be unusable with hot swappable pcb. Or worse, you might damage the socket on the pcb. Be careful and make sure you have a few spare switches.
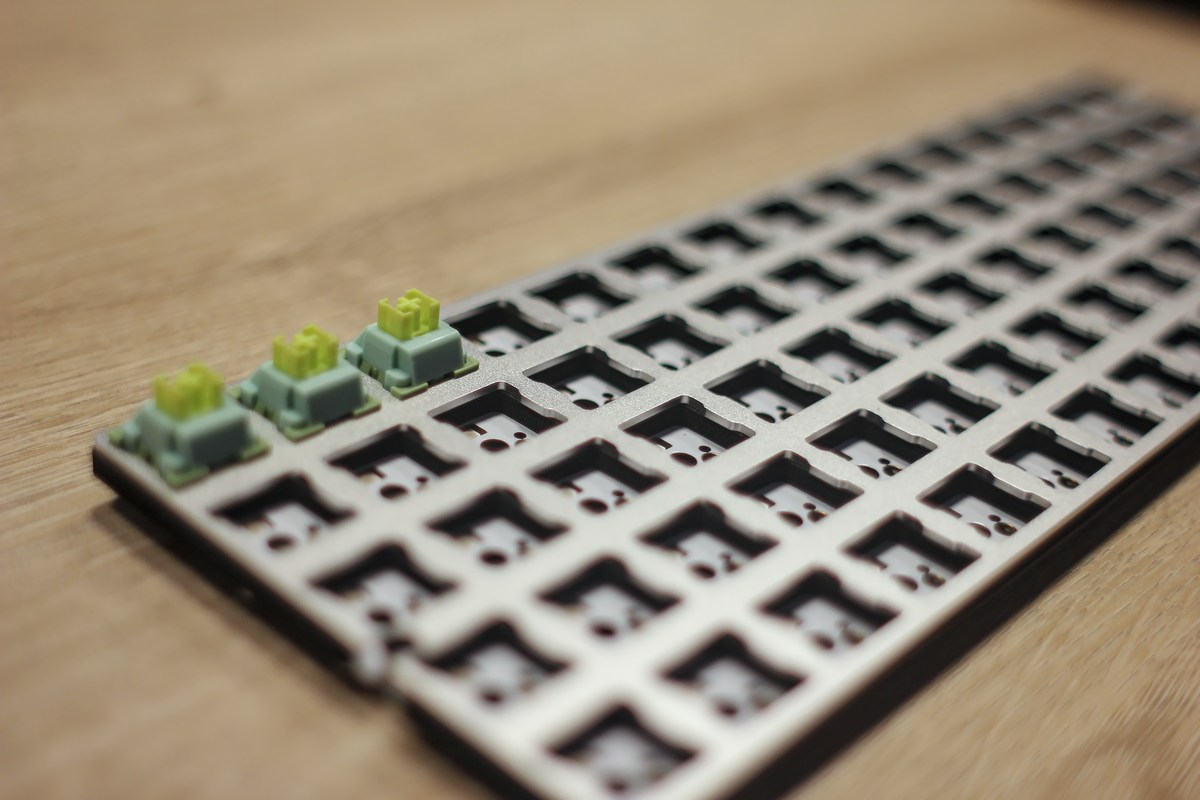
Once all switches are in place, connect the board and test if all switches are functioning. If not, use the switch puller to pull that switch from the keyboard and install another one.
The layout
The combination of XDA profile keycaps and an ortholinear board allow you to put any key anywhere on the board. So any layout can be achieved. While it seems most adhere to a layout similar to qwerty (which I would recommend not to unlearn typing on a normal keyboard and run into issues when using a laptop), even there you have multiple options. Once you have decided which layout to try, you can map the keys using the VIA software. This is a straightforward process that won’t pose much of a challenge if you made it up to this point. Use this json file if you want to have the same layout I’ve landed on.
How loud is it?
In the absence of a proper decibel meter, I had to rely on an app on my cell phone to make an objective measurement of the sound level. Although I do not expect it to be highly accurate, the measurements should be comparable and indicative of the relative loudness of different keyboards. To conduct the test, I simply placed the phone running the app next to the keyboard and typed on keybr.com at a moderate speed for a minute. This ensured that I would be typing at roughly the same speed on each keyboard. The results were astounding - the difference in sound level between the keyboards was remarkable!
| Keyboard | Average | Peak |
|---|---|---|
| My old mechanical keyboard | 30.4 dB | 56.9 dB |
| Cheap rubber dome keyboard | 25.0 dB | 42.7 dB |
| Logitech K400 | 21.5 dB | 39.5 dB |
| Silent mechanical keyboard | 20.3 dB | 32.0 dB |
This keyboard build is impressively quiet, emitting 10 decibels less noise than the average keyboard. Compared to a typical mechanical keyboard that emits over 20 decibels, the difference is quite significant. It’s the ideal solution for those who want to type away without disturbing their coworkers or loved ones, or for those who simply prefer a quieter typing experience.
Conclusion
Building a quiet mechanical keyboard is absolutely doable and the results speak for themselves. The tactile feedback of a mechanical keyboard remain, but the sound is drastically reduced. When done right, it’s even possible to build a keyboard that’s quieter than rubber dome keyboards while providing a much more satisfying typing experience.
Update: Changed the layout a little, using my thumb for backspace wasn’t working and the RGB controls are now better. The updated json file is available for download.
Liked this post ? You can buy me a coffee