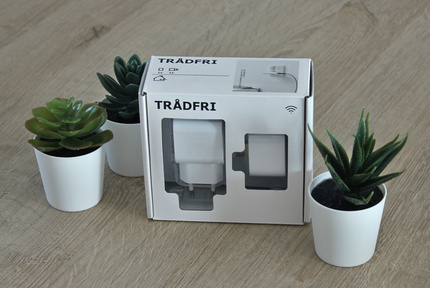

Expanding Zigbee Range with Ikea Tradfri Repeaters
solving random disconnects
My brand new Aqara Sensors were on the very edge of my Zigbee range, resulting in unwanted disconnects every few days. Fortunately Sweden’s largest contemporary designer has a cheap solution … though getting it to run with Home Assistant was a bit of a challenge.
The temperature, humidity and pressure sensors linked to Home Assistant in a previous post were working great … until they stopped, requiring a reset. Which would solve the problem for a day or two before reoccurring… these sensors were too far away from the Raspberry Pi with the Zigbee receiver to have a stable connection, so a repeater was required to extend the range. I noticed Ikea actually has a few Zigbee devices, and the repeater I needed, maybe … as it was not clear if this would work with my Aqara Sensors and Home Assistant, though given these are only 10 bucks I picked one up and started experimenting…
Switching to HomeAssistant OS
Initially I was running Home Assistant Core from a Python virtual environment and using Supervisor to make sure it was initiated on boot and restarted upon failure. This allowed me to run a few other applications on the same Raspberry Pi, but as Home Assistant is getting more and more advanced it was getting harder and harder to install add-ons. The newer add-ons are provided as Docker containers, and these cannot be included in Home Assistant Core, so I flashed the Home Assistant Operating System to the Pi’s SD card and got started with the official documentation. Once HA was running again, albeit without any devices, we can start to set up the Zigbee devices.
First there are a few add-ons to install. In the new version this can all be done using the admin interface (Supervisor –> Add-ons Store) and no tinkering with the command line is required.
- Mosquitto-MQTT : The broker for passing messages from devices to and from Home Assistant
- Zigbee2MQTT : Required to get the Zigbee antenna to work and pair with devices.
- File Editor and/or Samba share : To edit configuration files
The main reason for switching to Home Assistant OS is that the Zigbee2MQTT add-on has a few advantages over manually installing the service in the background (as I did previously). To correctly get devices to pair with the repeater and explore the Zigbee network map those features are a boon. So let’s start adding devices!
Pair Zigbee devices
While it seems Zigbee devices can find the best route to the main controller it might take some time for them to find this path. The sensors initially didn’t connect through te repeater, and lost the connection when moved to the final location. Fortunately, using the Zigbee2MQTT interface it is relatively straightforward to connect devices to a specific receiver. First, goto Zigbee2mqtt (in the sidebar) and click Permit join (All), this will give you a four-minute window to pair devices. I paired an Aqara Cube (open the battery lid, hold the button for 5 seconds until the blue LED blinks, make sure to move/shake the cube while waiting for it to pair, otherwise it will go into sleep mode which will cause the pairing to fail) and the Ikea Tradfri repeater (push with a pin the button in the hole and hold for 5-10 seconds, the light will fade in-and-out while pairing). This can take a minute or two, so be patient, once devices show up in the list you can click on the edit button and give them a proper name.
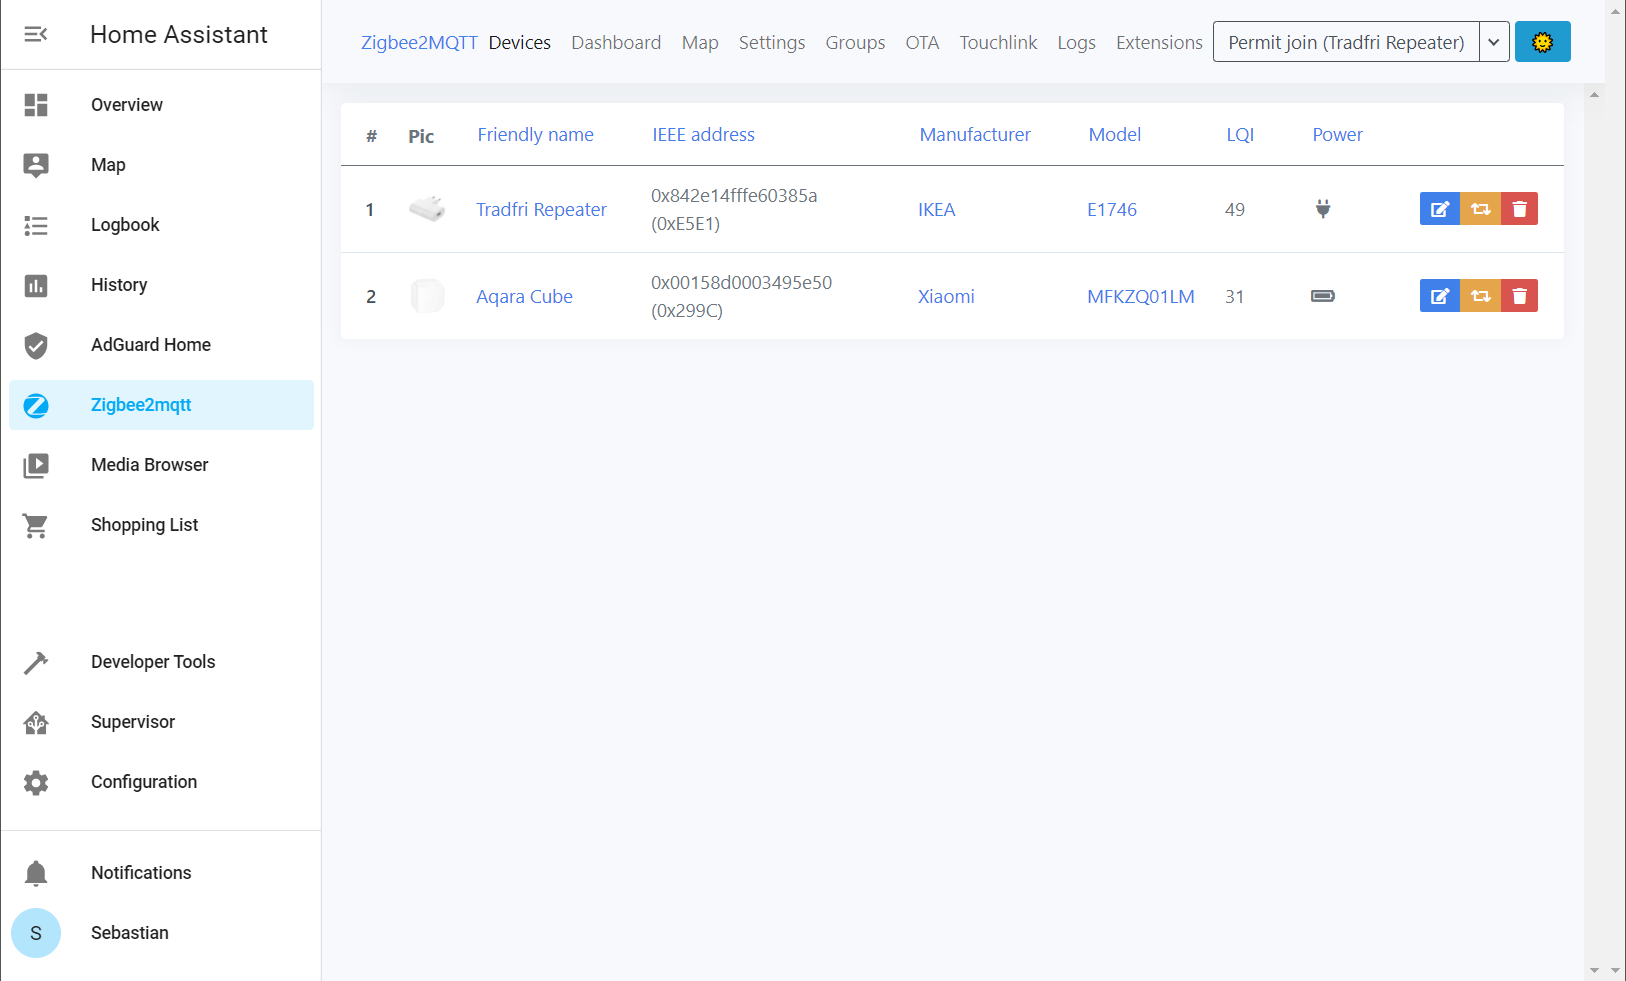
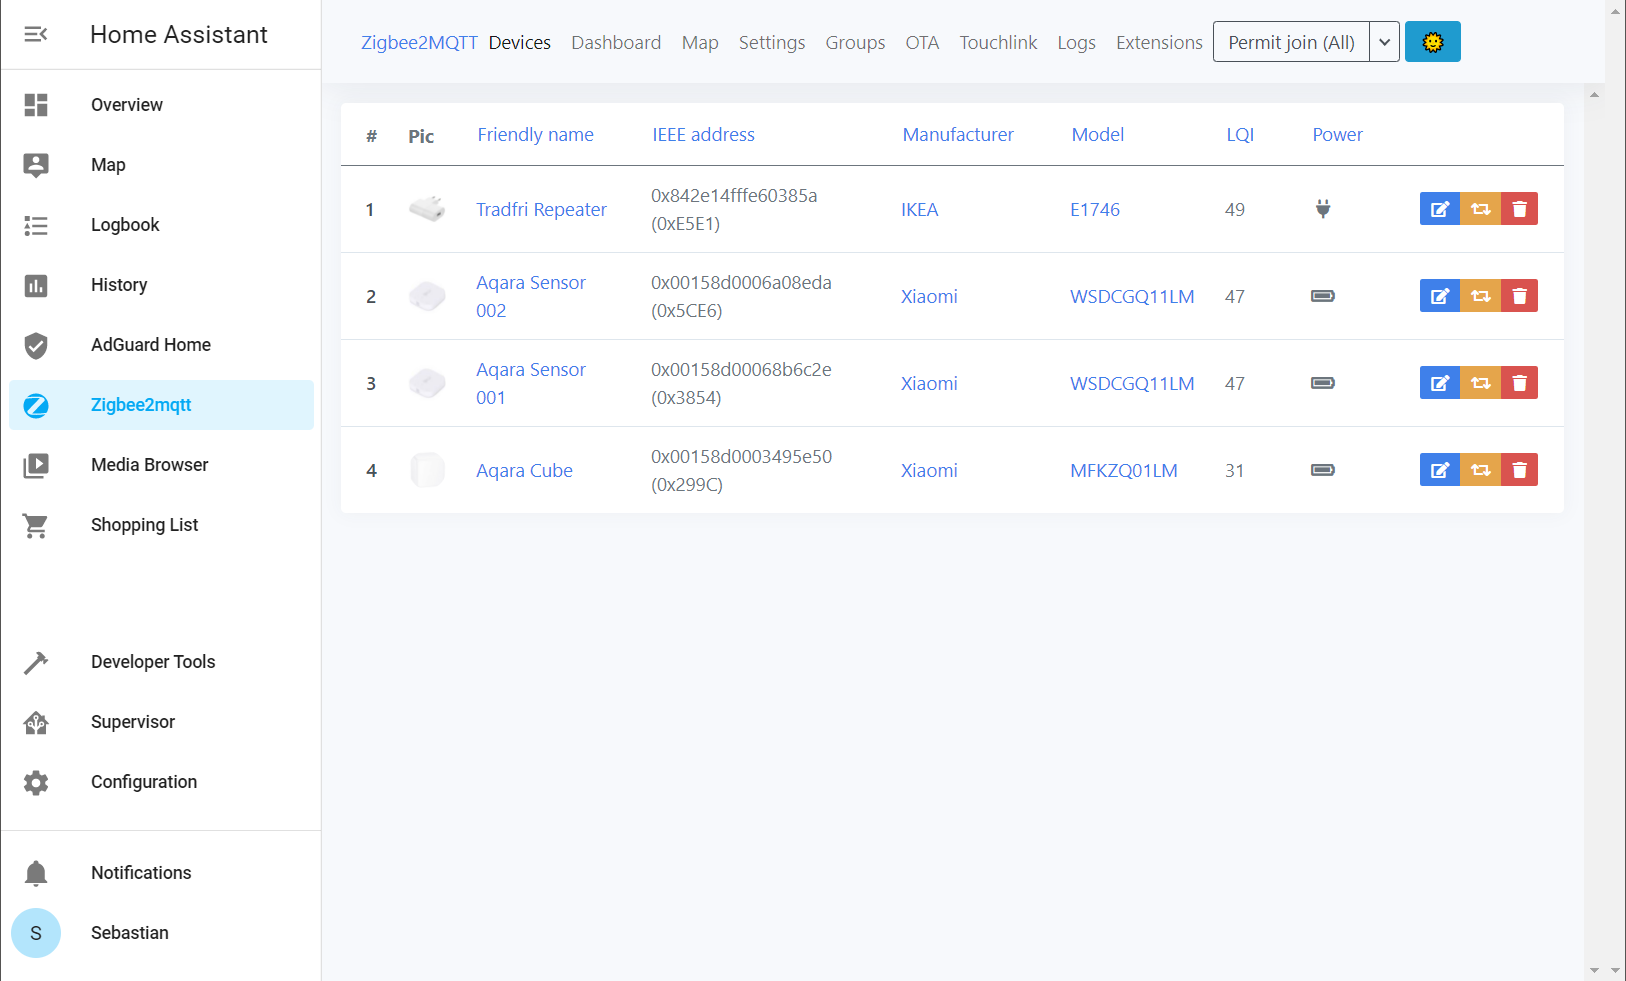
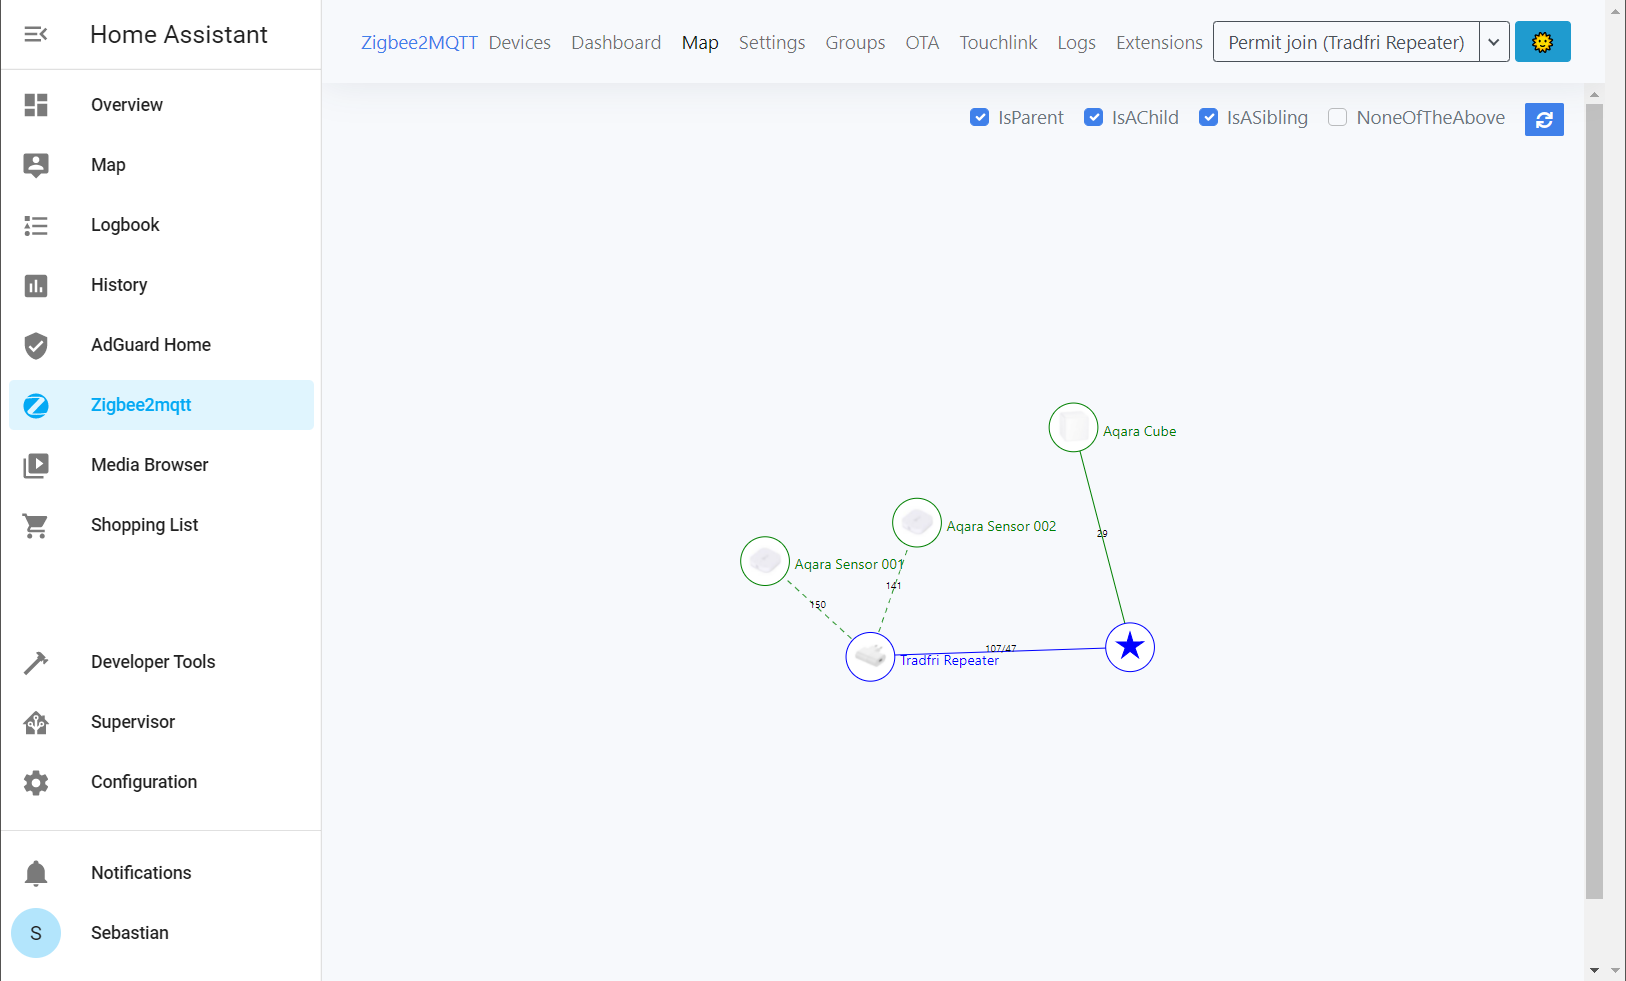
Next, to pair the Aquara sensors, click on the triangle next to Permit join (All) and select the repeater you want to connect the sensor to (I named mine Tradfri Repeater). Then click on the button Permit join (name repeater). Start pairing the devices. These sensors have a button on top, hold that for 5 seconds until the blue LED blinks, 2-3 fast flashes indicate the device paired. Again, be patient for the devices to show up in the list, and change the names to something logical by clicking the blue button Rename device. You can check the topology of your Zigbee network, and if devices are paired correctly, by clicking Map –> Load Map.
Configuring devices
While more and more settings can be altered through the Admin interface, right now I did most of the configuration by
editing YAML files based off my previous configuration. Using the File Editor you can start modifying
configuration.yaml, automations.yaml, … for the Aqara cube
the same configuration as described in this post still worked. Alternatively, if you
install the Samba share add-on, you can map the Raspberry Pi as a network drive in Windows. From
that path all configuration files can be directly edited using your favorite text editor.
For these changes to take effect you’ll have to restart Home Assistant, which can be done from Configuration –> Server Controls, make sure to use the Check Configuration to validate the changes you made before restarting and putting them into production.
The sensors don’t need much configuration, though I did need to add cards to the interface again. Here code from a previous post was re-used as well, though now the friendly name could be used for the device, much easier.
type: vertical-stack
title: Bedroom
cards:
  - type: glance
    entities:
      - entity: sensor.aqara_sensor_001_temperature
      - entity: sensor.aqara_sensor_001_humidity
      - entity: sensor.aqara_sensor_001_pressure
      - entity: sensor.aqara_sensor_001_battery
    show_name: false
  - type: horizontal-stack
    cards:
      - type: sensor
        entity: sensor.aqara_sensor_001_temperature
        graph: line
        name: ' Temperature (48 h)'
        hours_to_show: 48
      - type: sensor
        entity: sensor.aqara_sensor_001_humidity
        graph: line
        name: ' Humidity (48 h)'
        hours_to_show: 48
Conclusion
The Ikea Tradfri repeater does a great job for its price and does work with the Aqara devices once paired correctly. However, you can’t rely on devices figuring out the best path to the central point and devices need to be paired according to the network topology that fits your needs. As the Zigbee2MQTT add-on is the easiest way to do this, it did force me to switch to the Home Assistant Operating System which means the Raspberry Pi is now dedicated to HA and unless I can figure out how to run my other applications (like my MemoBoard for shopping, todo, … lists) as HA add-ons, I’ll have to find another solution for those. Though the additional add-ons for Home Assistant and the ease to install them more than make up for that.
Liked this post ? You can buy me a coffee