Using my Kindle PW3 as a Dashboard for Home Assistant
An old Kindle, once jailbroken and running KUAL, can be repurposed as a dashboard for just about anything. I’ve actually done this before - though right now, I don’t really need those stats anymore.
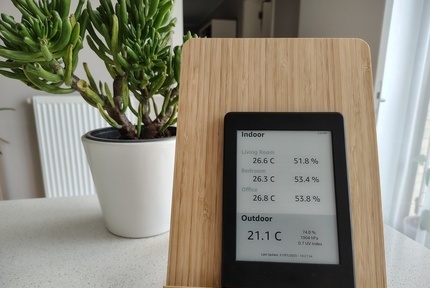
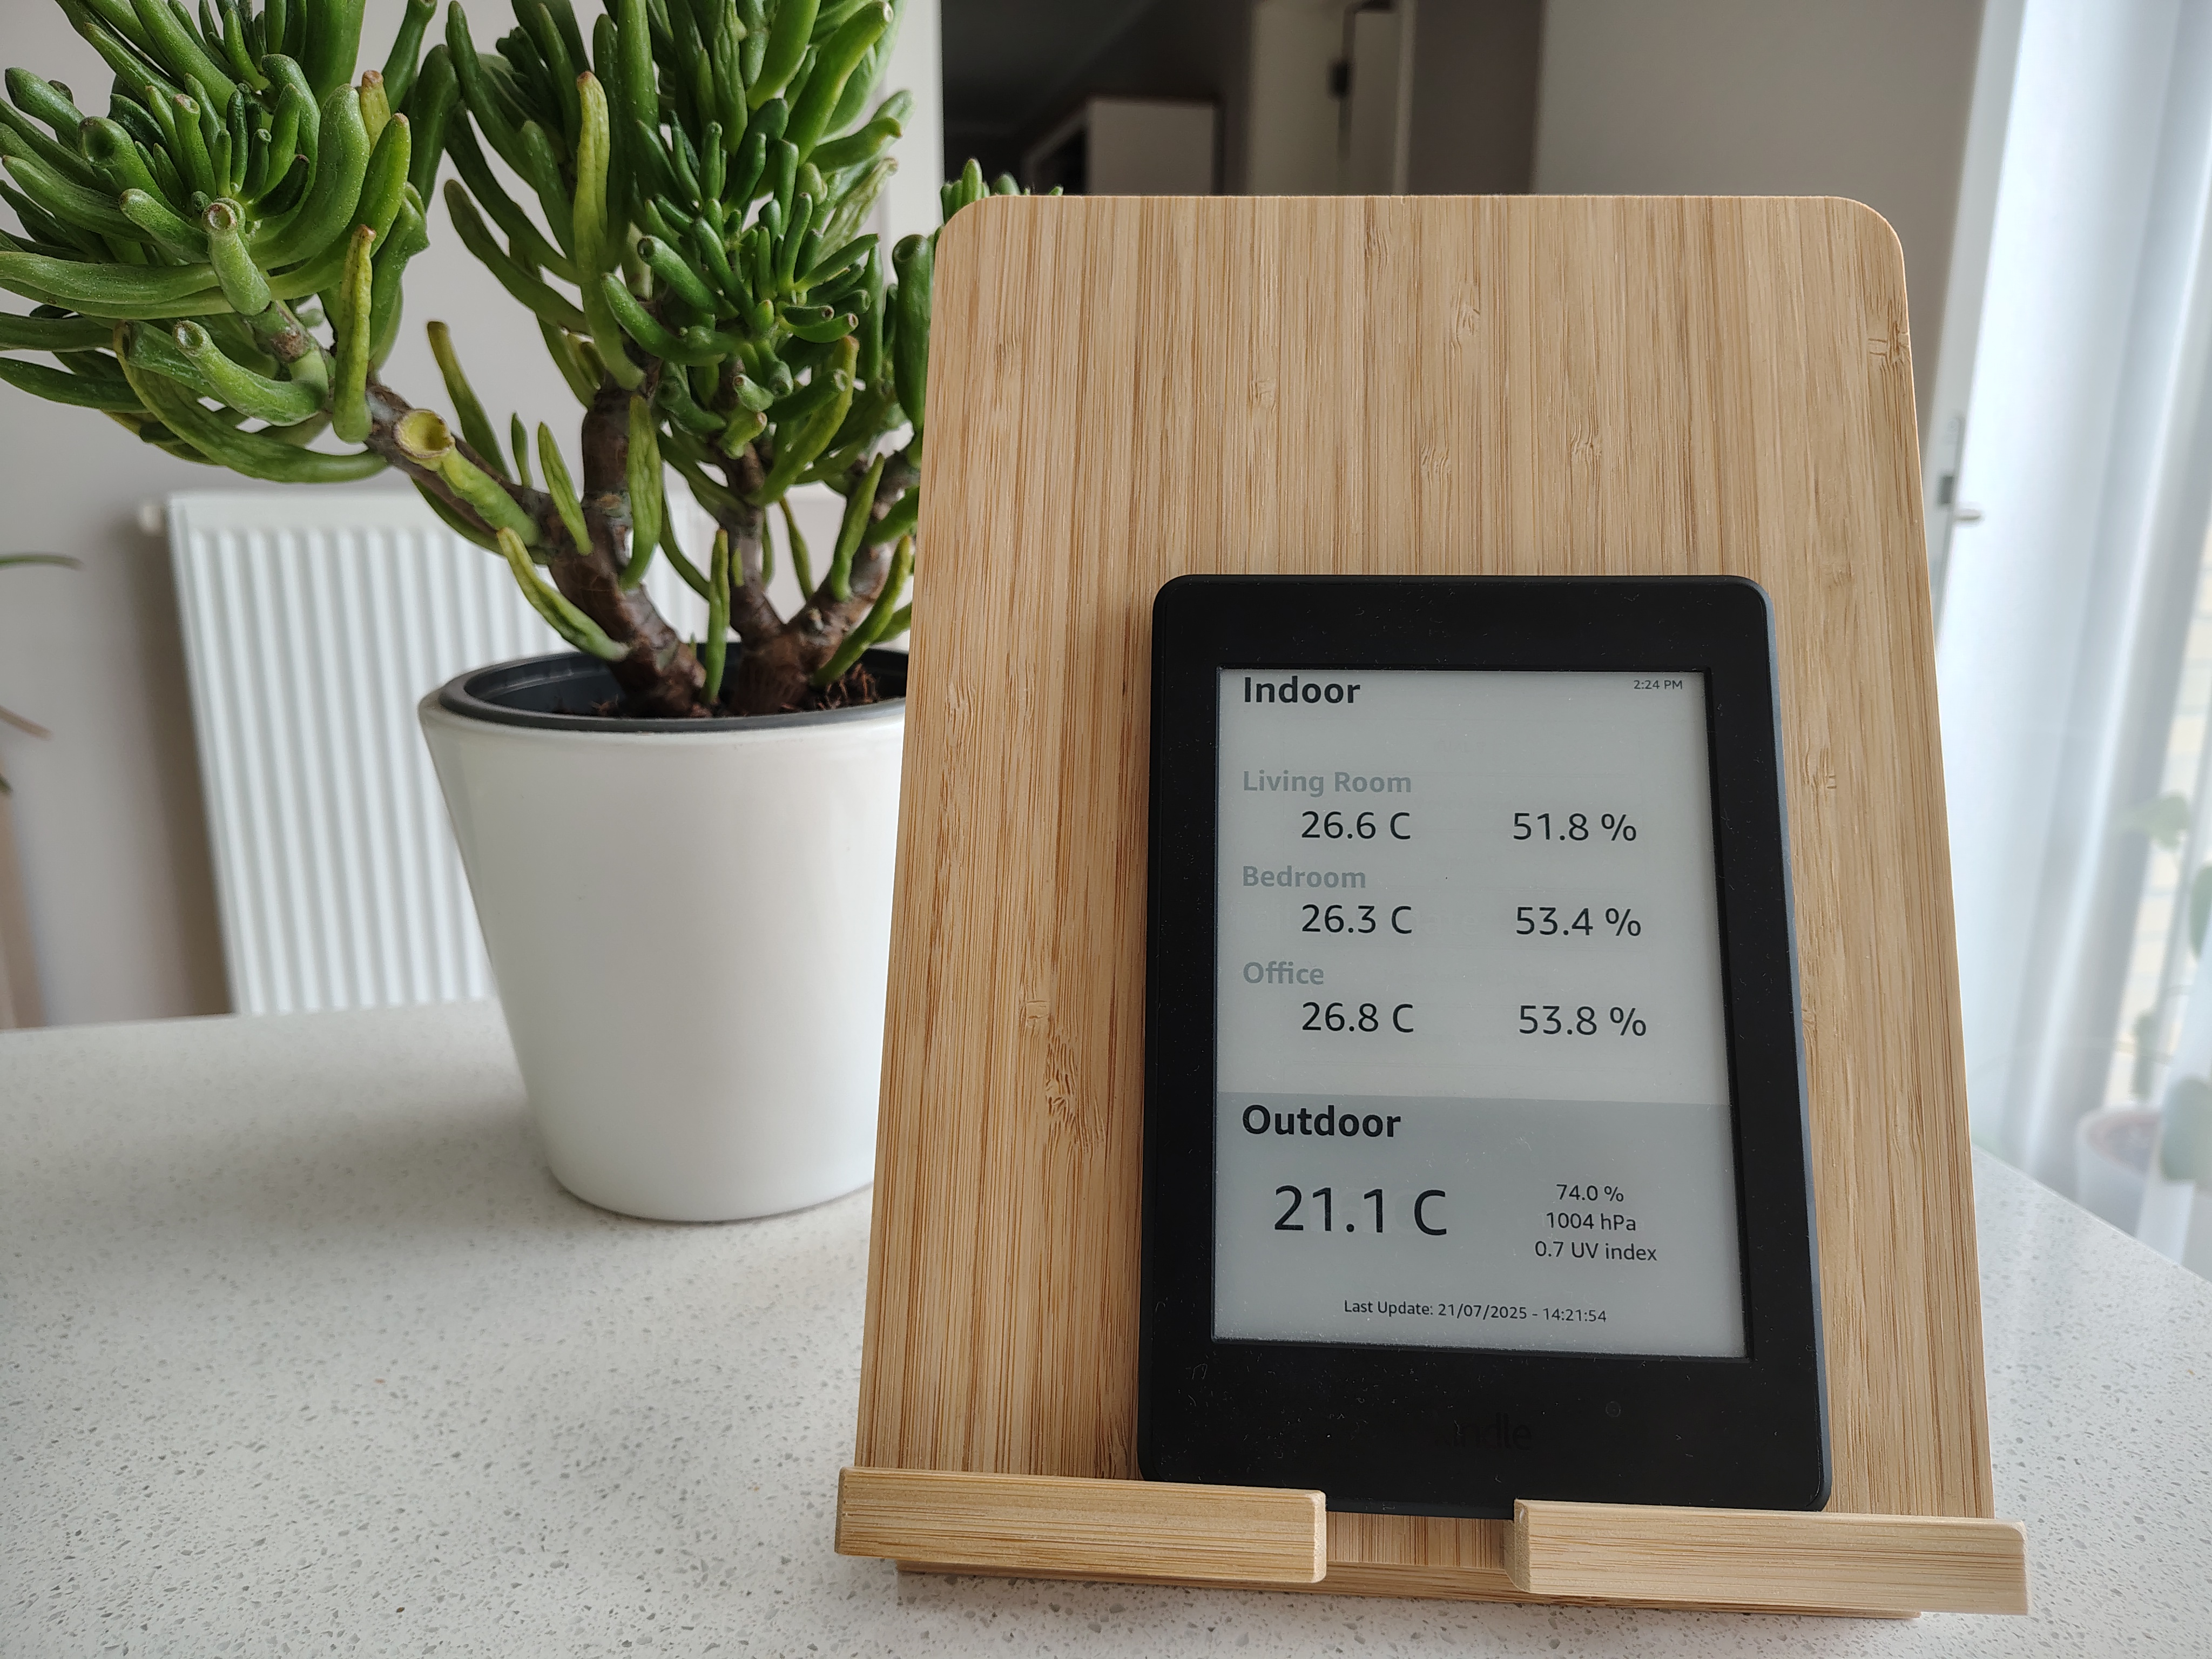
It would be nice, however, to show some real-time data from my Home Assistant setup on a low-power e-ink screen like the Kindle. That shouldn’t be too difficult, so let’s jump right in.
The full code for this project, as well as more detailed instructions how to get this running, is available on GitHub: https://github.com/4dcu-be/kual-dashboard-ha/.
Configuring Home Assistant
Before setting up the Kindle, we need to ensure that Home Assistant exposes the required information through its API. This involves updating the configuration file and creating an API token for our application.
In your config file at /homeassistant/configuration.yaml, add the following line to enable the API. I used the File Editor add-on, which makes it easy to edit configuration files directly through the Home Assistant interface:
api:
Next, we’ll generate an access token to securely authenticate our Kindle app with Home Assistant.
To do this, click your profile name in the lower-left corner. On the profile page, go to the Security tab at the top, scroll down to Long-Lived Access Tokens, and click Create Token. In the pop-up window, enter a name for your token and click OK.
You’ll now see your newly generated token - make sure to save it somewhere safe, as you’ll only see it once and we’ll need it later.
The Python Code for the Kindle
As before, we’ll package our code as a KUAL extension, allowing it to run on a jailbroken Kindle with KUAL installed. The Python scripts will fetch the necessary data, convert it to SVG using a template, and then use rsvg-convert to generate a PNG that the Kindle can display.
First, we need a function to retrieve data from Home Assistant using the access token. The snippet below handles the request and returns the result as a Python dictionary:
import ssl
import urllib.request
import json


def get_ha_data(url, access_token):
    ssl_context = ssl._create_unverified_context()

    request = urllib.request.Request(
        url,
        headers={
            'Authorization': f'Bearer {access_token}',
            'Content-Type': 'application/json'
        }
    )

    with urllib.request.urlopen(request, context=ssl_context) as response:
        html = response.read()

    return json.loads(html.decode('utf-8'))
When calling a Home Assistant API endpoint with valid credentials, you’ll receive a JSON response like the example below. For most sensors, we’re mainly interested in the state and unit_of_measurement fields.
Note that the structure may vary depending on the specific entity you’re querying.
{
  "entity_id": "sensor.upgraded_sensor_bme680_temperature",
  "state": "26.0",
  "attributes": {
    "state_class": "measurement",
    "unit_of_measurement": "°C",
    "device_class": "temperature",
    "friendly_name": "Upgraded sensor BME680 Temperature"
  },
  "last_changed": "2025-07-21T11:45:18.879717+00:00",
  "last_reported": "2025-07-21T11:45:18.879717+00:00",
  "last_updated": "2025-07-21T11:45:18.879717+00:00",
  "context": {
    "id": "01K0PCTX0ZYZ2TT9VXTQ1D6RDW",
    "parent_id": "None",
    "user_id": "None"
  }
}
Next, we need a script that defines which entities to fetch from Home Assistant, processes the data, and generates an SVG. This part is quite straightforward and builds on what we did in a previous post - only this time, we’re pulling data from Home Assistant instead of public APIs.
# bin/python3
# encoding: utf-8

from datetime import datetime
import os
from os.path import join
from extract import get_ha_data
from config import HA_URL, HA_TOKEN


svg_path = '/mnt/base-us/extensions/dashboard/svg/' if os.name != 'nt' else '../svg'


def create_svg(svg_data, svg_template, svg_output):
    with open(svg_template, 'r') as fin:
        template = fin.read()

        for k, v in svg_data.items():
            template = template.replace(k, v)

        with open(svg_output, 'w') as fout:
            fout.write(template)

if __name__ == "__main__":
    ha_urls = [
        f"{HA_URL}sensor.sensor_bedroom_temperature",
        f"{HA_URL}sensor.sensor_bedroom_humidity",
        f"{HA_URL}sensor.sensor_nursery_temperature",
        f"{HA_URL}sensor.sensor_nursery_humidity",
        f"{HA_URL}sensor.upgraded_sensor_bme680_temperature",
        f"{HA_URL}sensor.upgraded_sensor_bme680_humidity",
        f"{HA_URL}sensor.herenthumidity",
        f"{HA_URL}sensor.herenttemperature",
        f"{HA_URL}sensor.herentpressure",
        f"{HA_URL}sensor.herentuv"]

    all_data = []

    for ha_url in ha_urls:
        try:
            ha_data = get_ha_data(ha_url, HA_TOKEN)
            all_data.append({
                'sensor': ha_data['attributes']['friendly_name'],
                'readout': f"{ha_data['state']} {ha_data['attributes']['unit_of_measurement']}"
            })

            print(ha_data)

        except Exception as _:
            all_data.append({
                'sensor': "Failed read",
                'readout': "Failed Update"
            })

    print(all_data)

    # Combine into dict
    svg_data = {"LASTUPDATE": "Last Update: " + datetime.now().strftime("%d/%m/%Y - %H:%M:%S"),
                "R1_TEMP": all_data[4]['readout'].replace("°", ""),
                "R1_HUM": all_data[5]['readout'],
                "R2_TEMP": all_data[0]['readout'].replace("°", ""),
                "R2_HUM": all_data[1]['readout'],
                "R3_TEMP": all_data[2]['readout'].replace("°", ""),
                "R3_HUM": all_data[3]['readout'],
                "OUT_TEMP": all_data[7]['readout'].replace("°", ""),
                "OUT_HUM": all_data[6]['readout'],
                "OUT_PRES": all_data[8]['readout'],
                "OUT_UV": all_data[9]['readout'],}

    # Load Data into SVG
    create_svg(svg_data, join(svg_path, "template.svg"), join(svg_path, "tmp.svg"))
If you want to use this script in your own setup, create a config.py file that defines HA_URL and HA_TOKEN.
You’ll also need to update the list of entity URLs to match the sensors in your own Home Assistant configuration.
The template.svg file contains placeholders (like R1_TEMP) that are replaced with real sensor values by the create_svg() function.
Finally, a shell script - triggered via KUAL - converts the generated SVG into a PNG image suitable for display on the Kindle.
Conclusion
Repurposing an old Kindle Paperwhite as a low-power, always-on Home Assistant dashboard is not only practical but also a great way to breathe new life into unused hardware. With just a bit of scripting and customization, you can turn your Kindle into a clean, glanceable display for key sensor data - perfect for a nightstand, hallway, or workspace.
While this setup does require a jailbroken Kindle and some Python familiarity, the end result is a highly customizable, elegant display that integrates seamlessly with your smart home.
Resources
- https://kindlemodding.org/jailbreaking/: A recent guide how to jailbreak a Kindle
- Kindle DashBoard part 1: Older post how to jailbreak a Kindle and create KUAL extensions
- Kindle DashBoard part 2: Post from 2020 outlining the first dashboard I made using this Kindle
Liked this post ? You can buy me a coffee